How do I connect Magento 2 to Afosto
This guide gives you step-by-step instructions for connecting your Magento 2 environment to Afosto. In the first part, we'll check some settings in Magento, then we'll create an access key in your Magento 2 environment, which you'll use in Afosto to connect to your webshop.
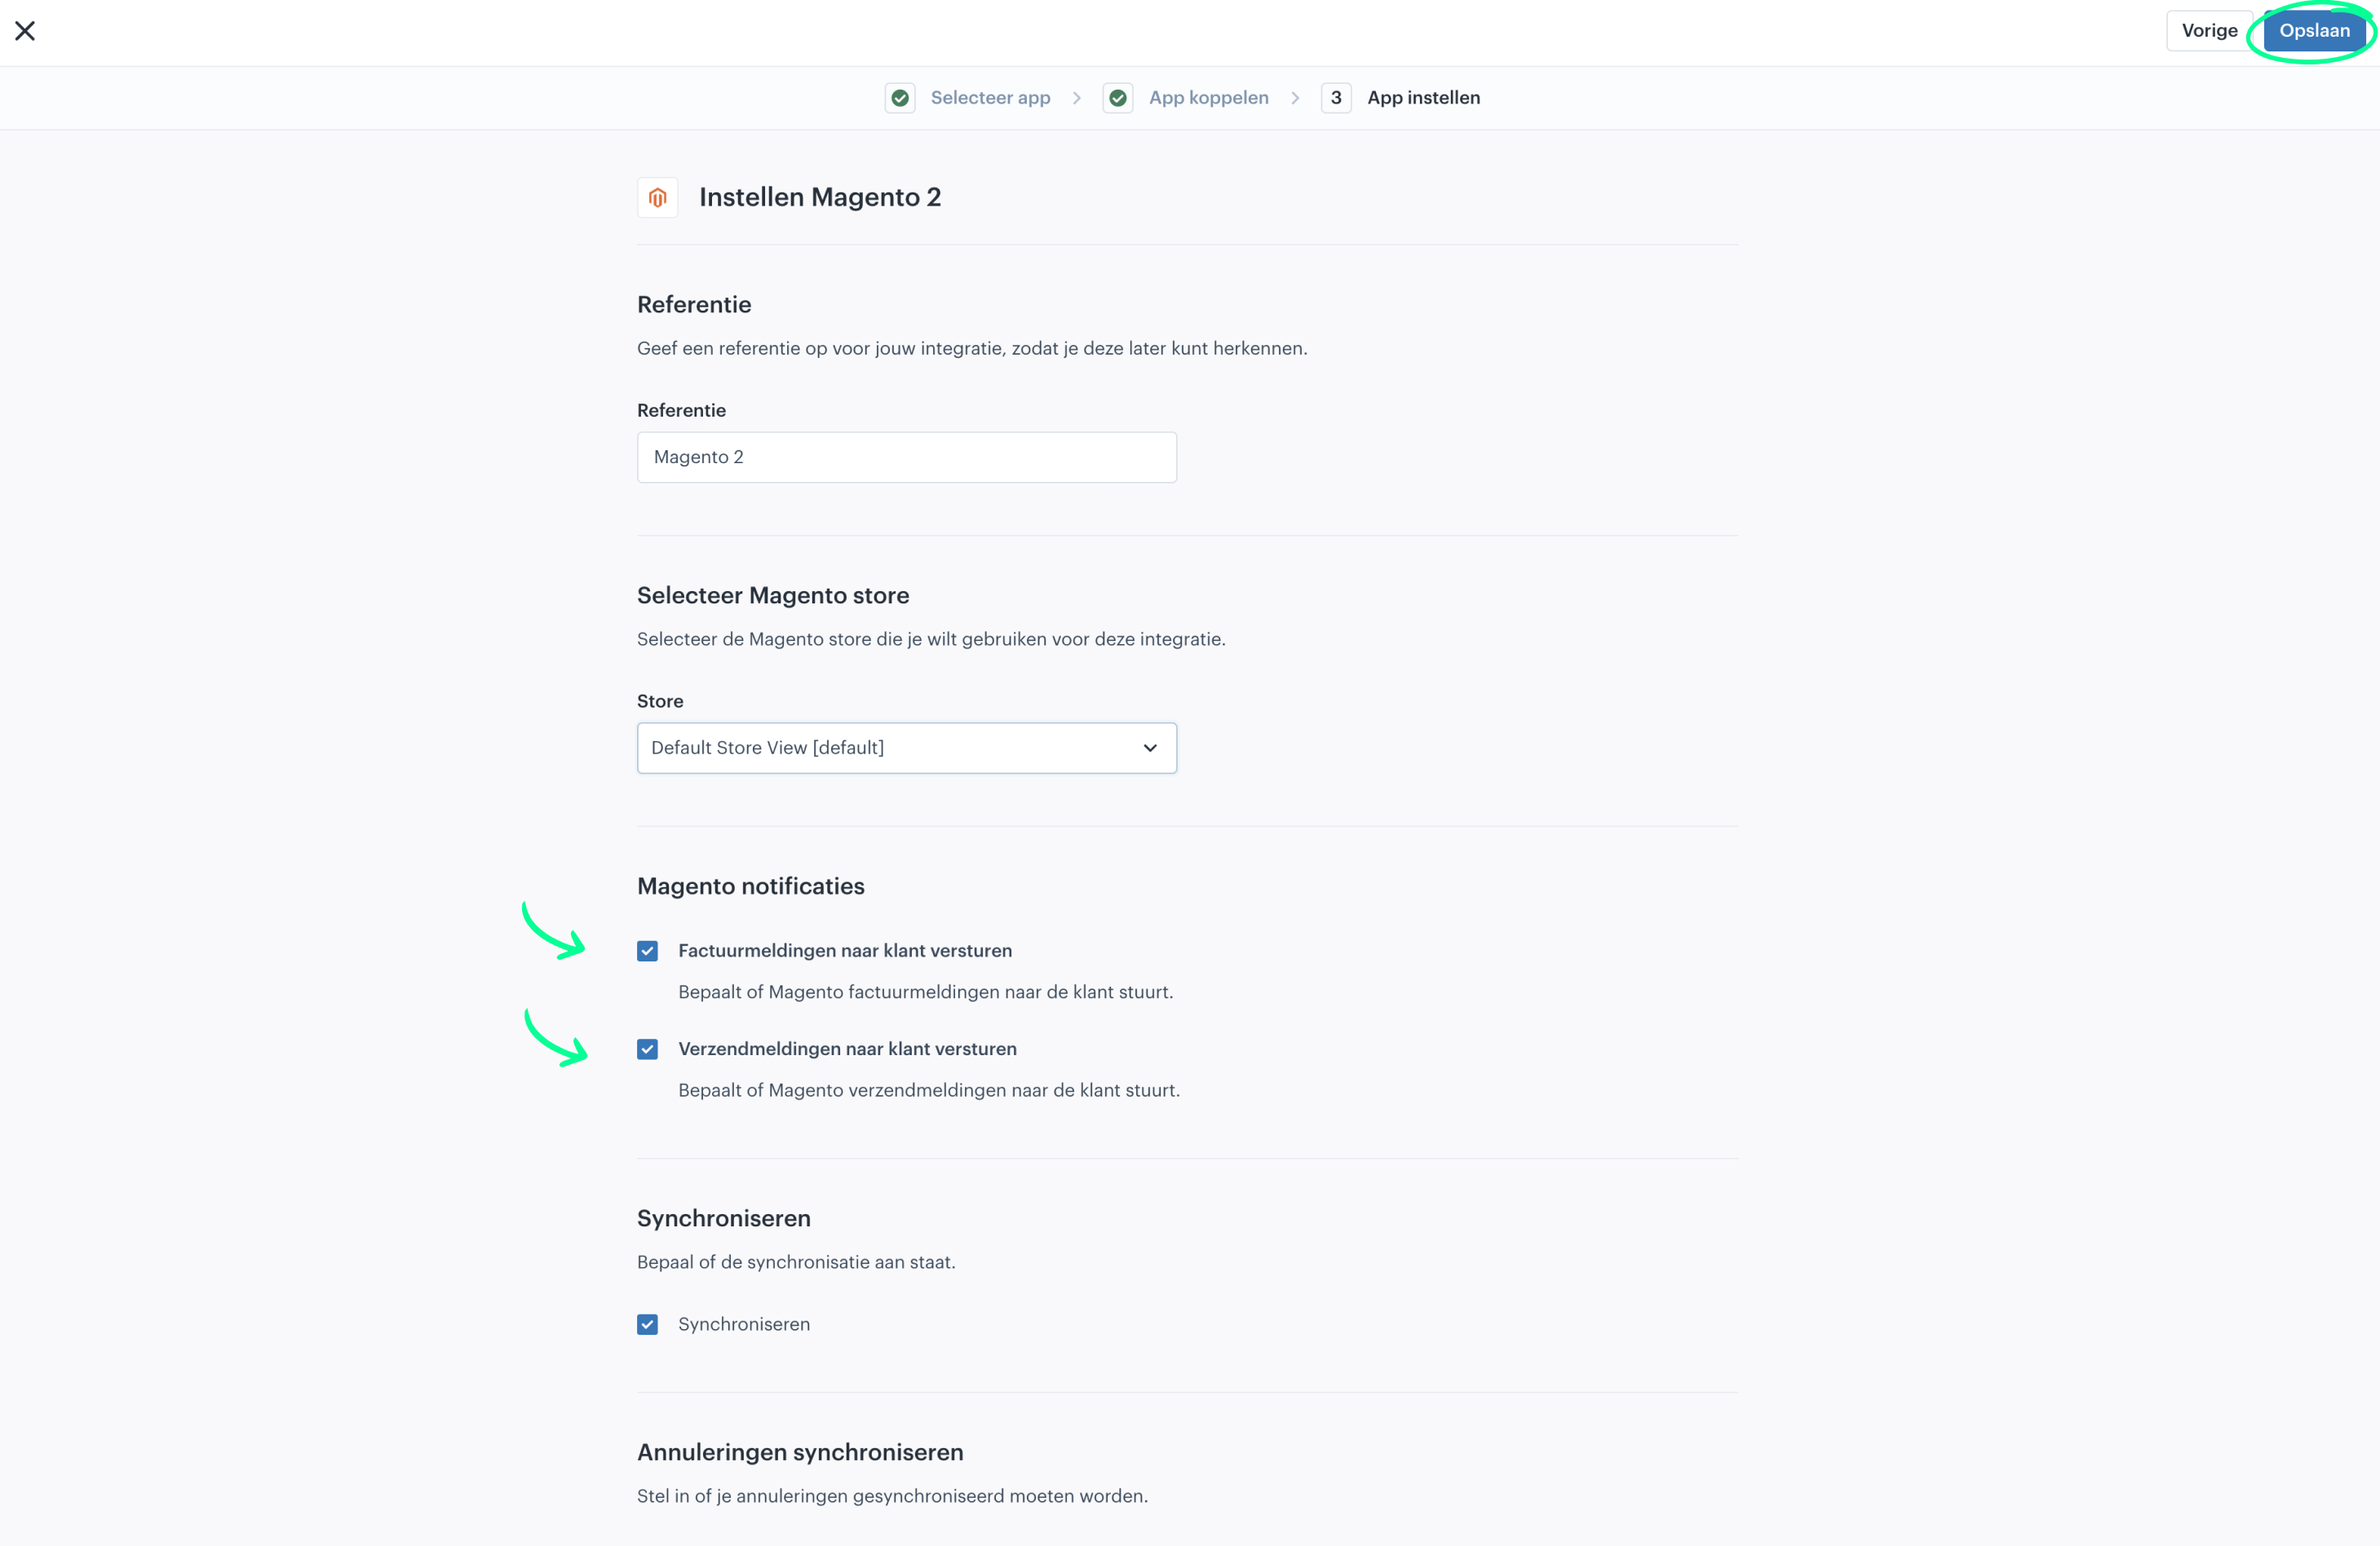
During the installation, you can choose whether or not to synchronize stock and how you want to handle cancellations, for example.
Check Magento settings
To ensure we can set up a reliable connection, we need to check settings in Magento, specifically the integration tokens. In the next 2 steps, we'll make sure the setting is correct.
- Log in to your Magento 2 environment
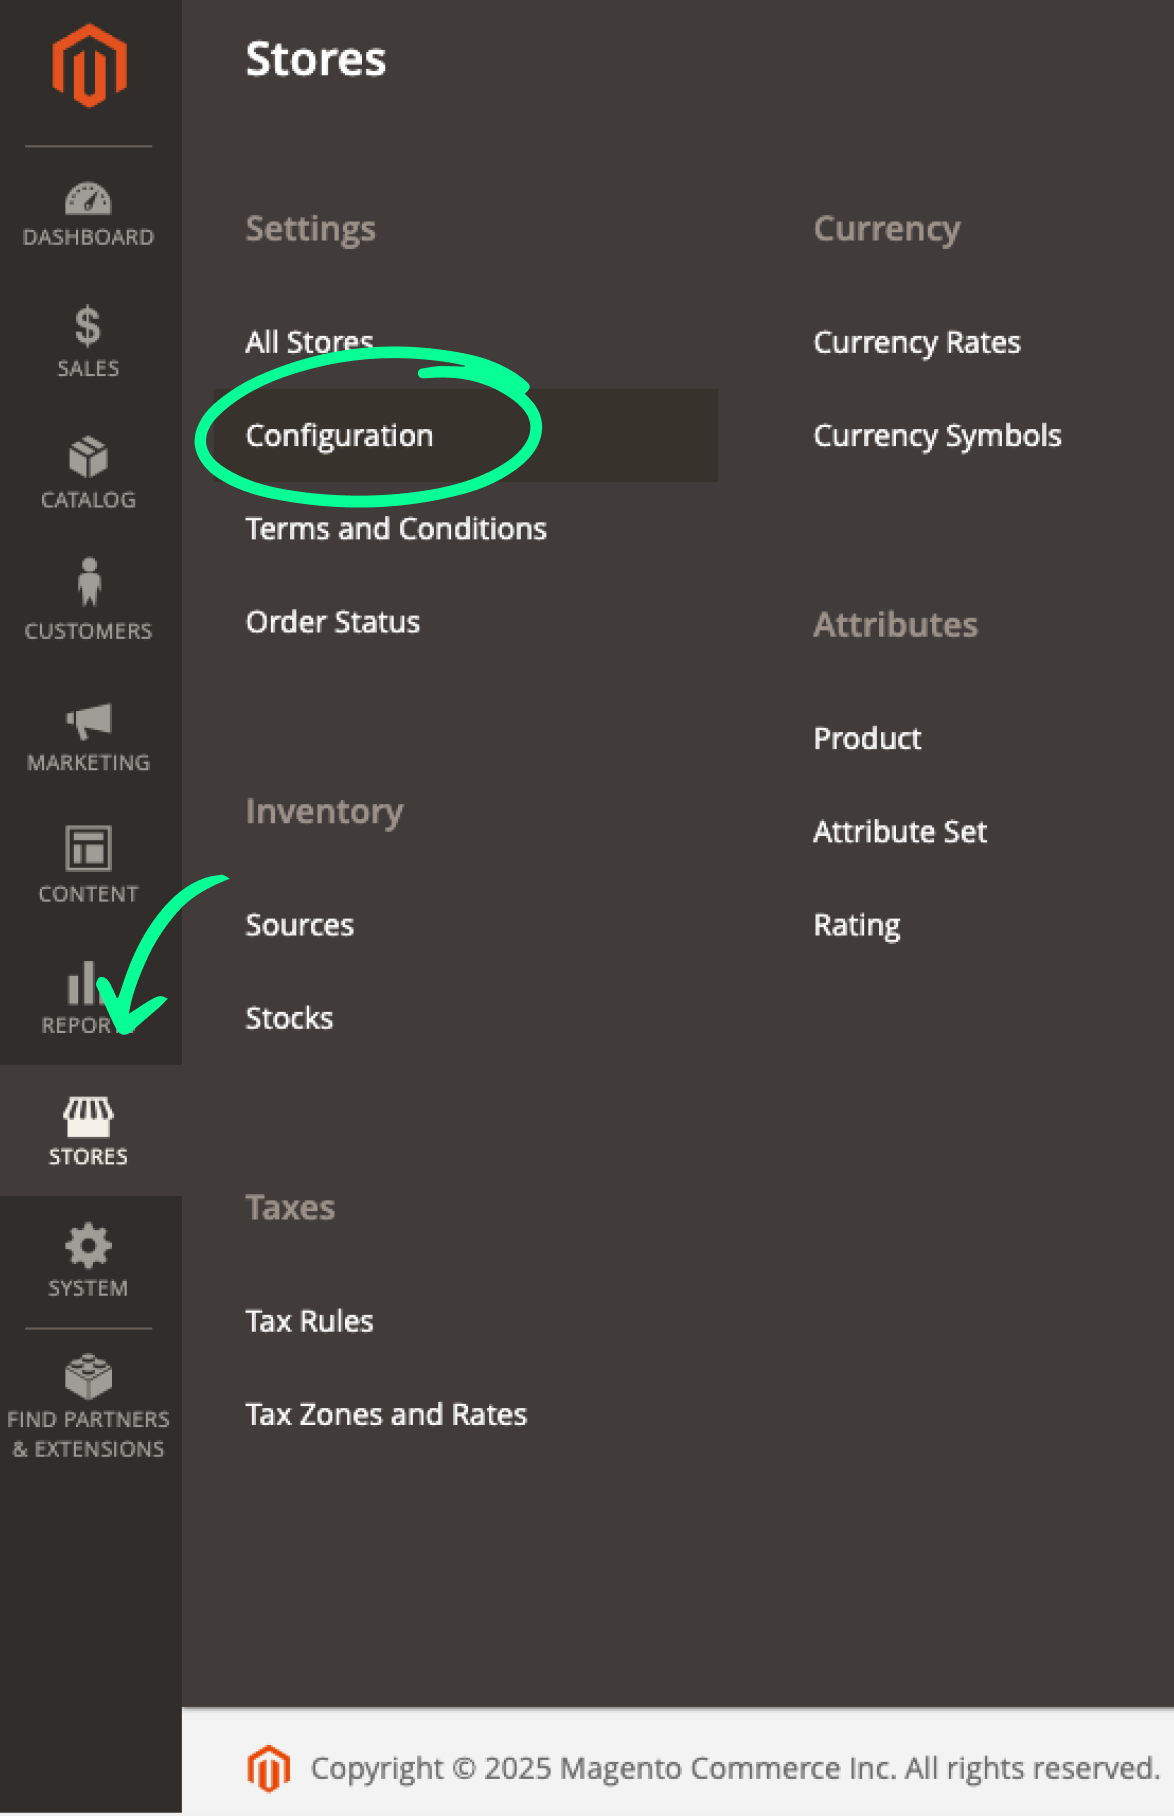
- Click on Stores (in the sidebar) and then on Configuration

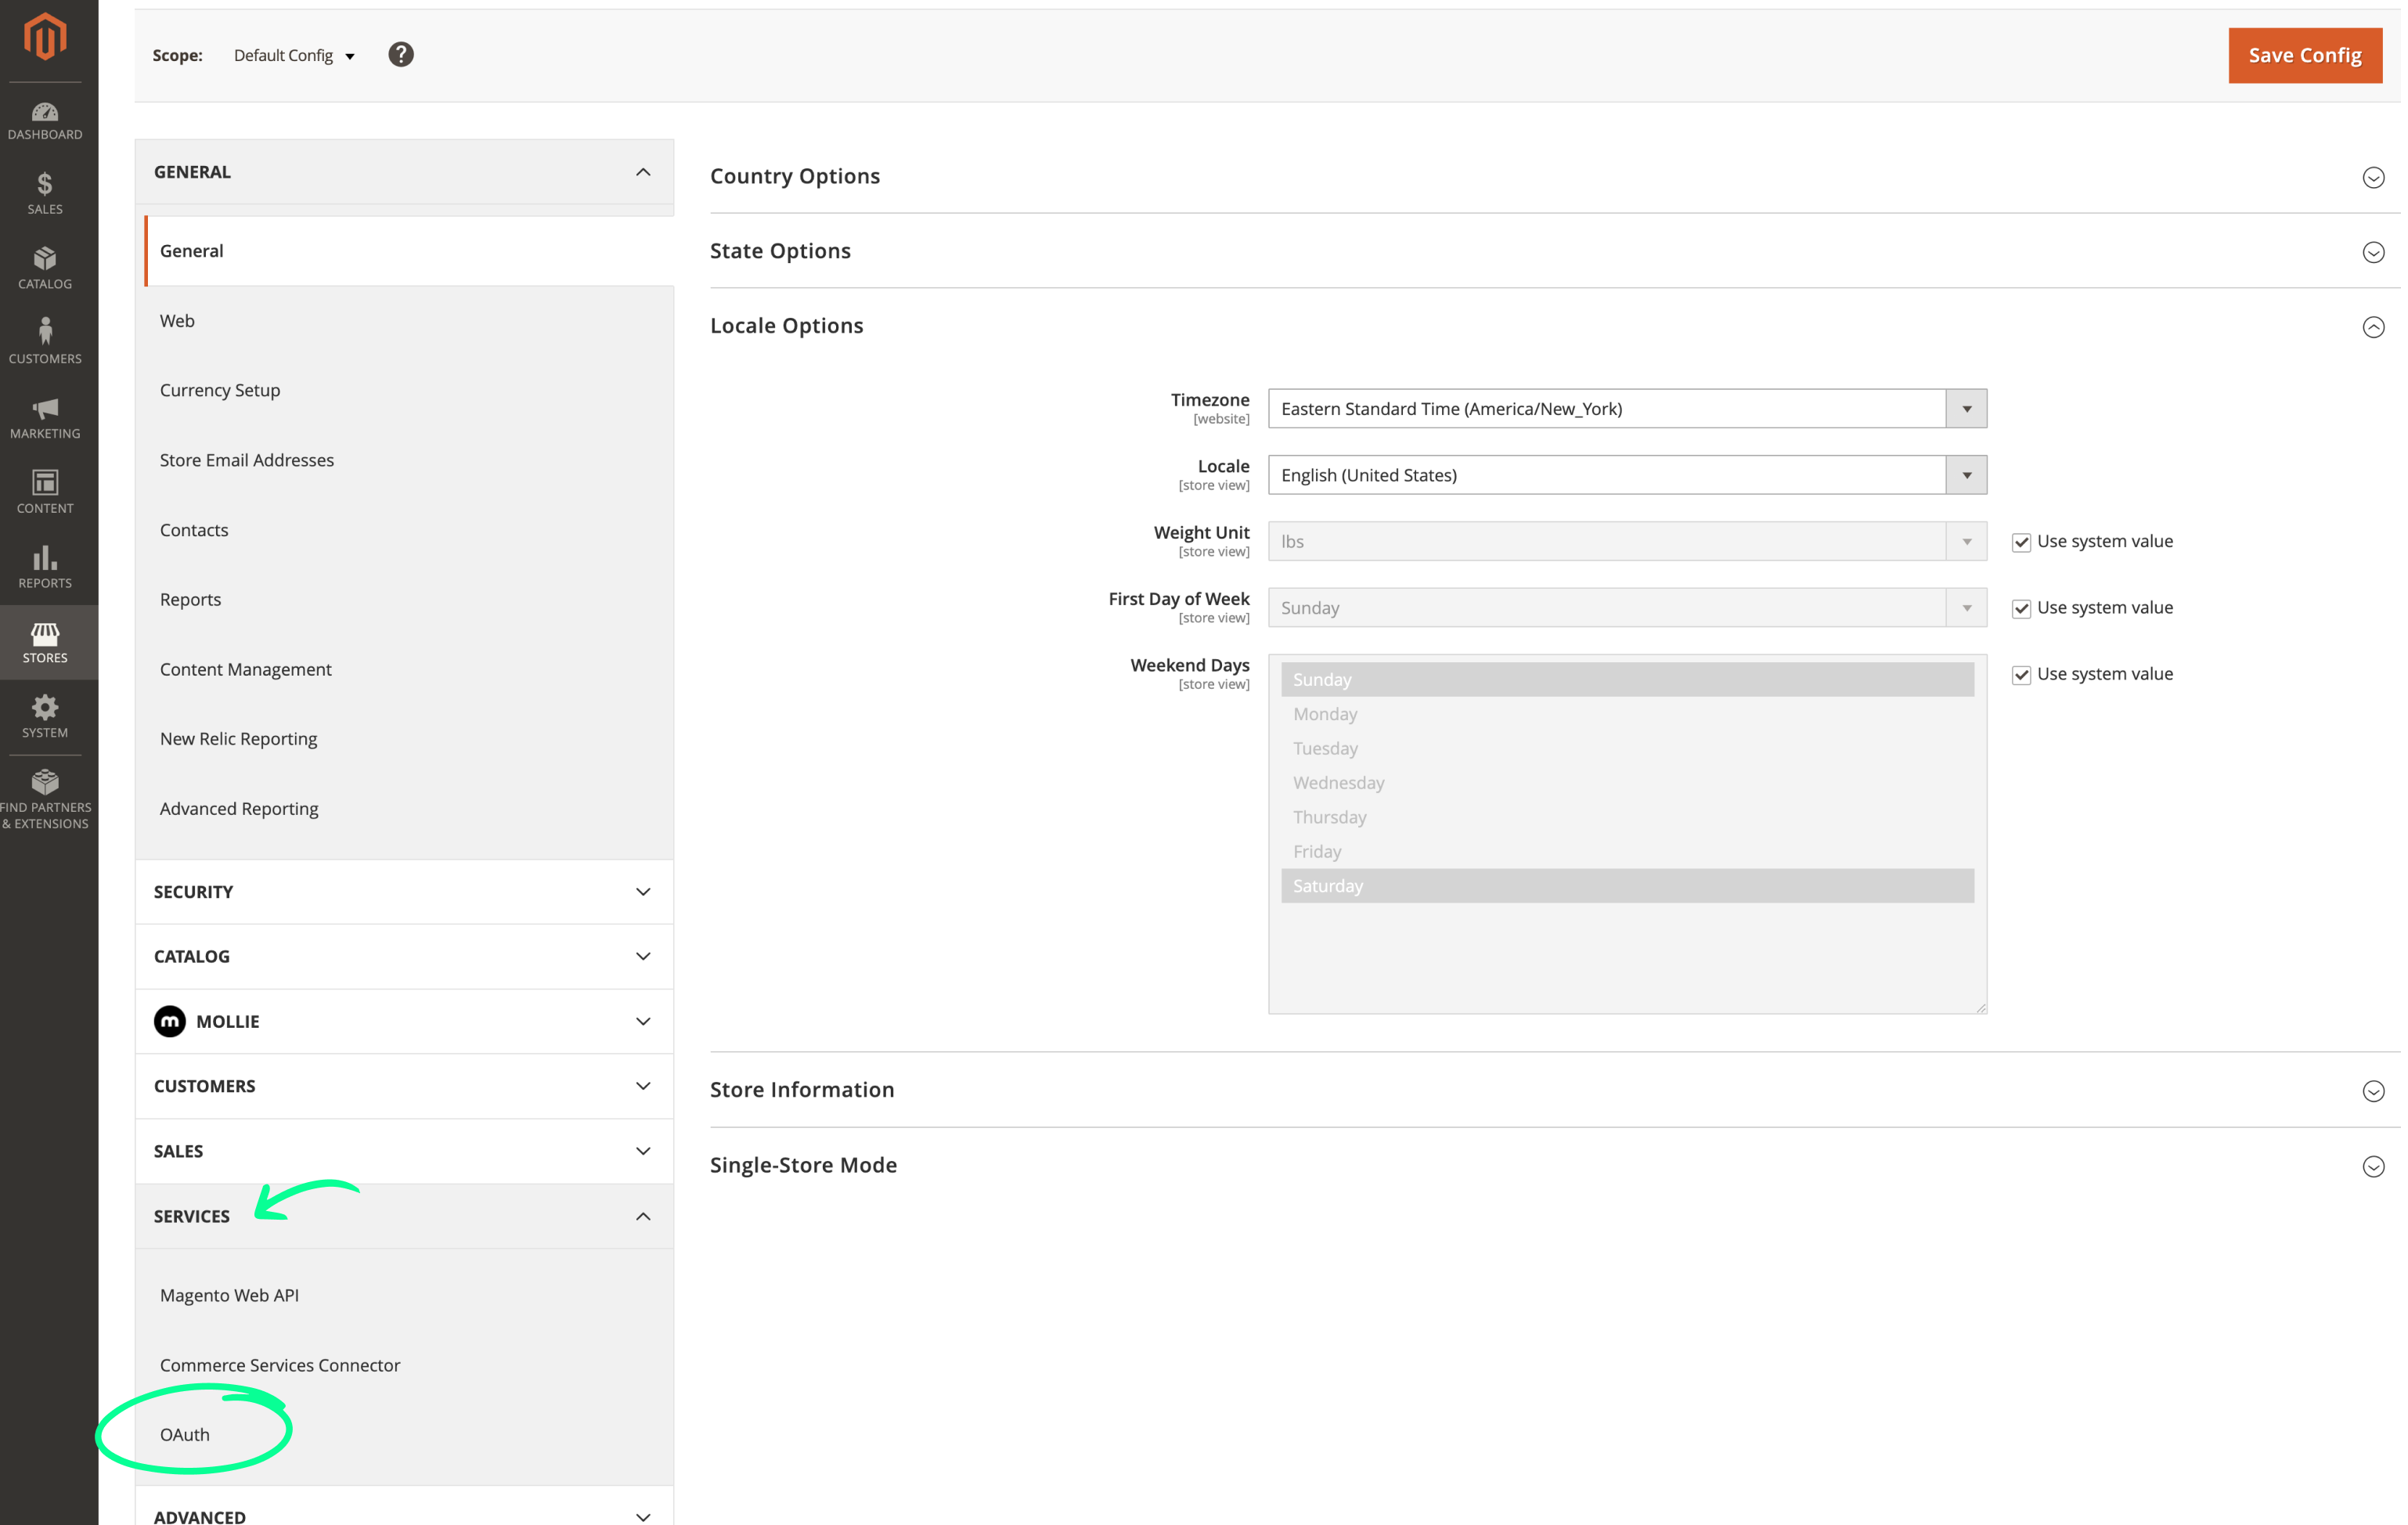
- Now click on Services and then on OAuth

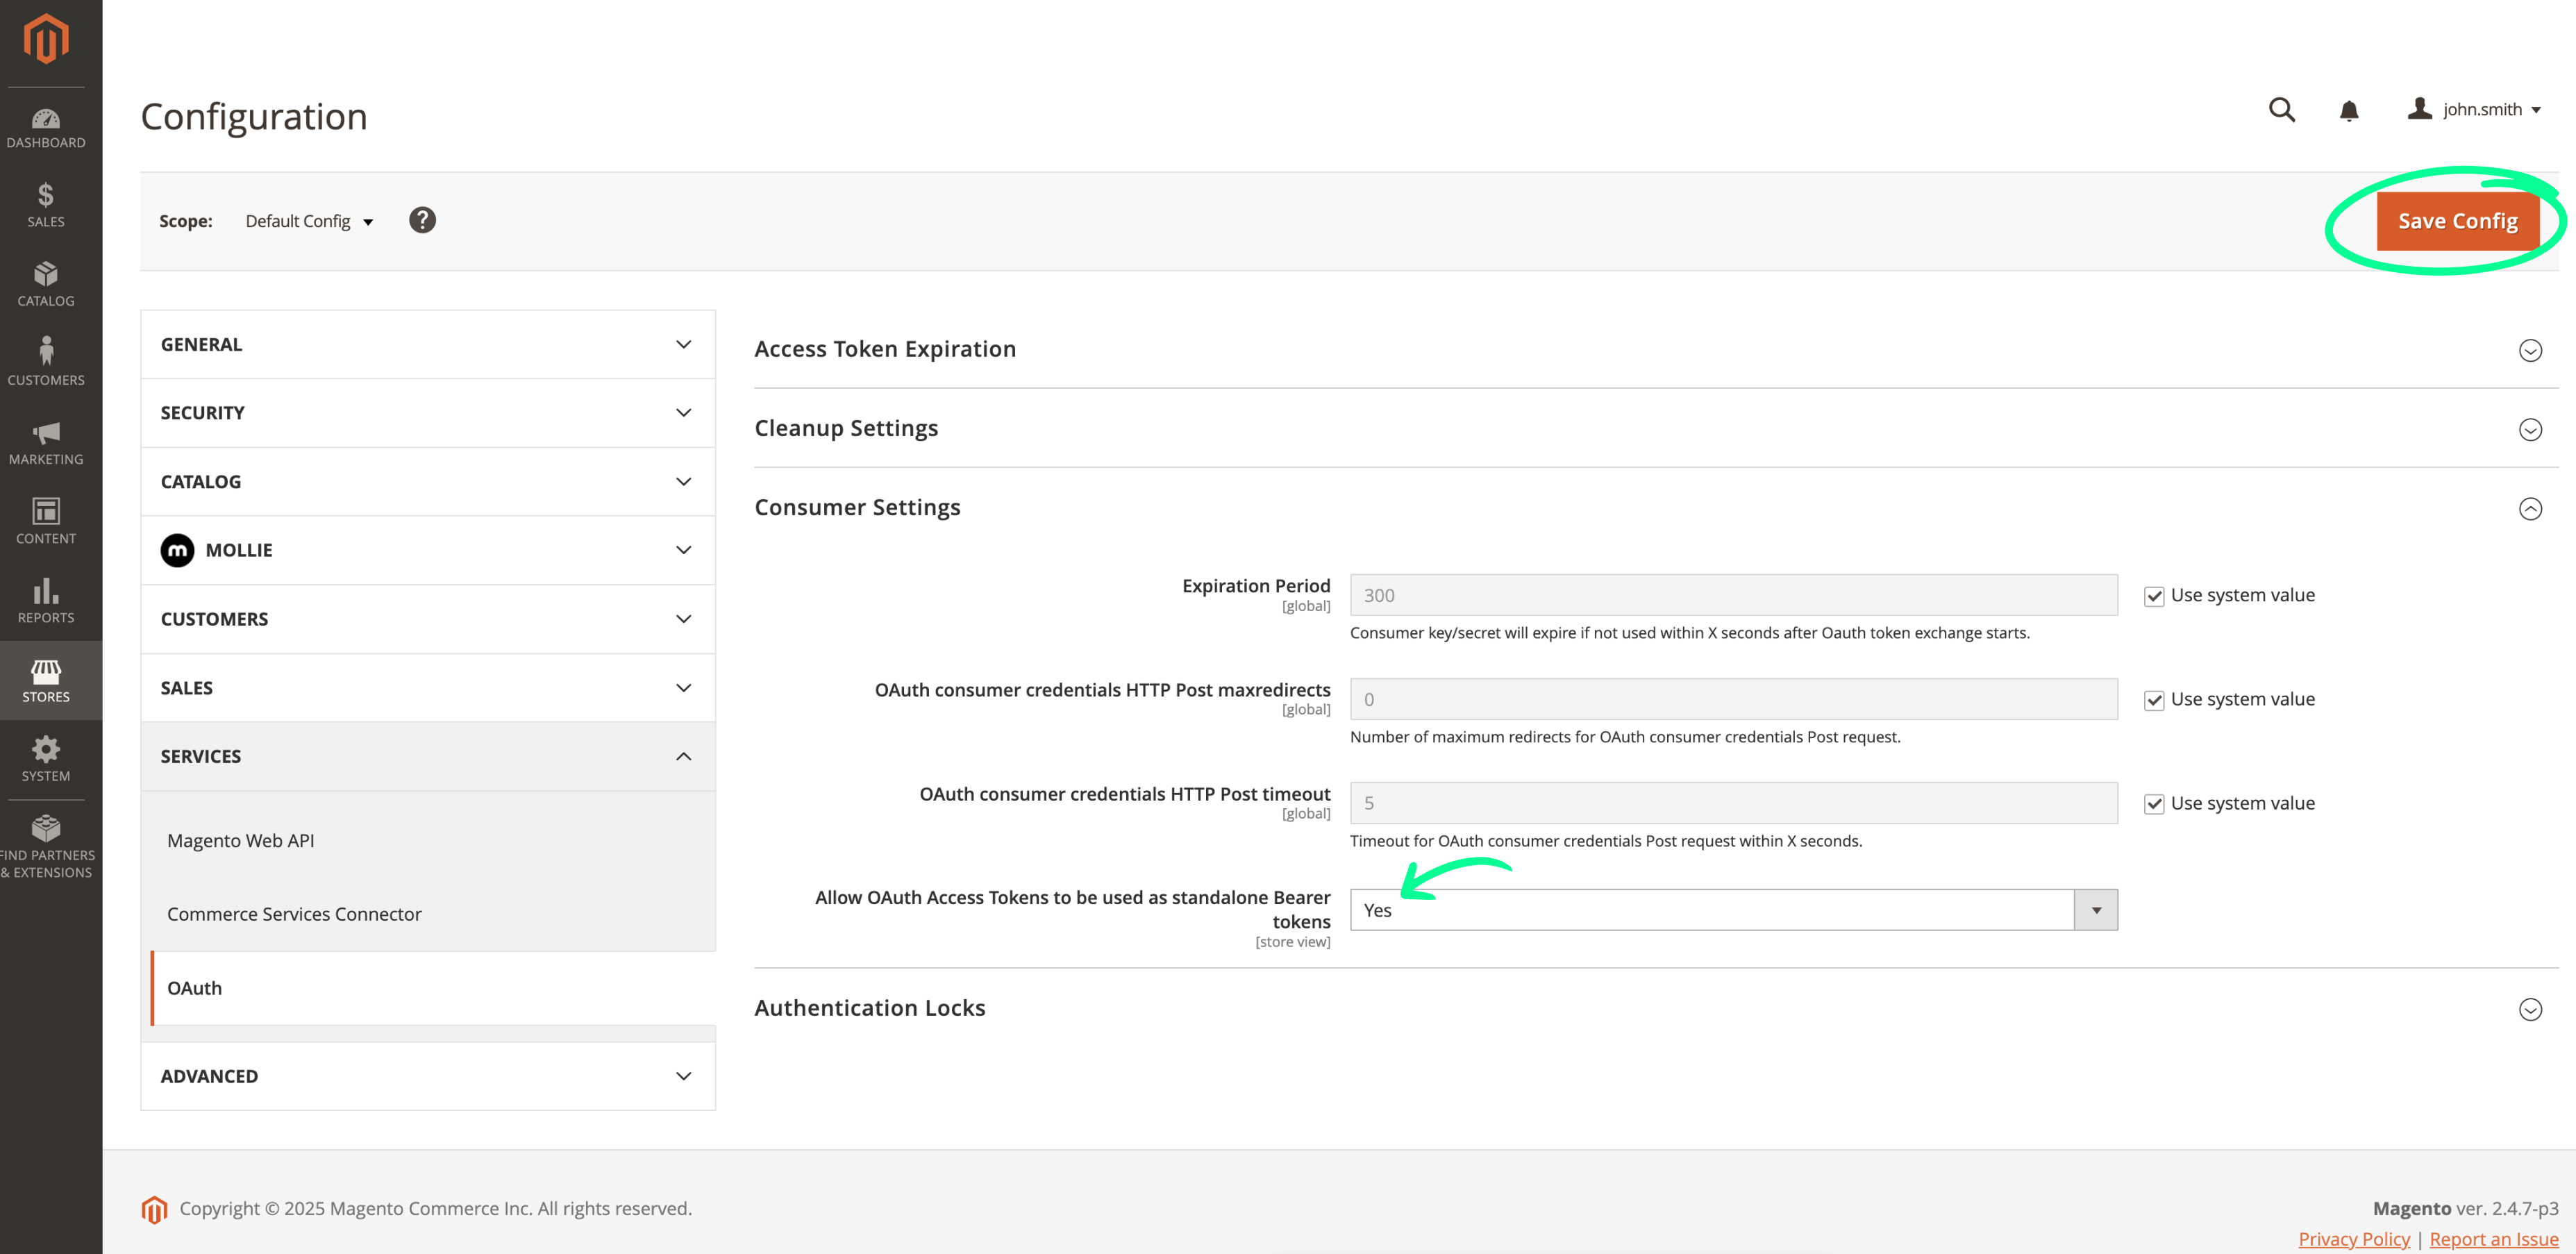
- Make sure Allow OAuth Access Tokens to be used as standalone Bearer tokens is set to Yes and click on Save config

Add integration in Magento
In the following steps, we will make the integration possible by adding a token (key) and giving it the correct permissions for integration with Afosto.
- Click on System (in the sidebar) and then on Integrations

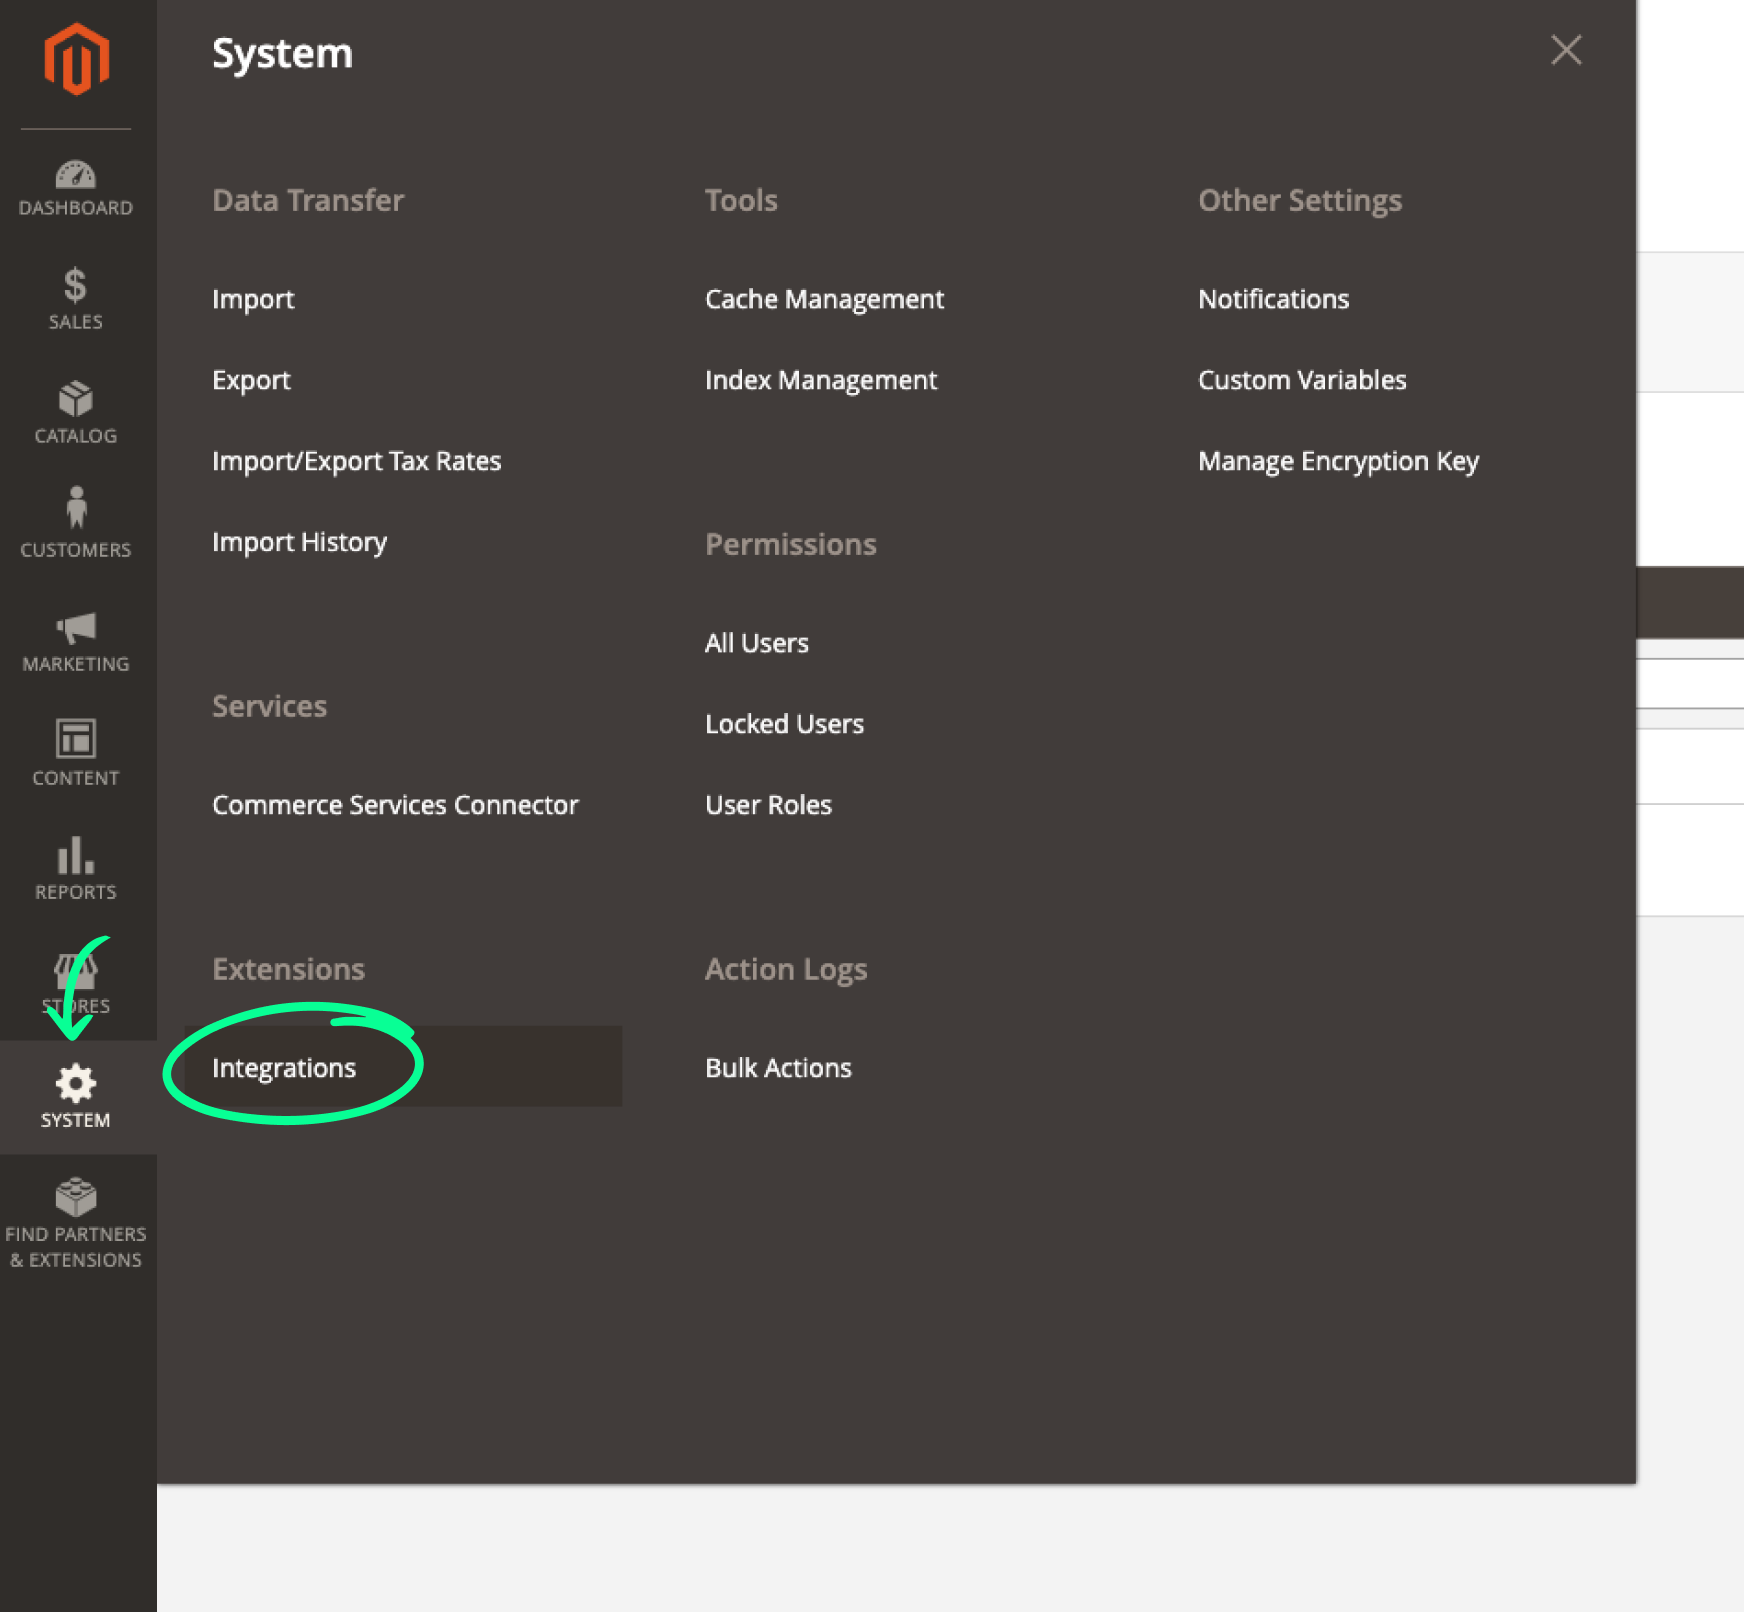
- Click on Add New Integration


- Enter a name: Afosto
- Enter the password you used to log in to your Magento environment (this is for Magento's own verification)
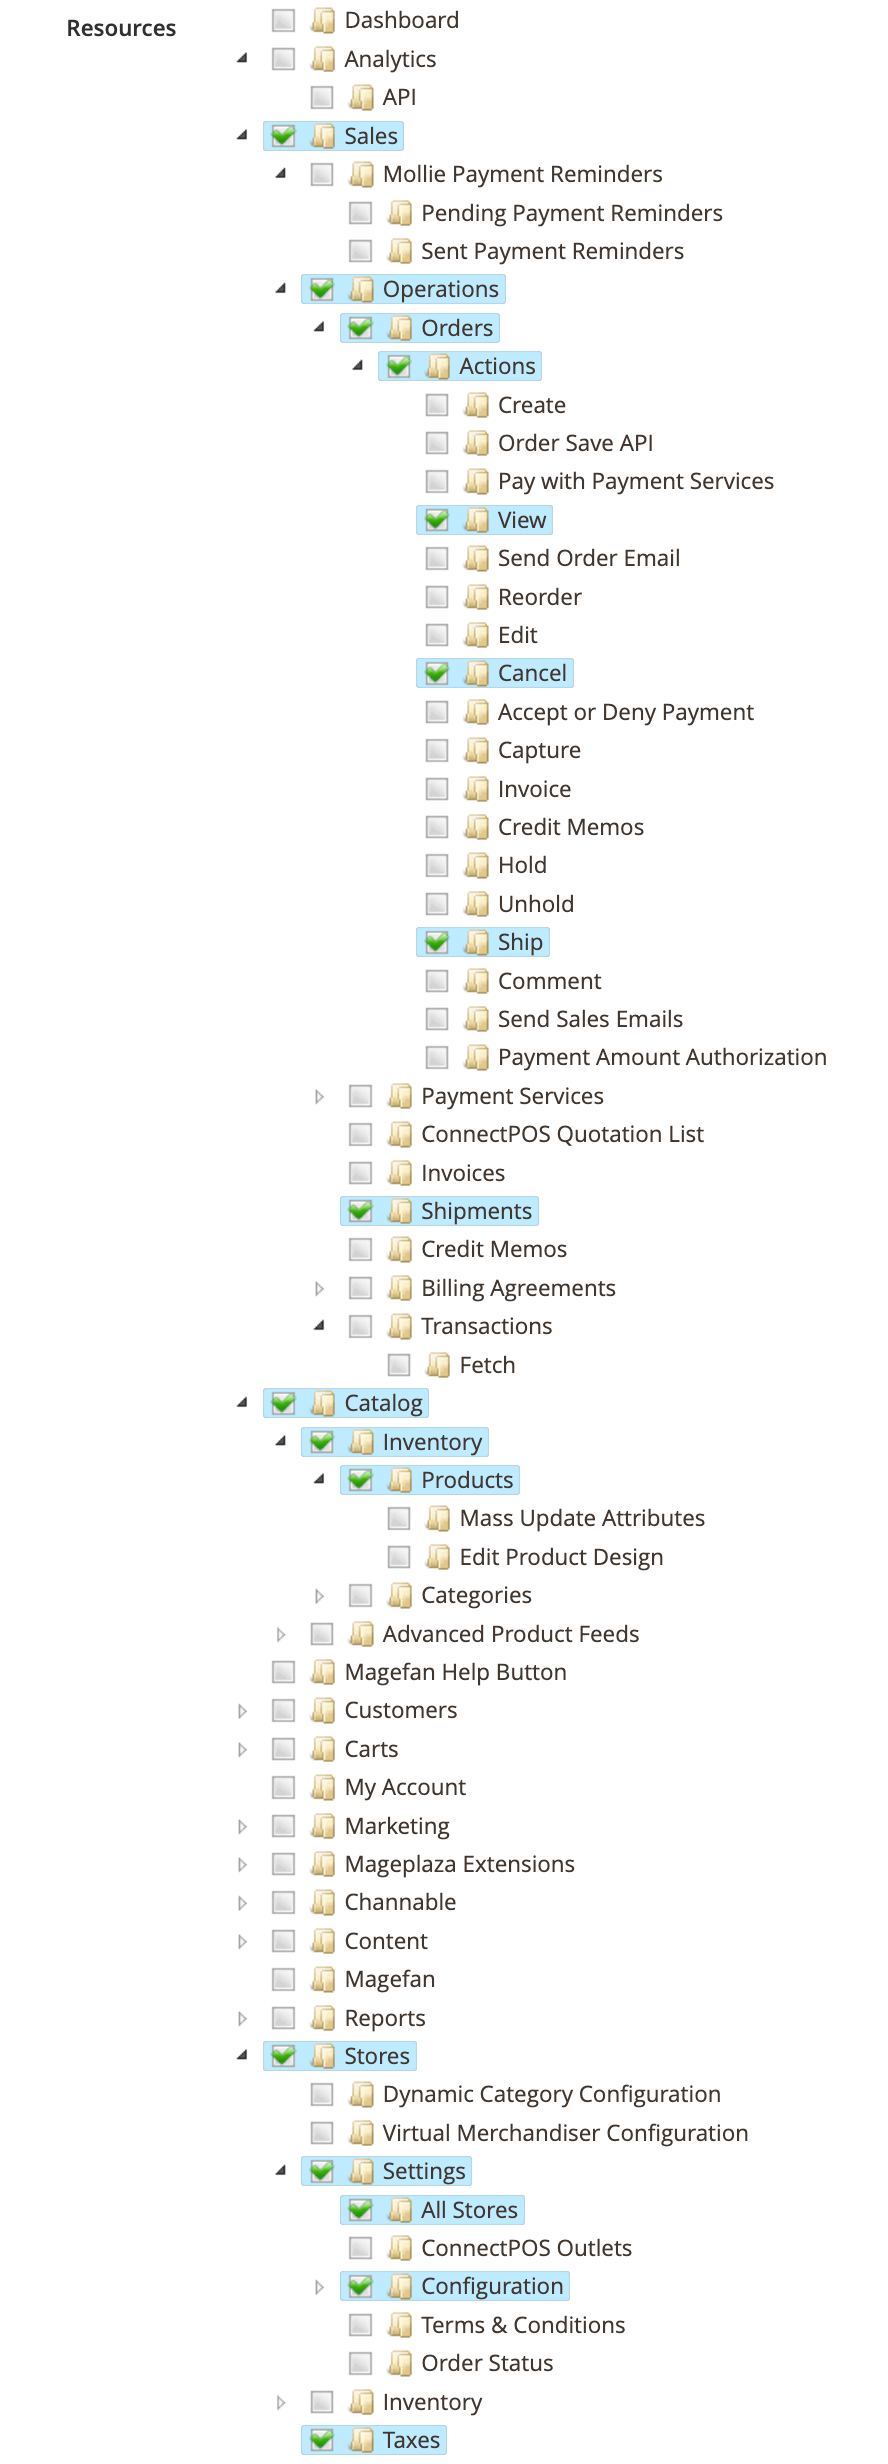
- Then click on API (in the light gray sidebar)


- Now check the following checkboxes:

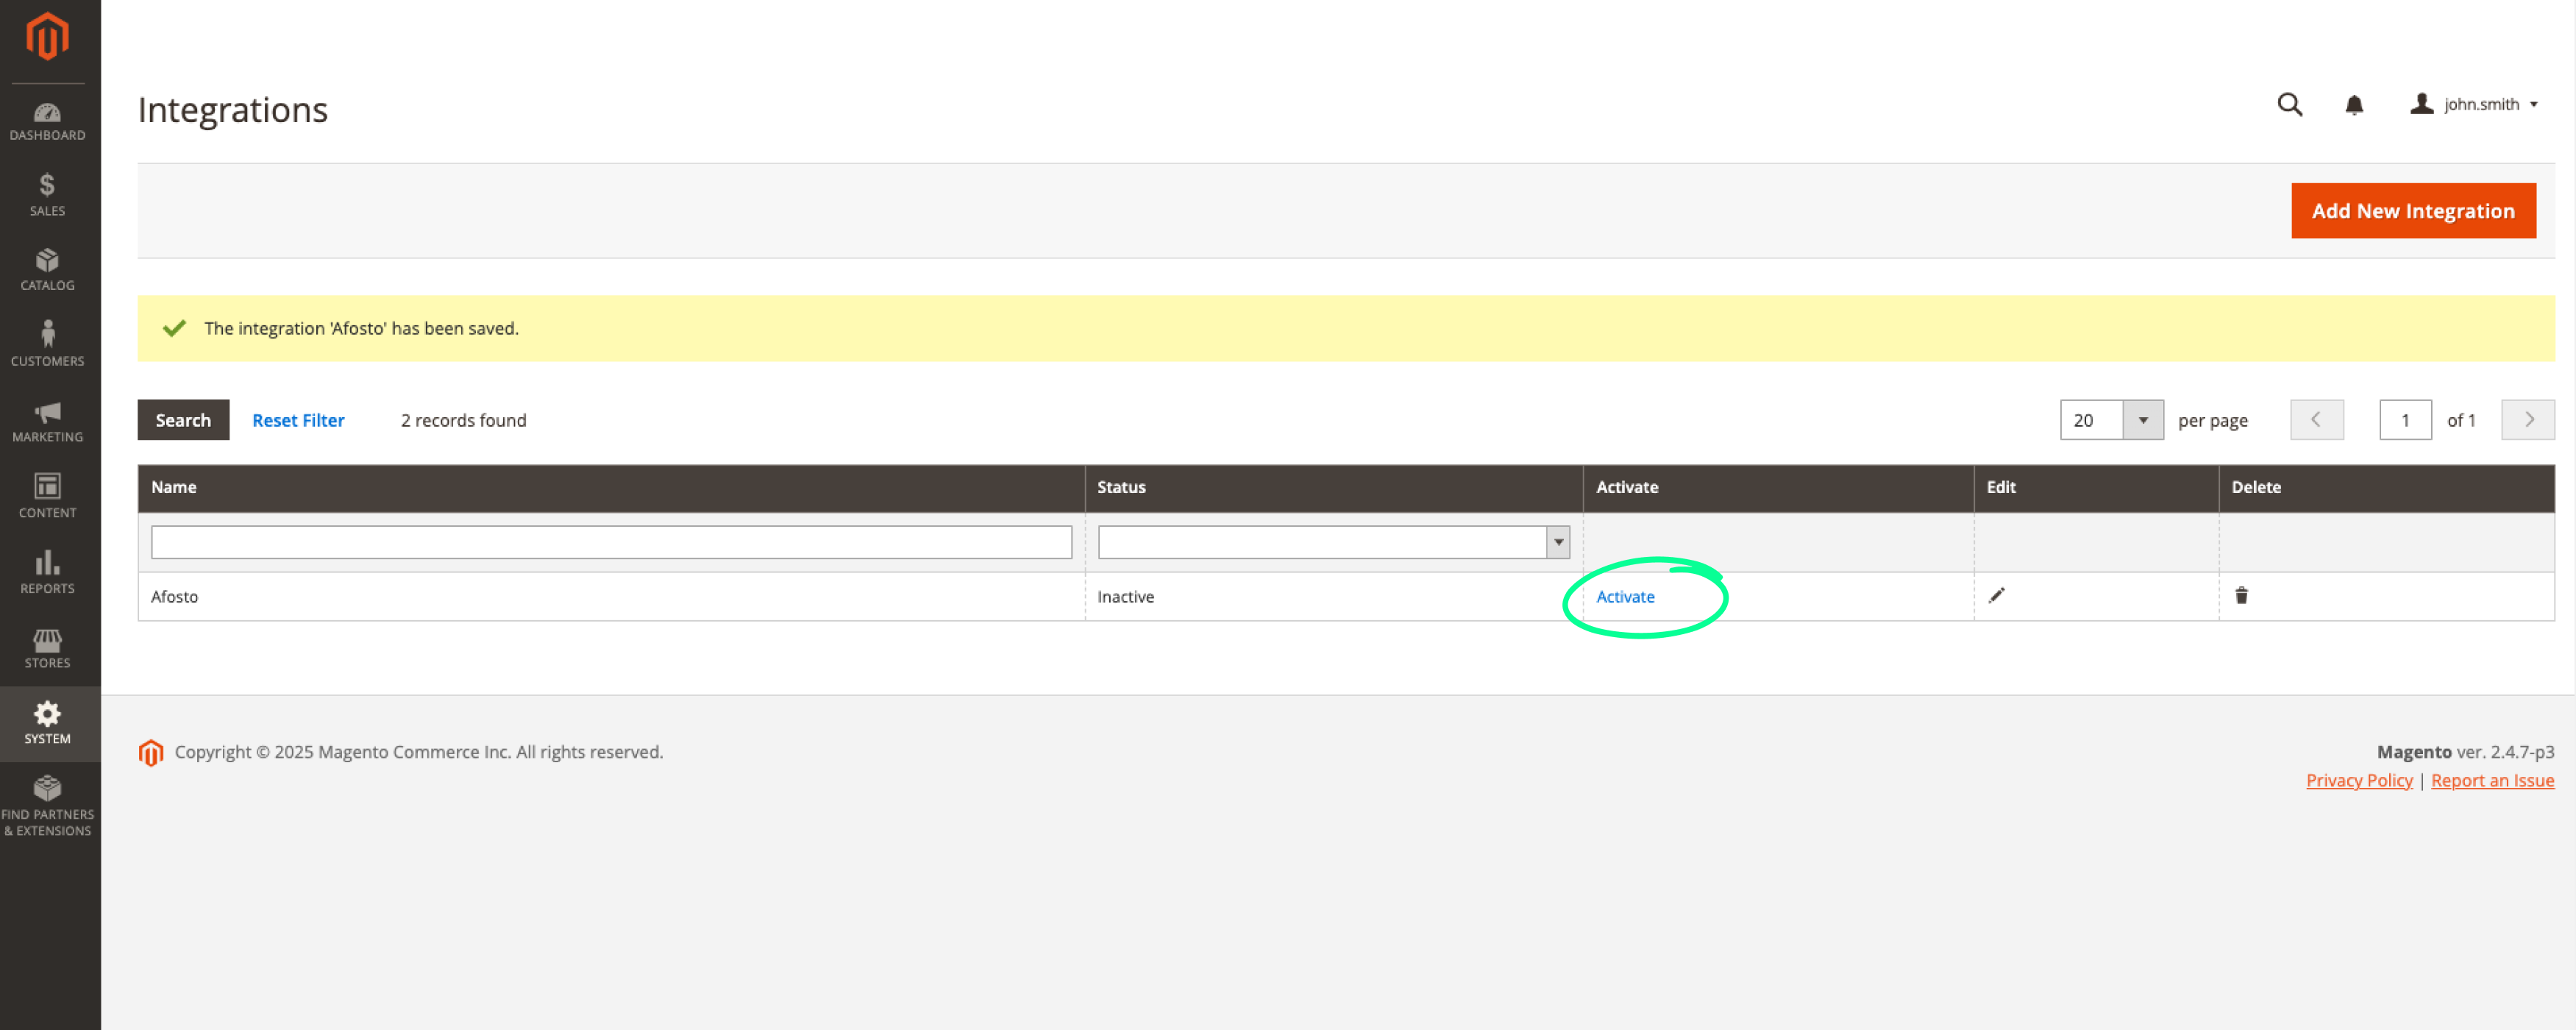
- Click on Save (top right)
- Now click on Activate

- Now click on Allow

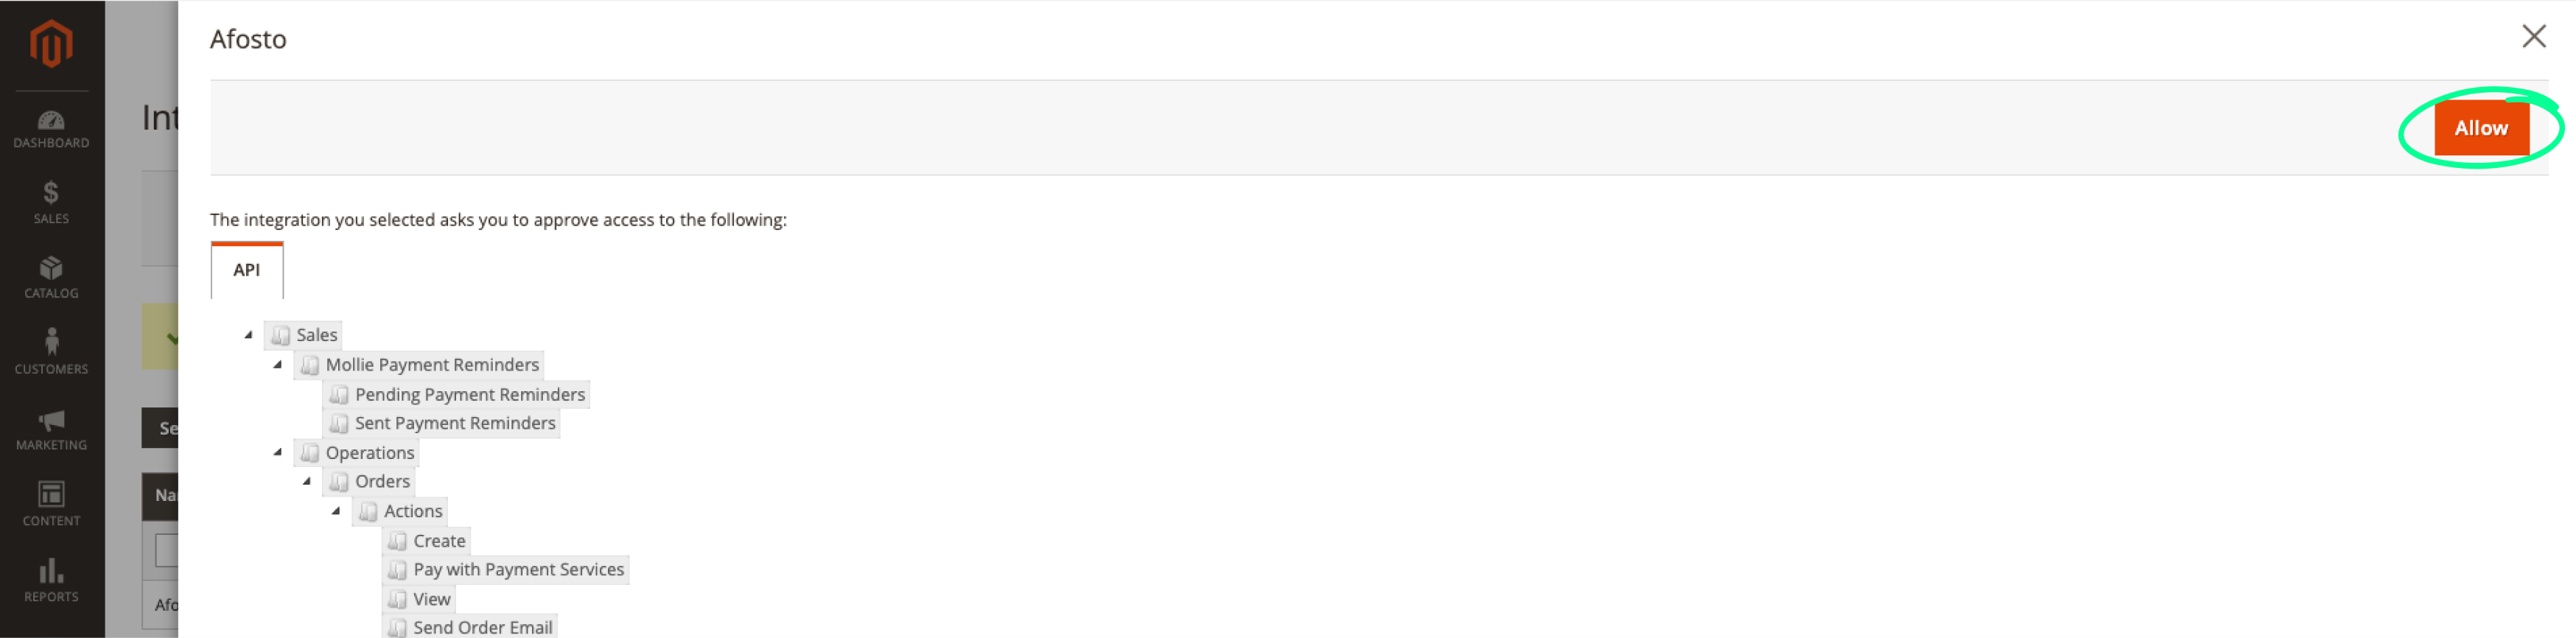
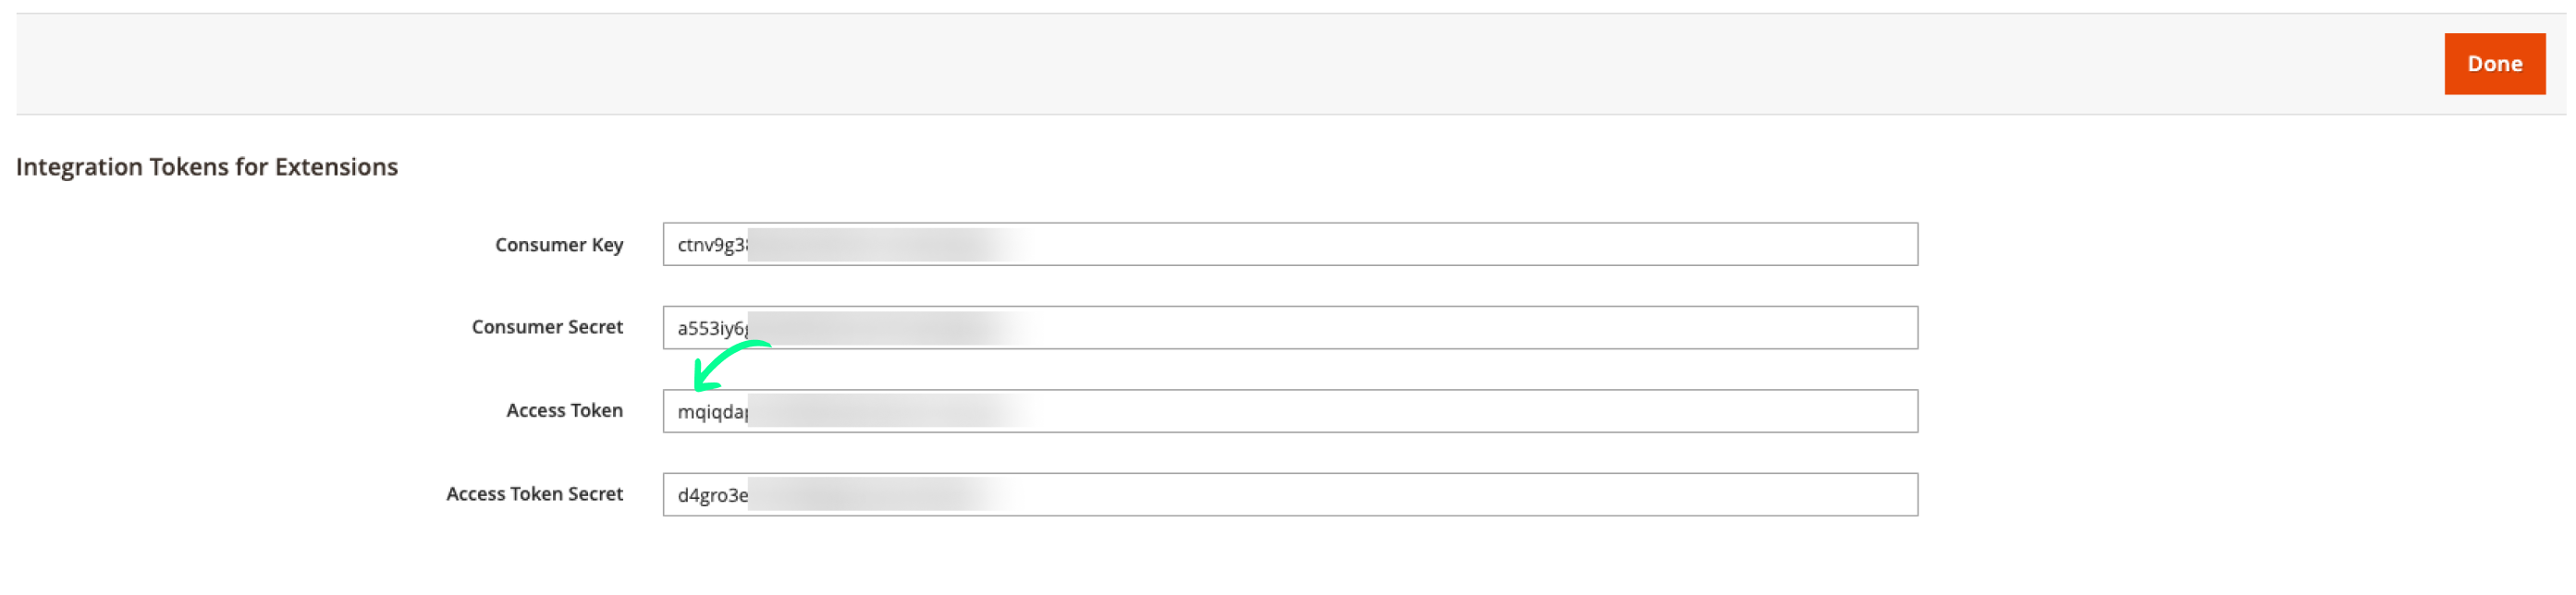
- Now copy the Access Token (you'll need this in Afosto in the next step)

Connect integration to Afosto
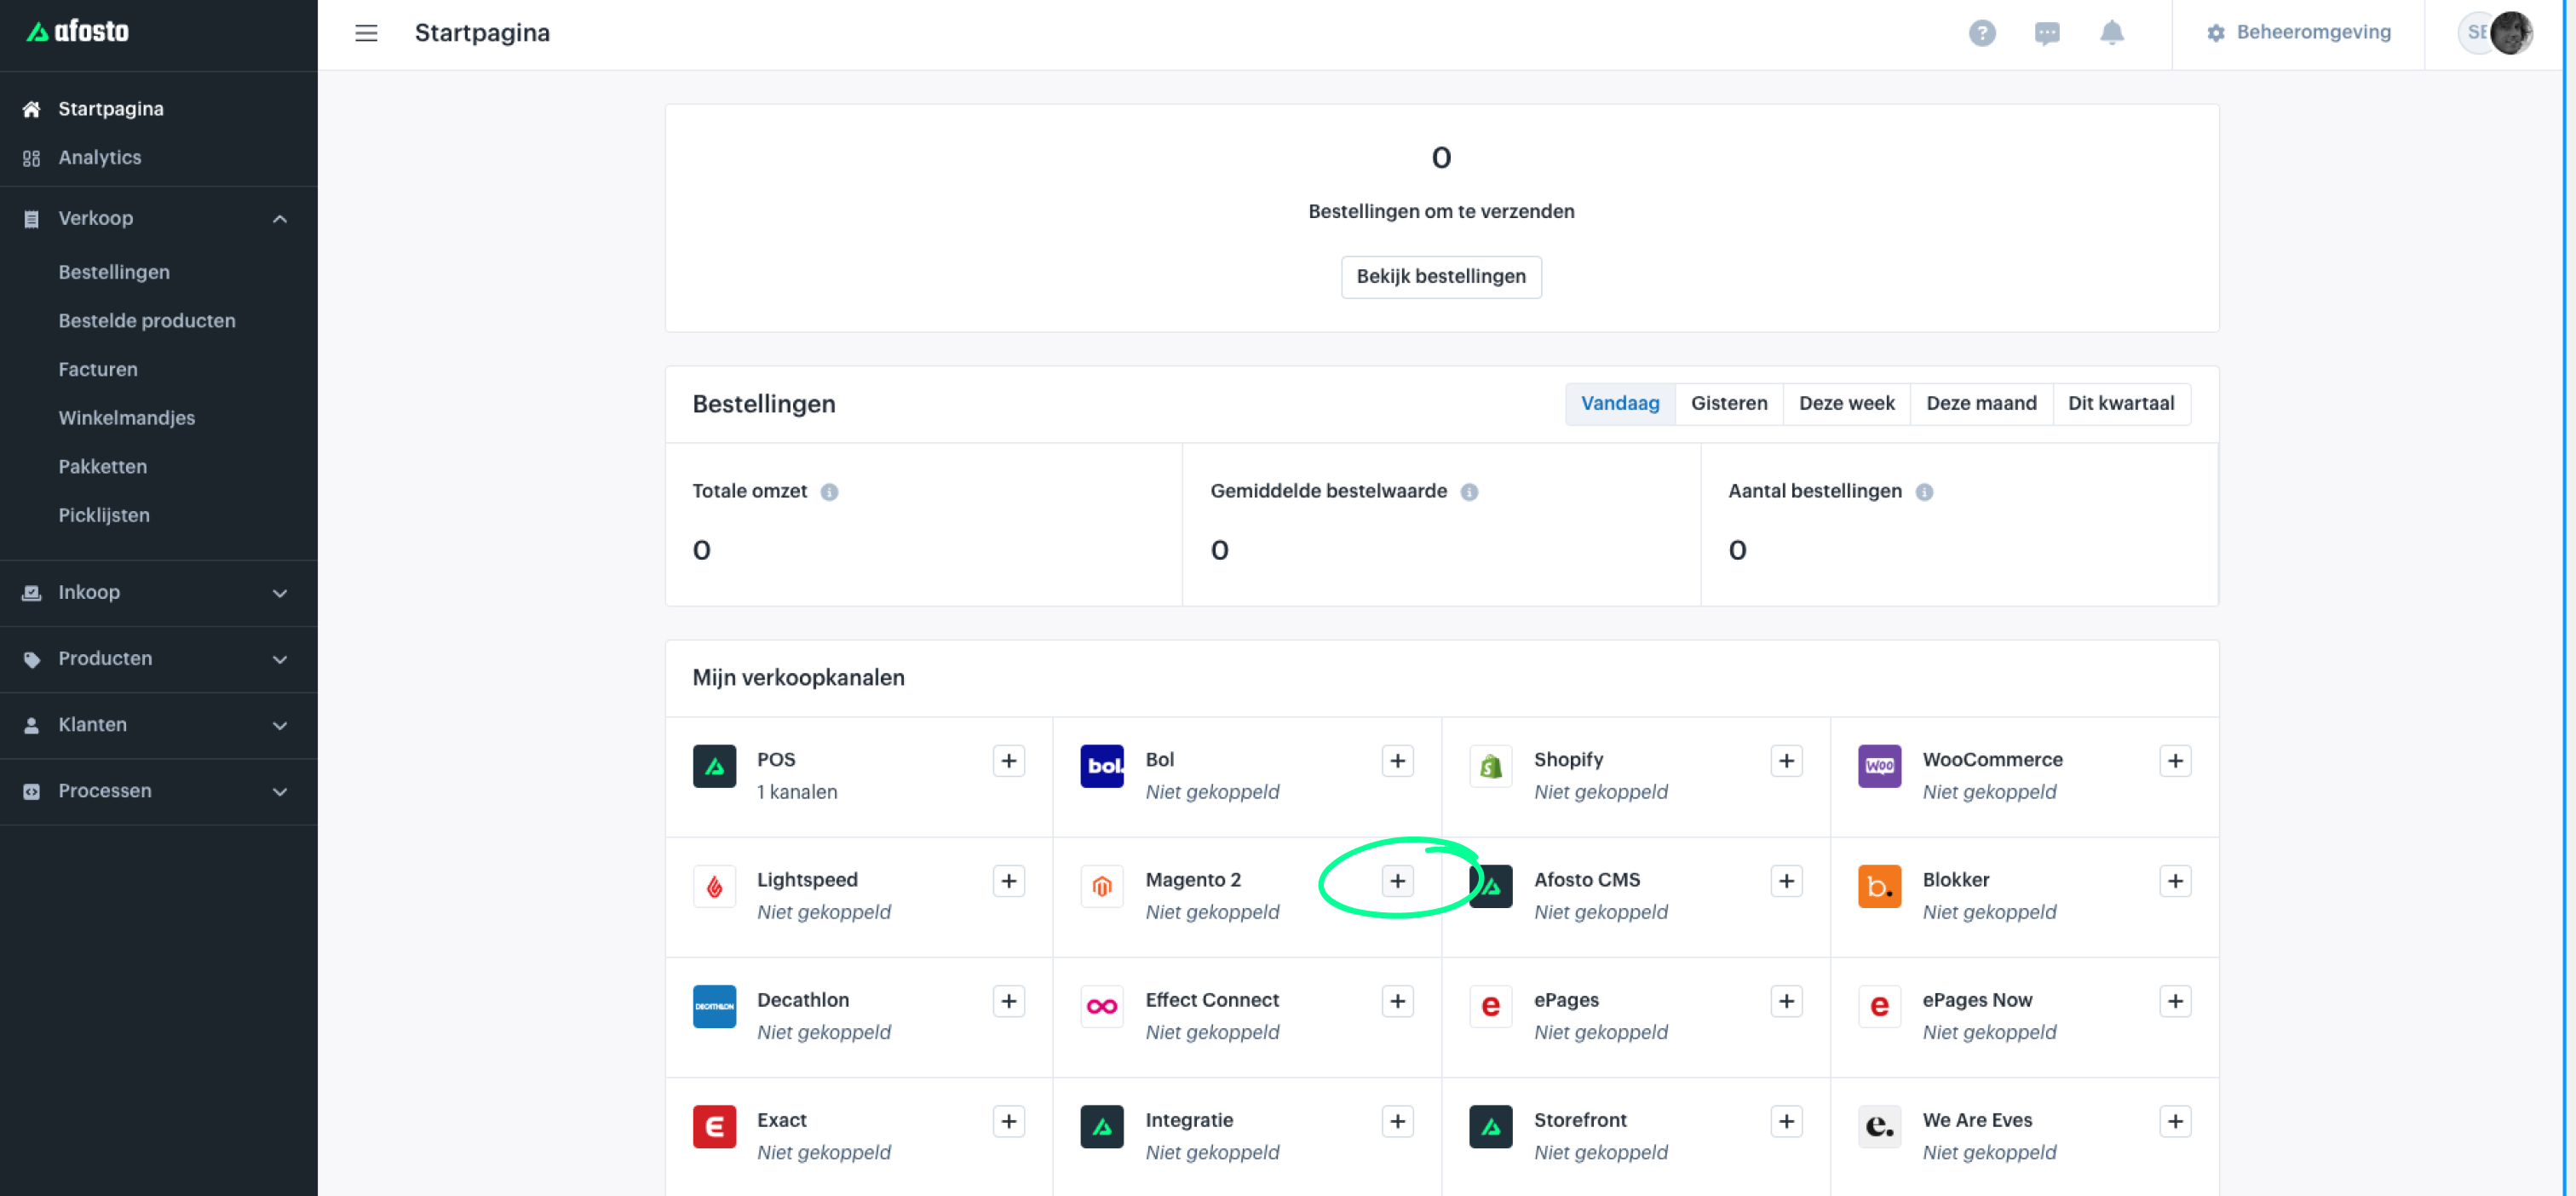
- Log in to your Afosto account at afosto.app
- From the home screen, click the plus icon next to Magento 2

- Choose a name for the sales channel you are adding and fill in the other settings

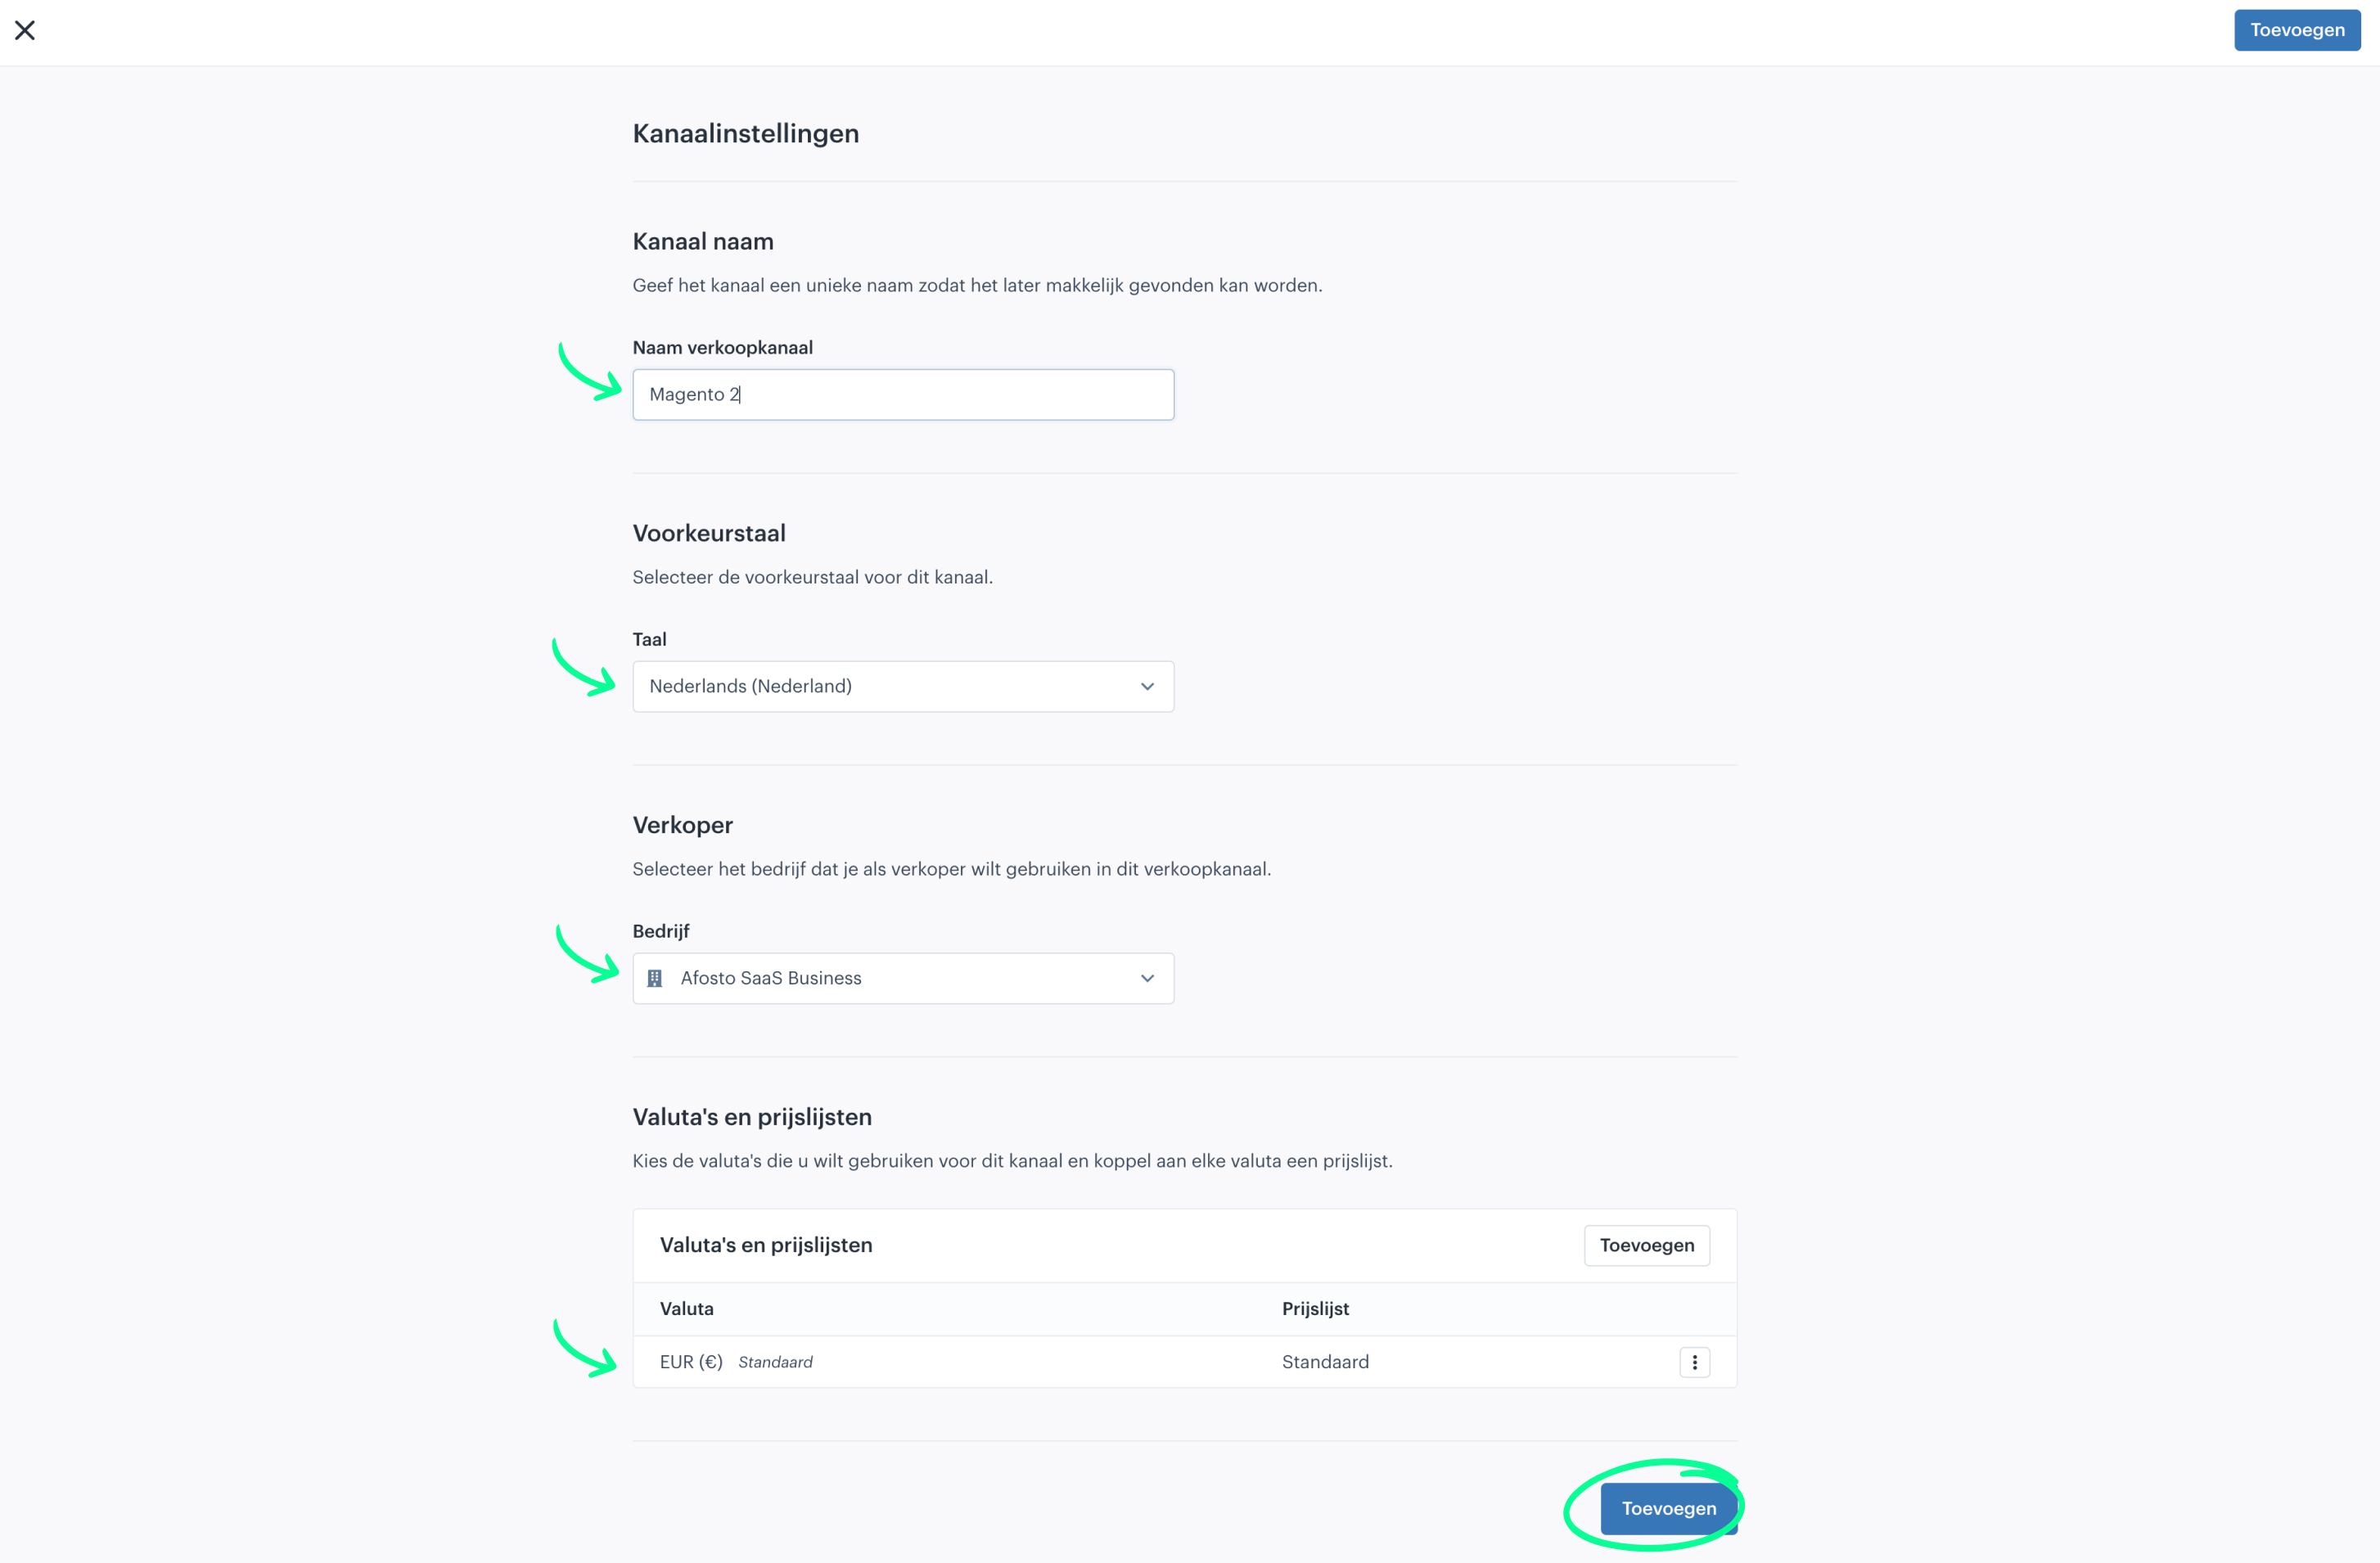
- Click on Add
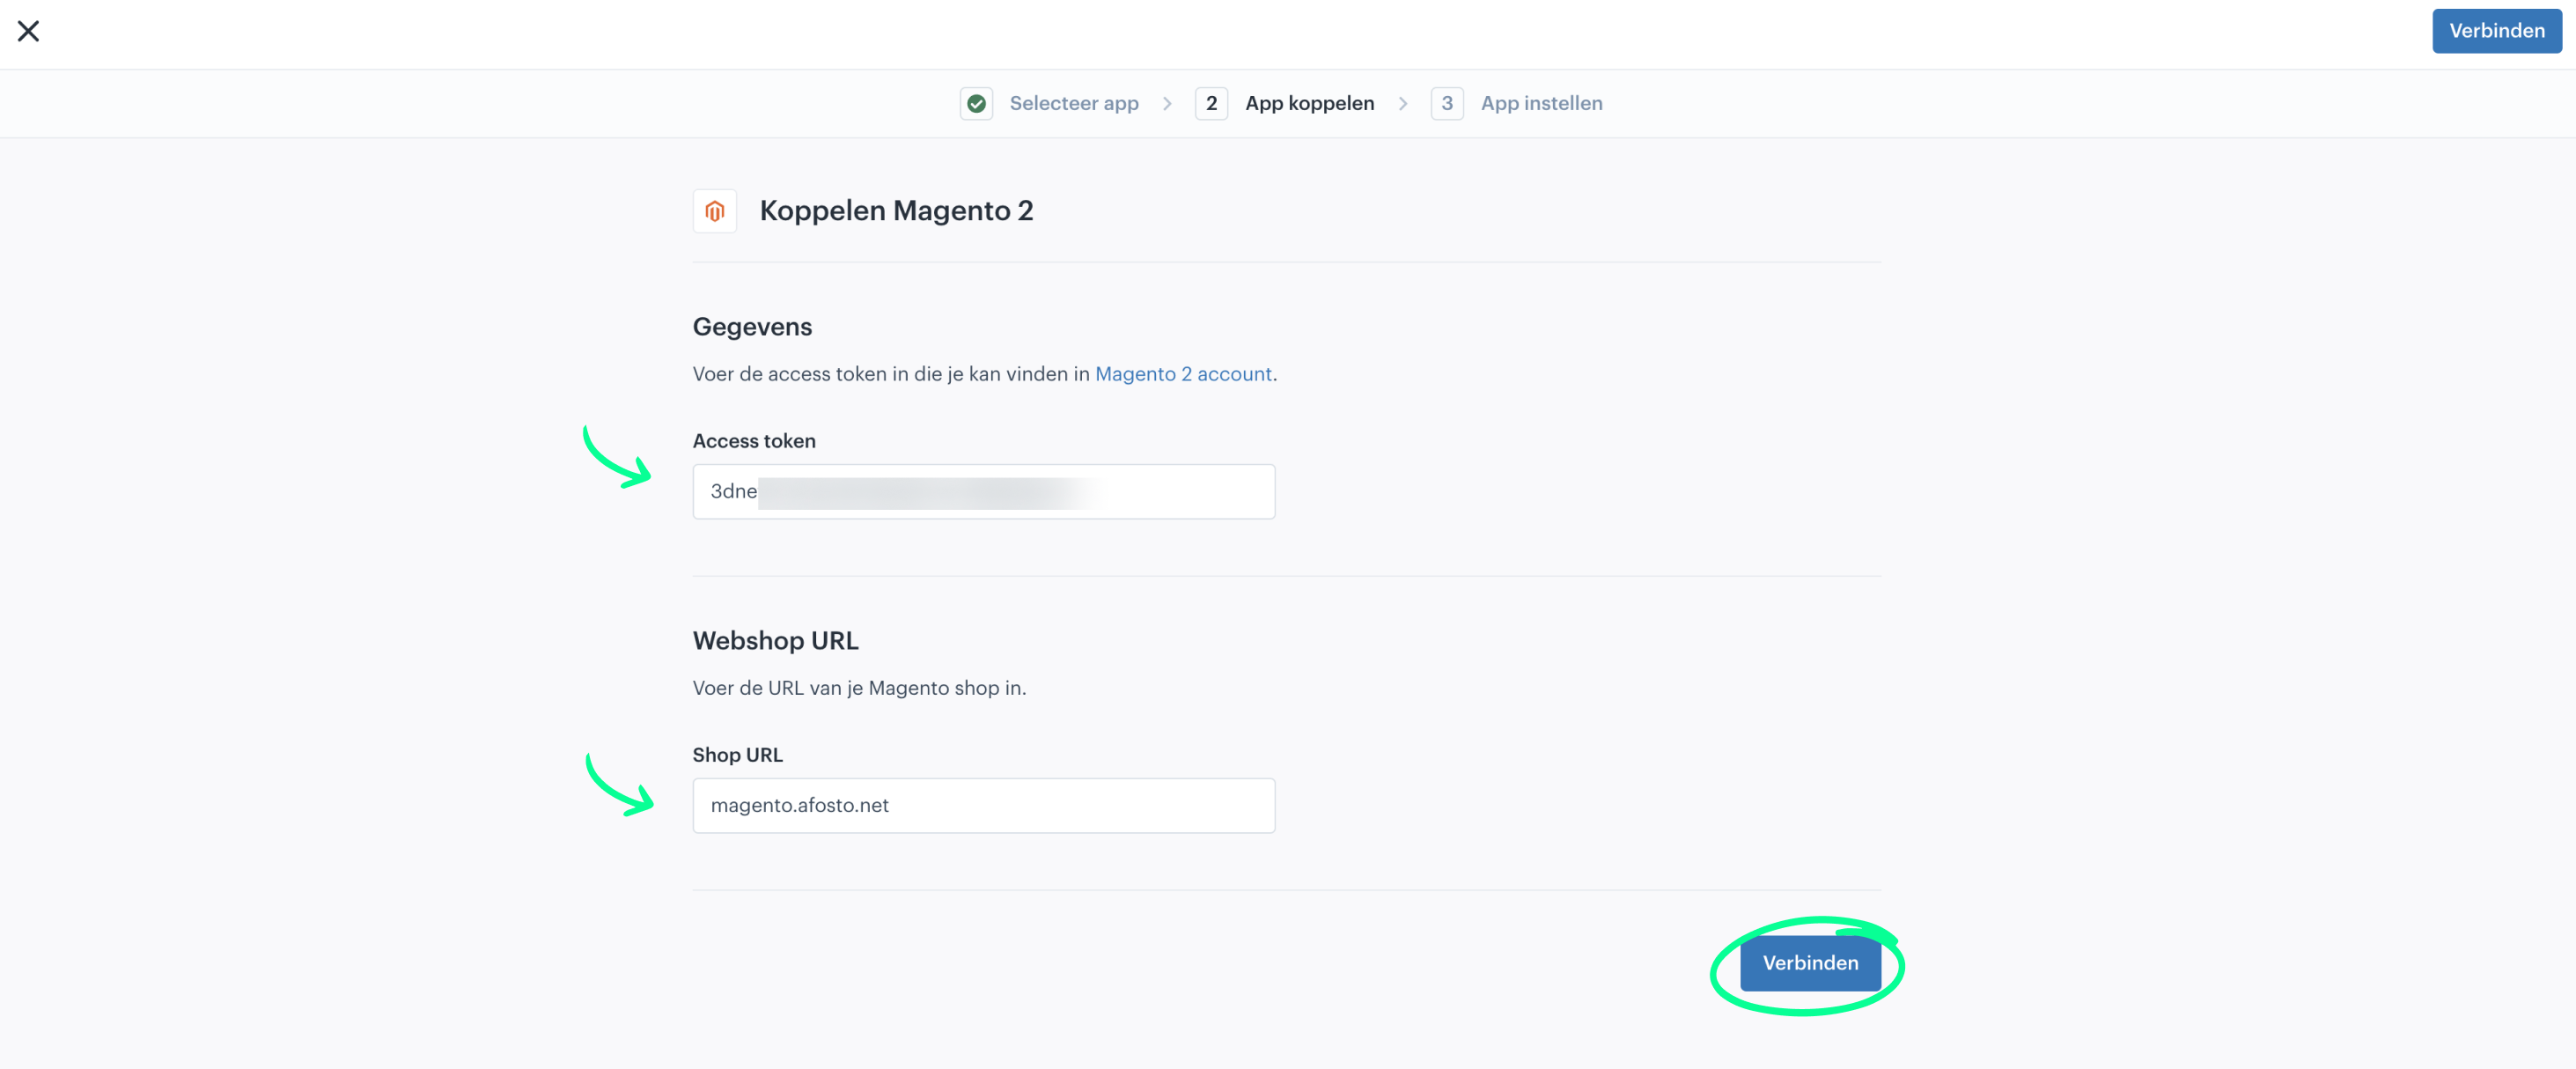
- Enter the previously copied Access token and also enter your webshop's URL (without http(s)://)
- Click on Connect

- Select which store you want to connect, and optionally enter a different name for the connection
- Further, choose whether you want to synchronize stock and how you want to handle cancellations and notifications.
- Click on Save

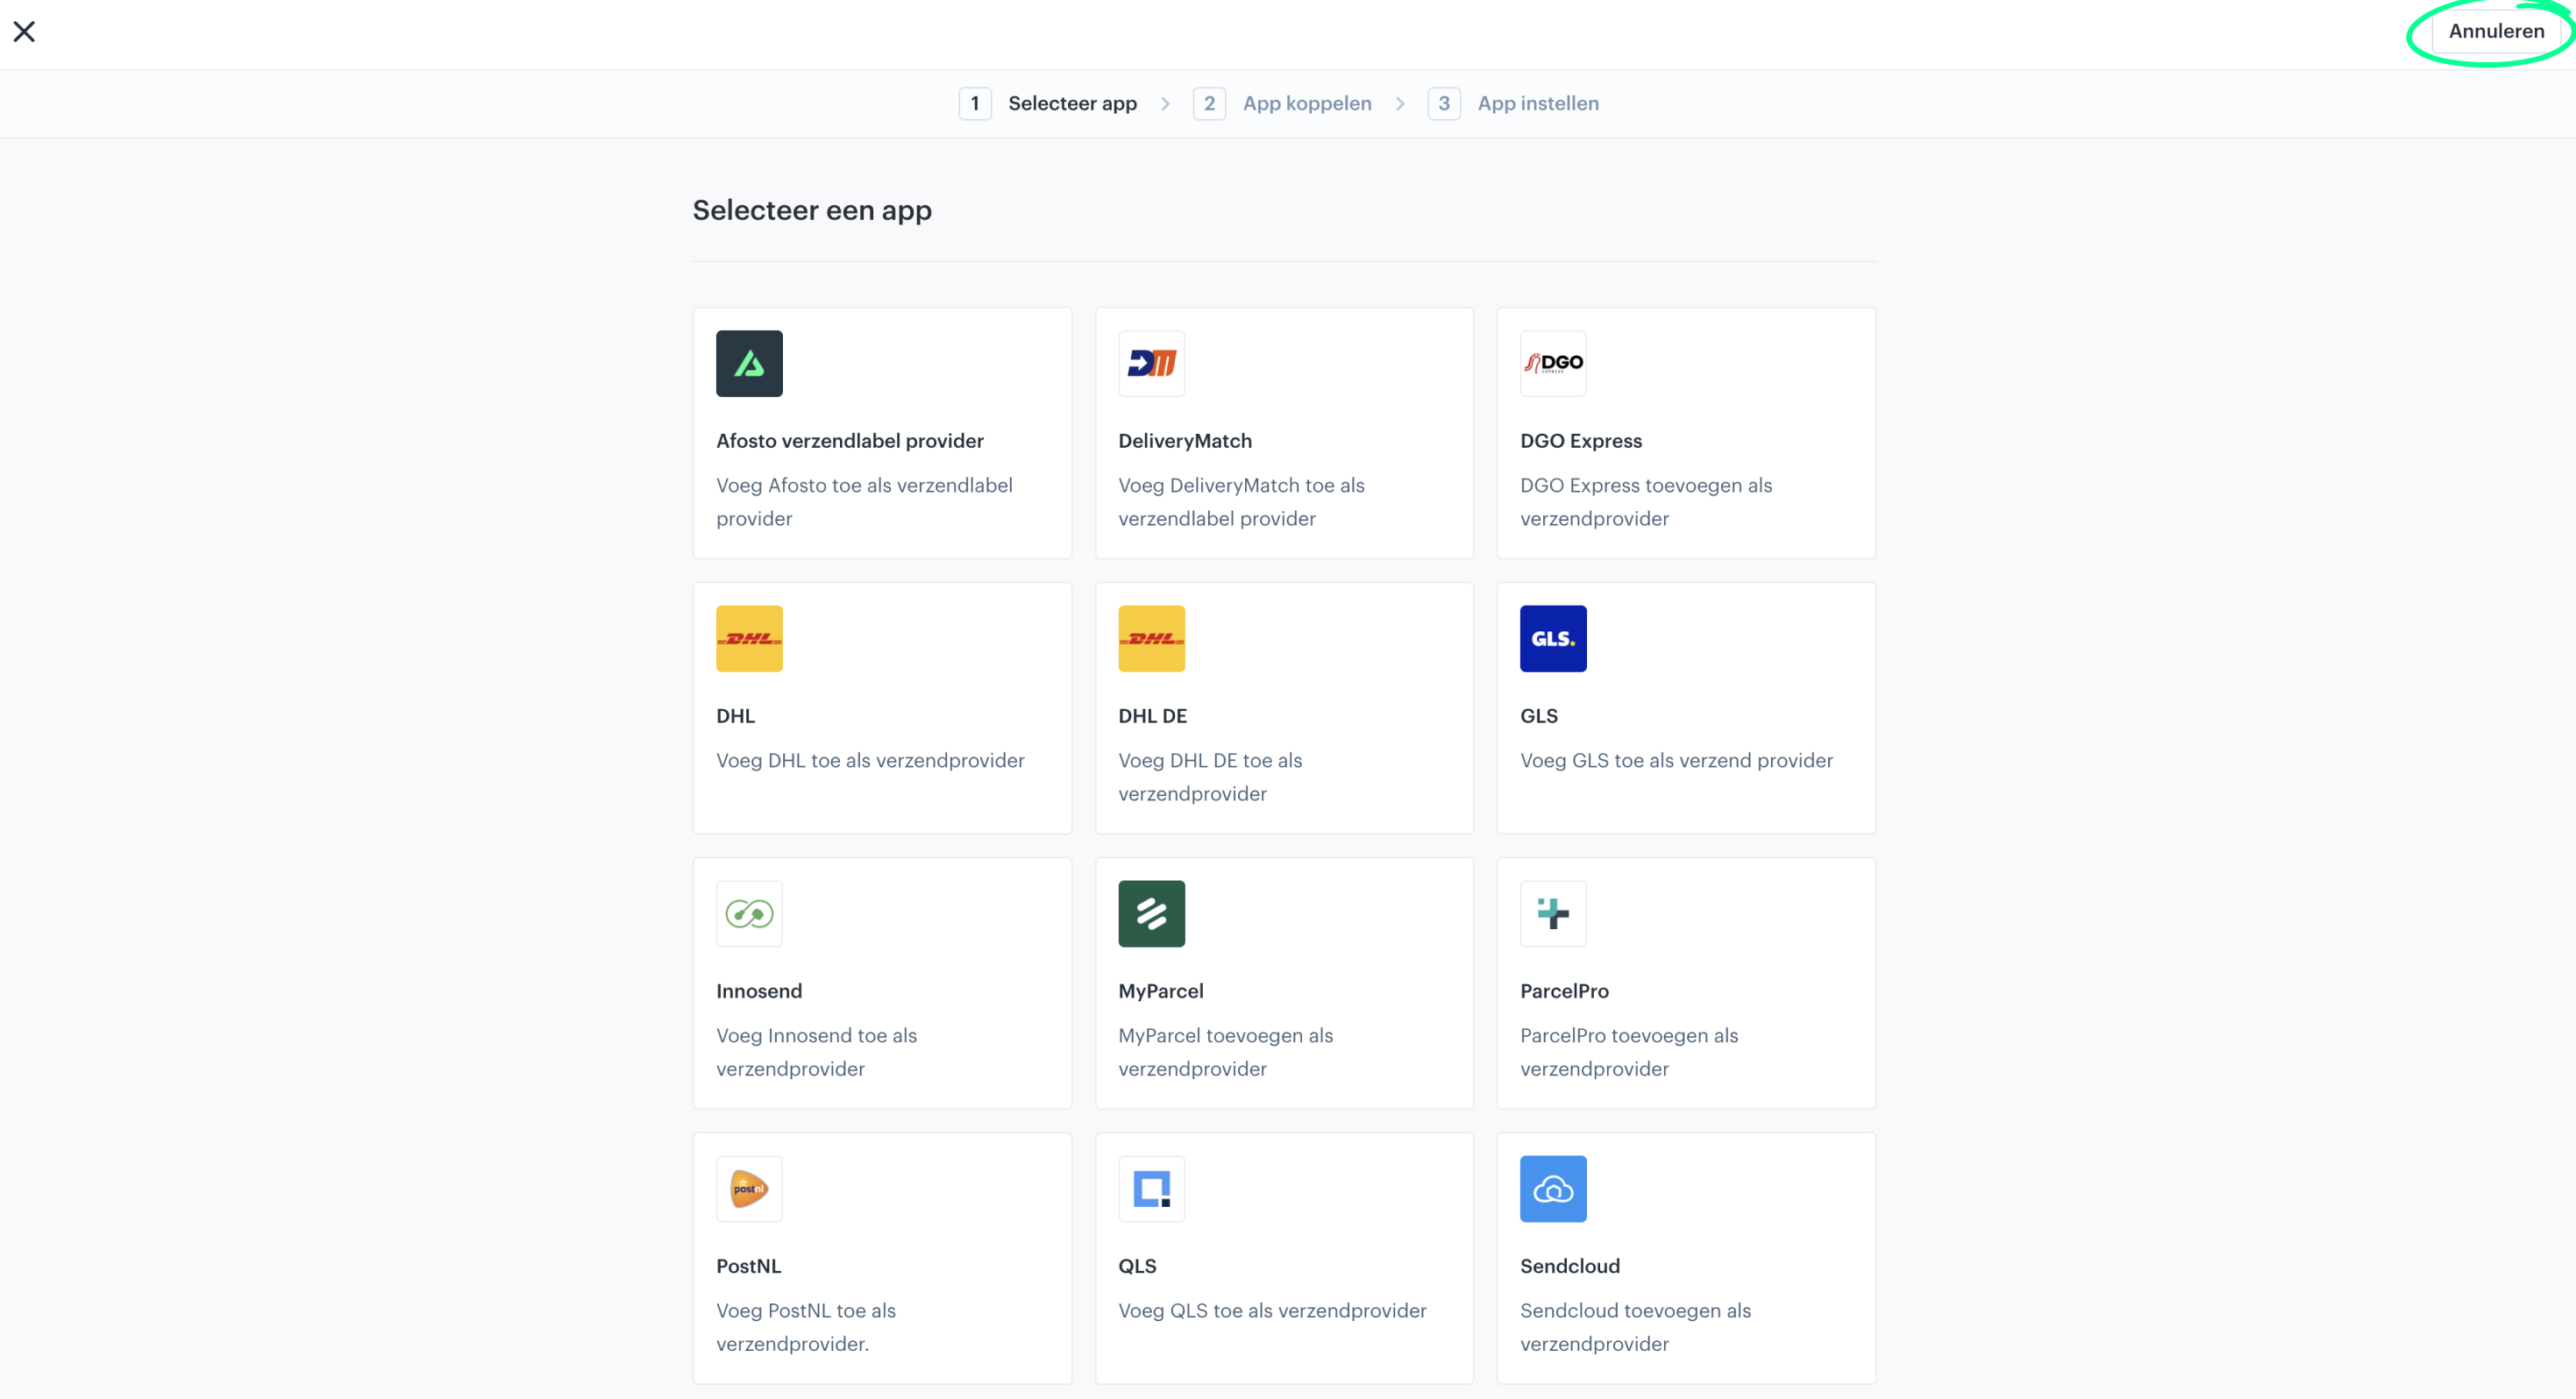
- Congratulations, the Magento 2 connection is now successful. You can also connect a shipping provider if you want; if not, click Cancel.