Request account
There are two options for creating an account on your webshop:
- The customer can create an account themselves and then log in immediately.
- The customer requests an account, and you first review the application.
This section focuses on requesting an account and the steps you need to take to ensure the customer can log in afterward.
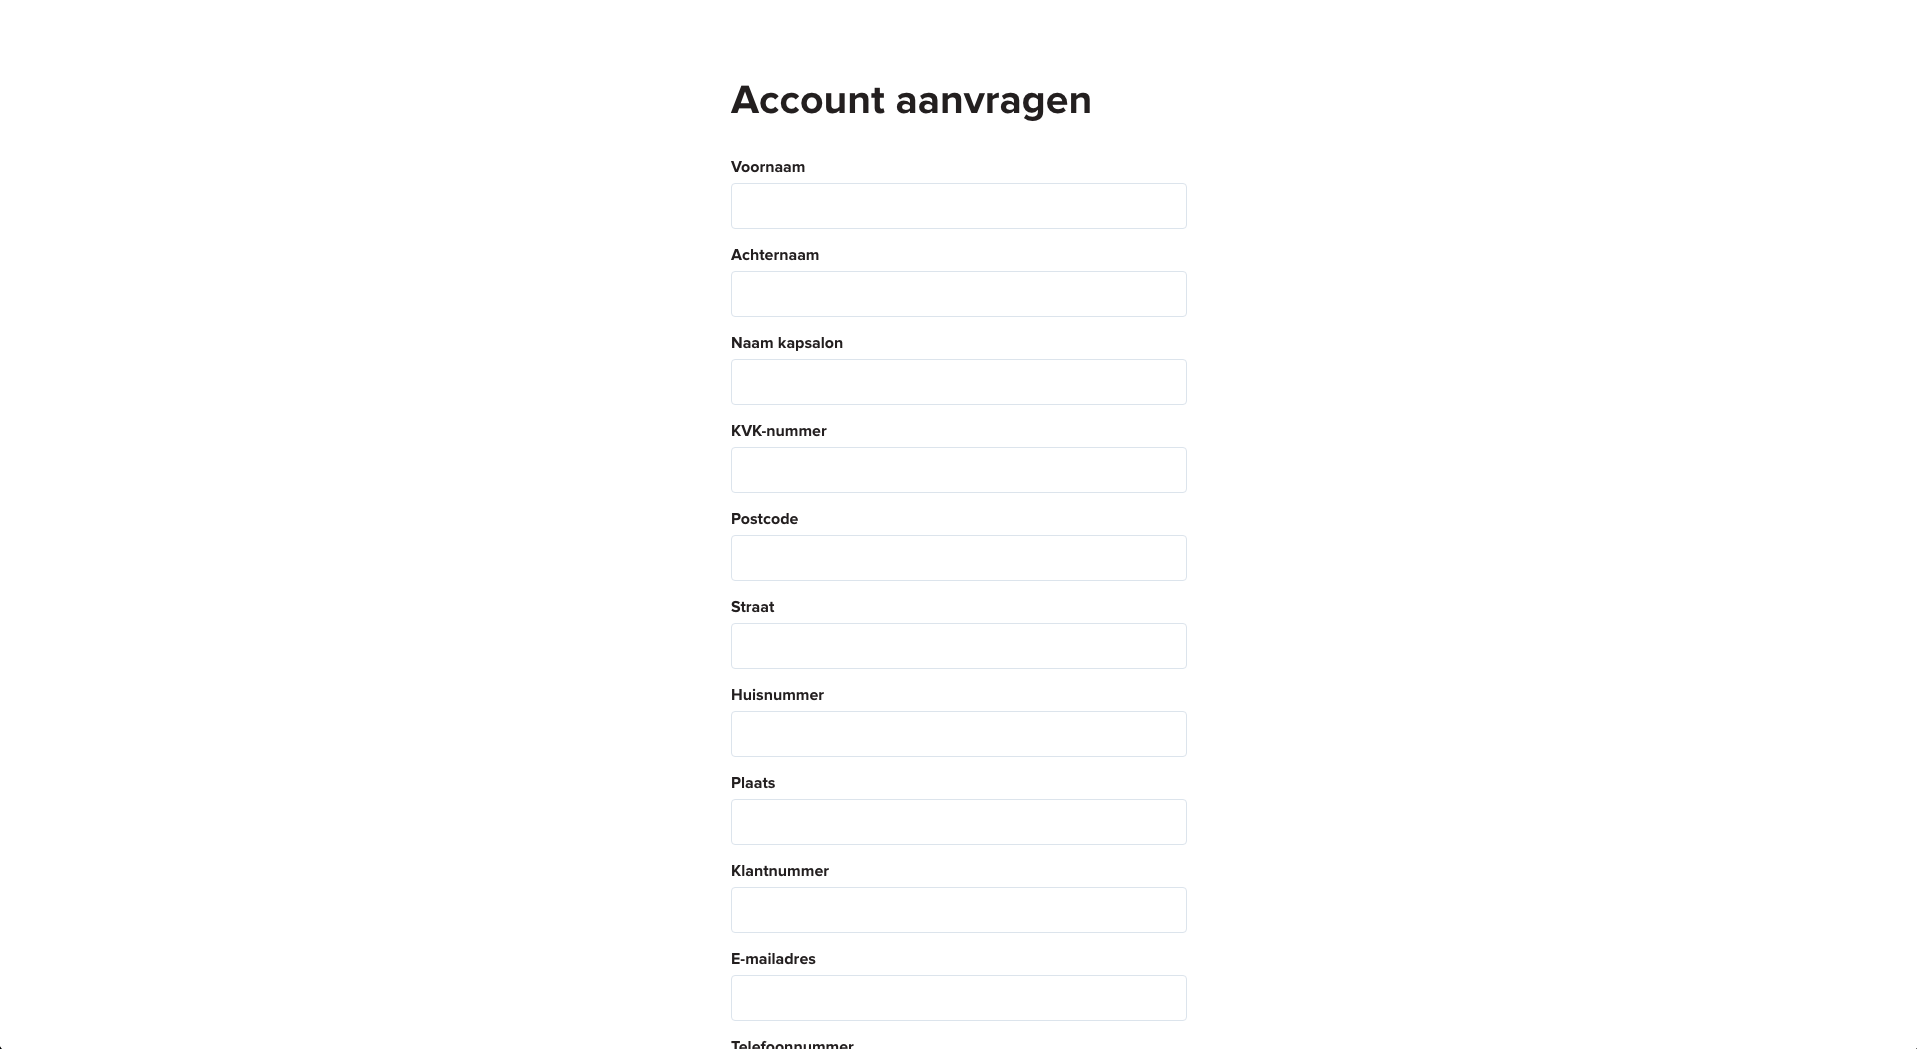
When requesting an account, the customer fills out an application form on your webshop. The information they provide is then sent to you via email. You review whether the customer meets the requirements for an account—for example, whether they have a valid VAT number and Chamber of Commerce (KvK) number if you run a B2B webshop. Once you have reviewed and approved the information, you can proceed with the process.

Setting Up Groups
To ensure that a contact can log in to an organization on your sales channel, it’s important that all three elements—the sales channel, the contact, and the organization—belong to the same group.
- If a customer should be able to log in on all your webshops, for example both your Dutch and Belgian webshop, make sure that the sales channels, the contact, and the organization the customer should access all share the same group.
- If the customer needs a separate account for your B2C webshops and your B2B webshop—for example, they can freely register on B2C but must request an account for B2B—then make sure your B2C sales channels and B2B sales channel have different groups (e.g., ‘B2C’ and ‘B2B’).
In this case, you still need to create a contact and an organization so the customer can log in to your B2B webshop, because they cannot log in with their B2C account and have just requested a B2B account. The following steps explain how to create a contact and organization and then link the contact to the organization.
Creating a Contact
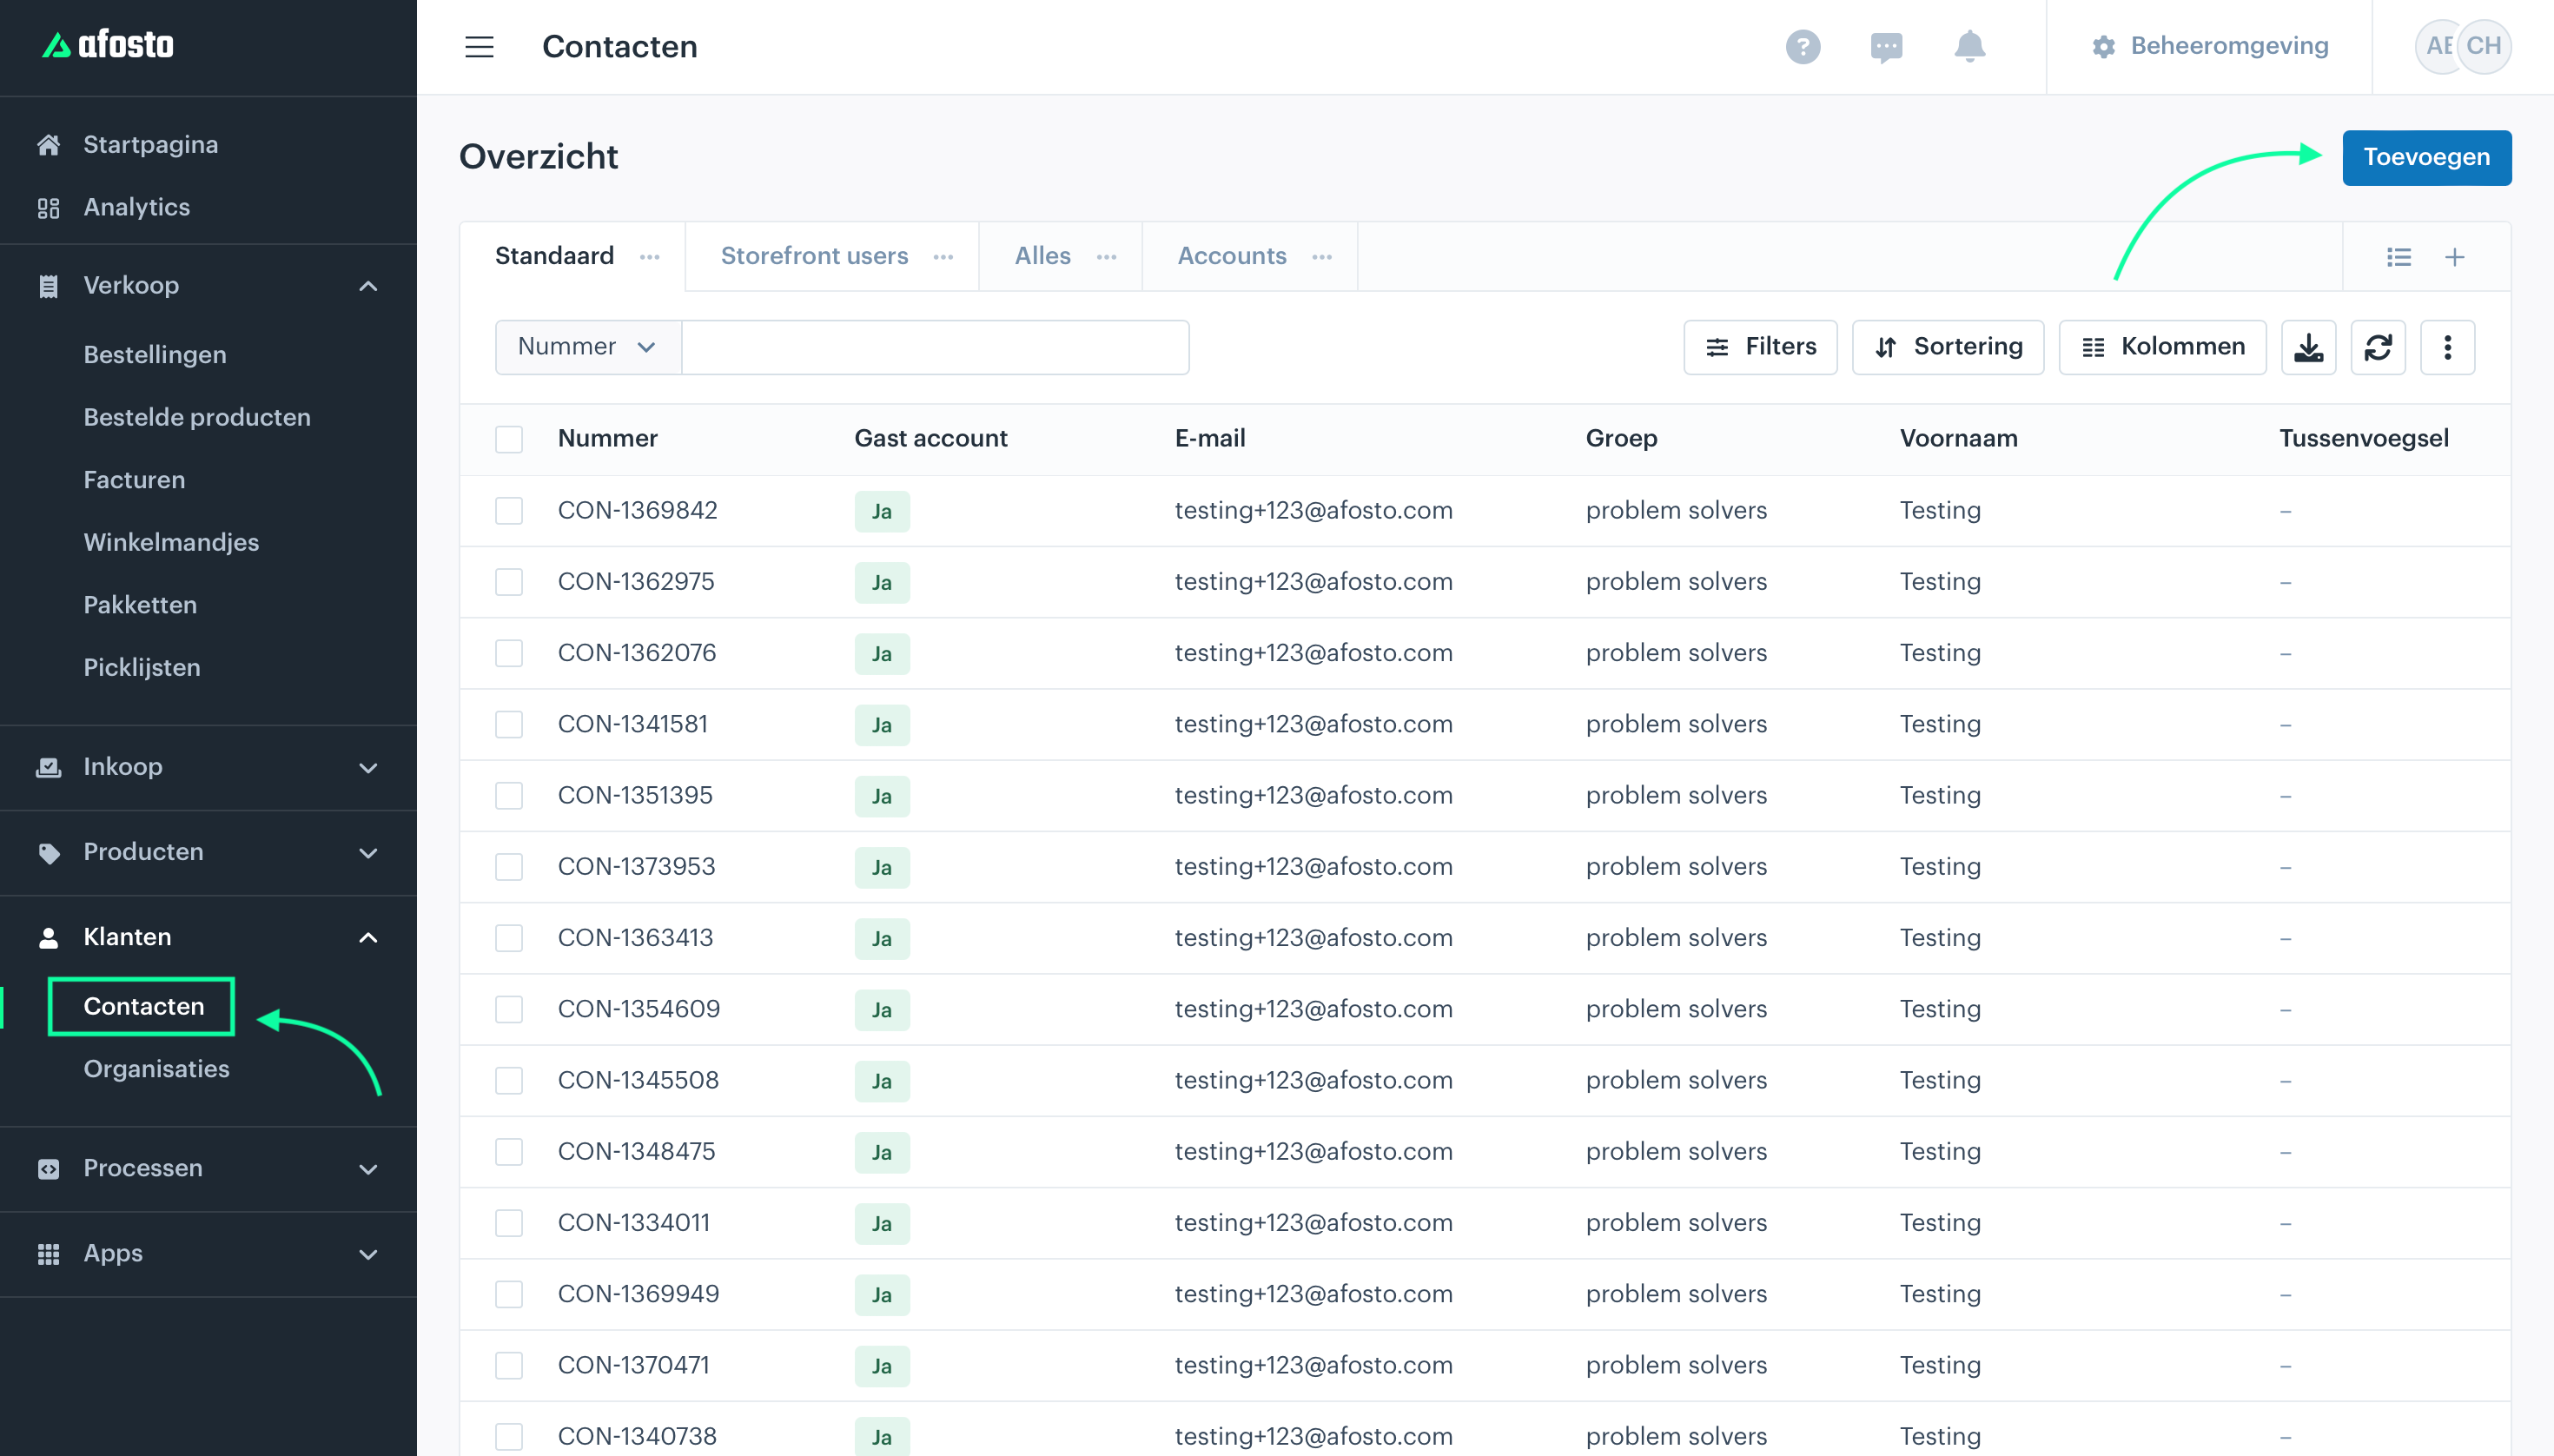
Using the information you received from the customer, create a contact in Afosto. This is the person who needs to be able to log in to your webshop. For business accounts, this is also the person who must be able to log in to an organization to place orders on behalf of that organization.
Read more about Add contacts

Creating an Organization
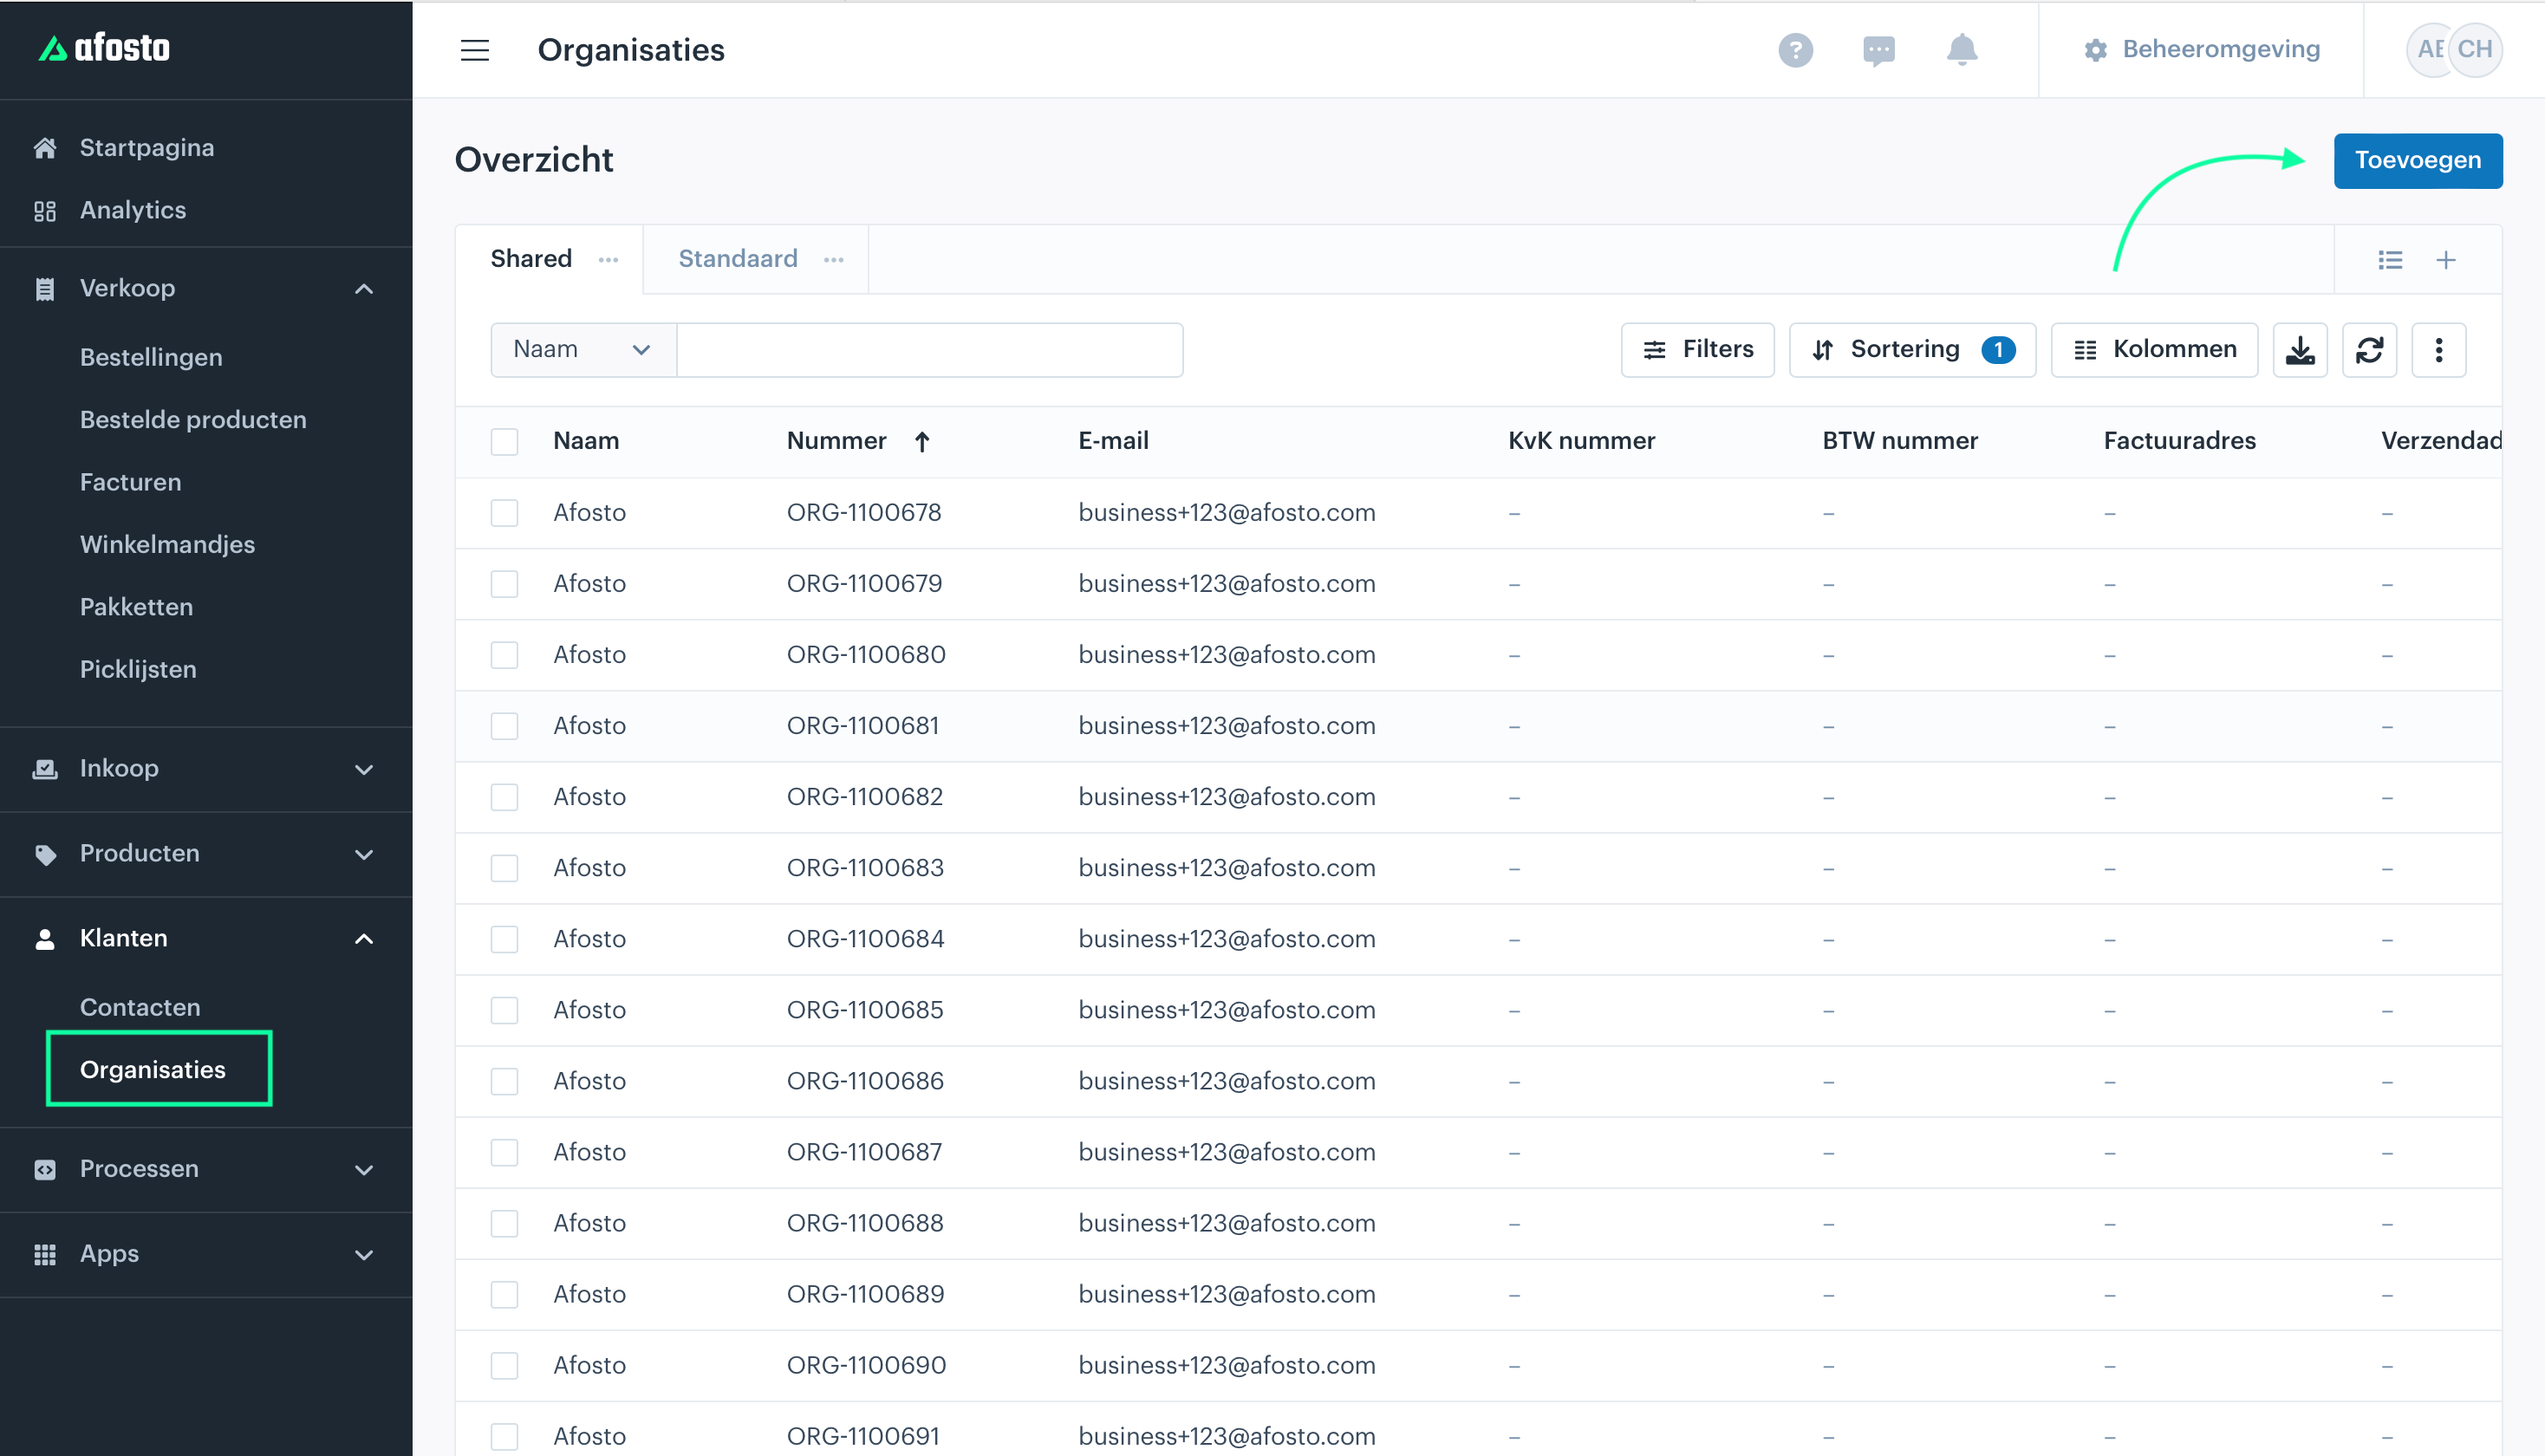
For a business account, for example if you have a B2B webshop, you also need to create an organization. The contact you created in the previous step must be linked to this organization as a user with account access. This ensures that the contact can log in to the organization.
A contact linked to an organization can have three roles:
- Admin
- Employee
- User
Read more about it here. add organizations

Activating the Account
After creating both the contact and the organization, and linking the contact to the organization, the account still needs to be activated. You have two options:
Option 1: Customer Activates Themselves
You send the customer an activation link, for example:
https://account.afosto.com/activate
The customer follows the link, activates the account themselves, and then automatically receives an email to set a password.
Option 2: You Activate the Account via the Same Link
You use the same activation link to manually activate the account. The customer then automatically receives an email to set a password.
Once the password is set, the customer can log in to the B2B webshop.