Custom Views
A view in a datagrid is a saved combination of your columns, filters and sorting. Instead of setting up the grid again every time, you save those settings once and recall them with a single click. You can make a view available to everyone or restrict it to specific roles, which improves consistency and makes collaboration within your team more efficient.
View access
You control who can see a view through roles, in the Edit view dialog (via the three dots next to a view):
Everyone: leave the Add roles field empty. The view is then available to all users.
Restricted to roles: select one or more roles — for example Administrator, Manager or User. Only users with that role will then see the view.
There is no separate option to make a view visible only to you. If you want that anyway, assign the view to a role that only you have.
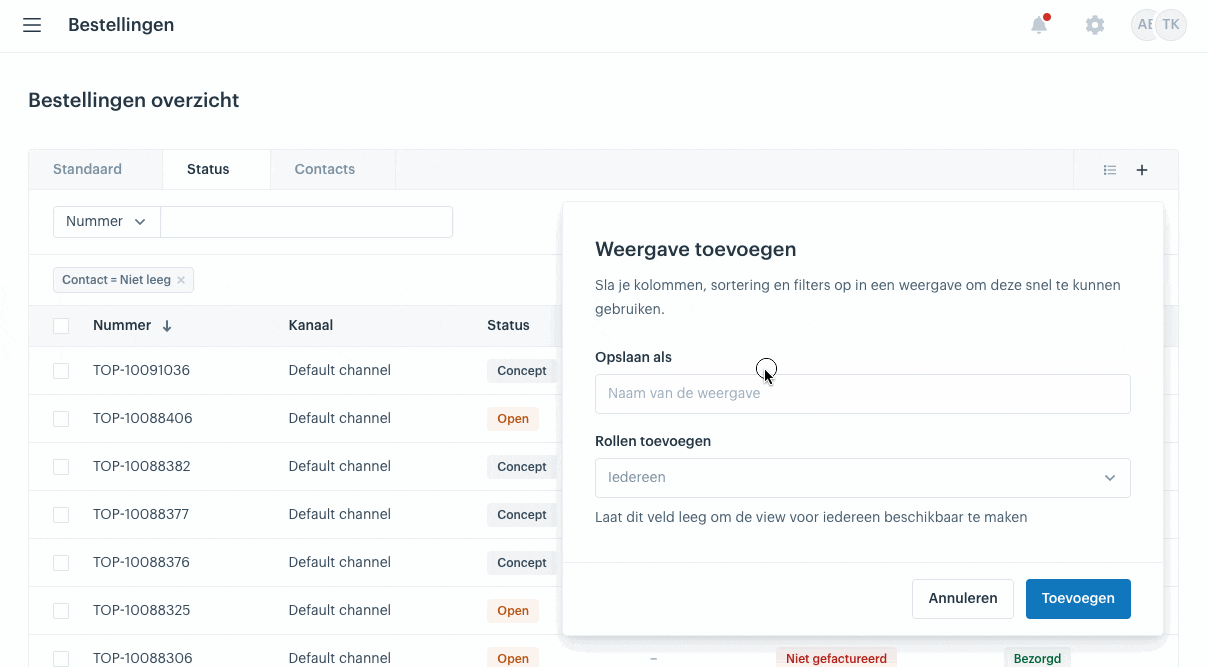
Creating a view
You create a new view with the + (plus) icon at the top right of the datagrid. The new view appears as an extra tab in the bar at the top. After that you set it up and save it — covered in the next steps.

Setting up a view
Open the view you just created and set up the grid the way you want to keep it: choose which columns are visible and in what order, apply filters and set the sorting. Together these three elements determine what the view shows. For how to set each of them, see the separate articles Columns, Filters and Sorting.
Saving a view
You save a view via the three dots next to the tab. In the Edit view dialog you enter a name under Save as and set who can see the view under Add roles. Click Save to store your current columns, filters and sorting in the view. To change something later, repeat this step and overwrite the view.

Managing views
Switching: click a tab at the top, or open the Saved views list via the icon at the top right of the datagrid.
Renaming: open the three dots next to a view and change the name under Save as in the Edit view dialog.
Deleting and reordering: open the Saved views list via the icon at the top right. Drag the views to change their order, or click the cross to delete one.
Examples
A few views that work well in practice:
Splitting B2C and B2B: create a separate view per sales channel by filtering on the Channel column. This lets you view consumer orders and business orders separately, each with the columns and sorting that make sense for that channel.
To be shipped: show all orders that still need to go out with a filter on Status = Open and Delivery status ≠ Shipped. Useful as a fixed view for the shipping process, so it is clear at a glance what still needs to be shipped.