

Setting Up My Organization
Effortlessly manage company details with Afosto's "My Organization" page. Streamline contracts, suppliers, locations, warehouses, domains, and more for optimal efficiency.
The "Setting Up My Organization" module in the Afosto platform helps you organize your business operations step by step. It allows you to define key elements like Businesses, Locations, Warehouses, Suppliers, Domains, and Inboxes, ensuring everything is structured and easy to manage. This module ensures centralized control for efficient management.
These elements work together to answer critical questions like “Who sells it?”, “Where is it located?”, and “How is it managed?”.
By filling out these sections, you create a clear framework for managing inventory, sales, and communication. Following the logical order—Business → Location → Warehouse—ensures seamless integration and streamlined processes.
To set things up, it’s important to follow a logical order:
-
If you want to add a Warehouse, you first need to add a Location.
-
If you want to add a Location, you must add a Business first.
Each section allows a detailed overview, why it’s essential to complete them and configuration to fit your organization’s needs.
In this guide, we will explore how you can manage your organization.
Let’s get started 🚀
How to Manage My Organization
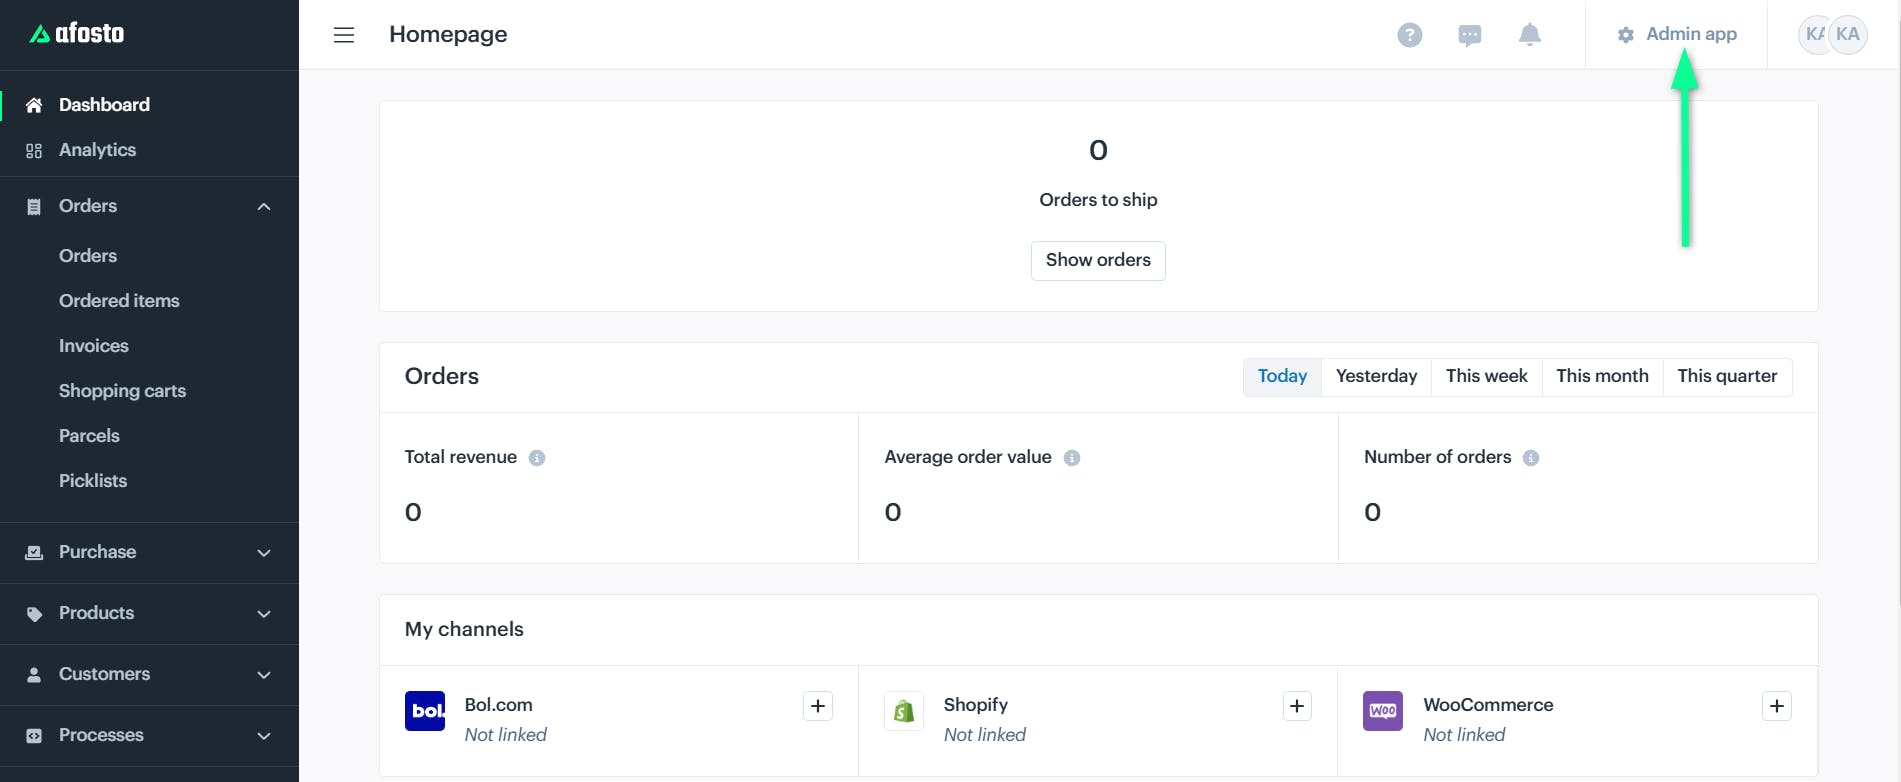
After logging into your Afosto account, click the "Admin App" button located in the top-right corner of the header on the Afosto screen.
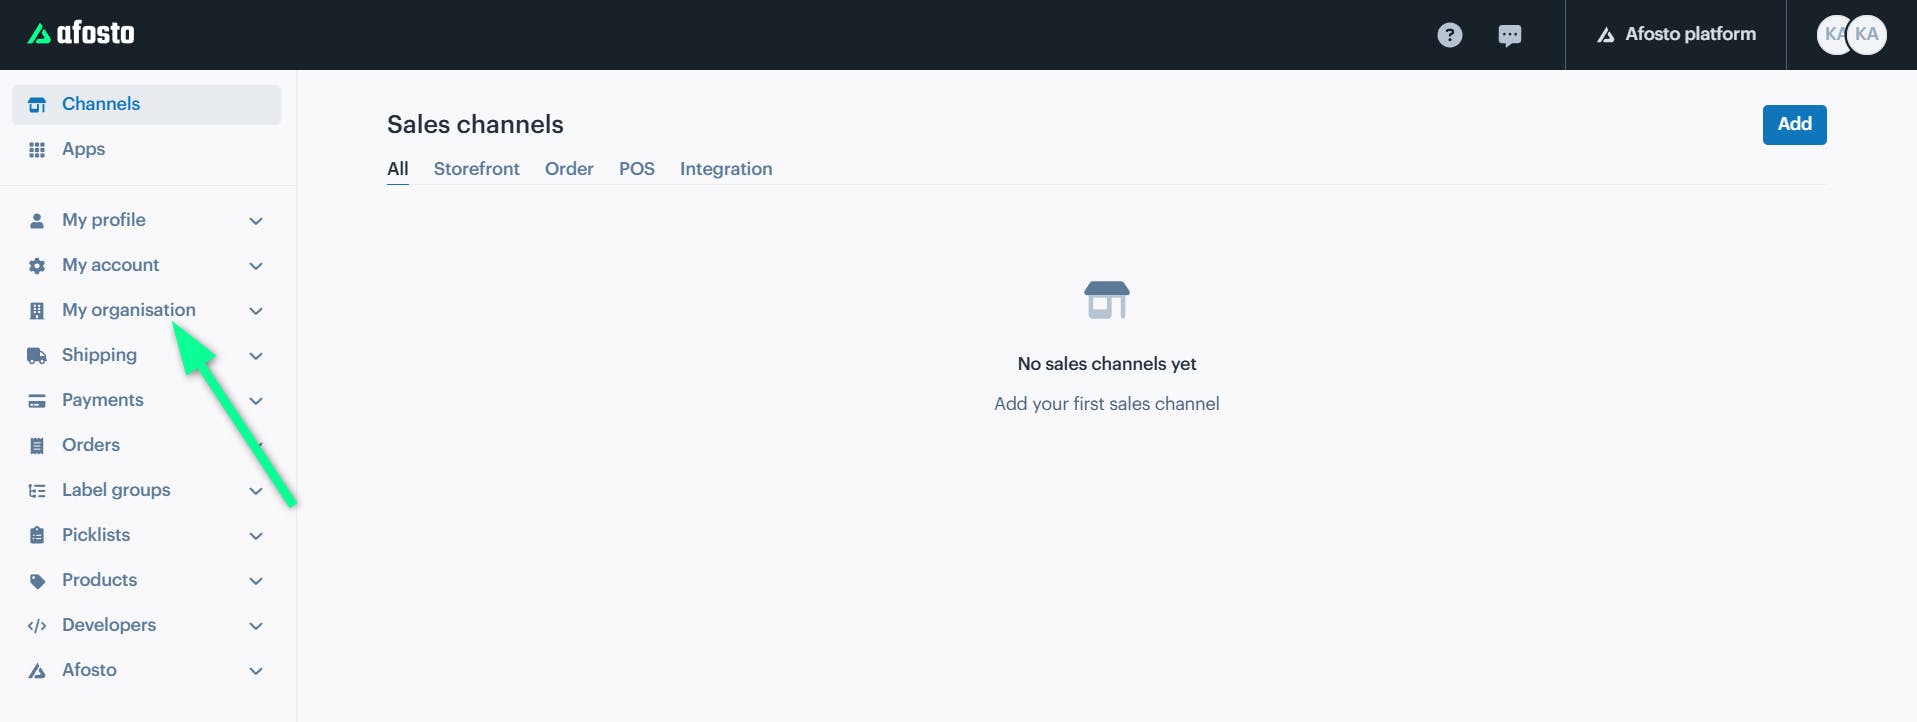
A new screen will open, select "My Organization" from the left-side panel of the screen to access and manage your organization.
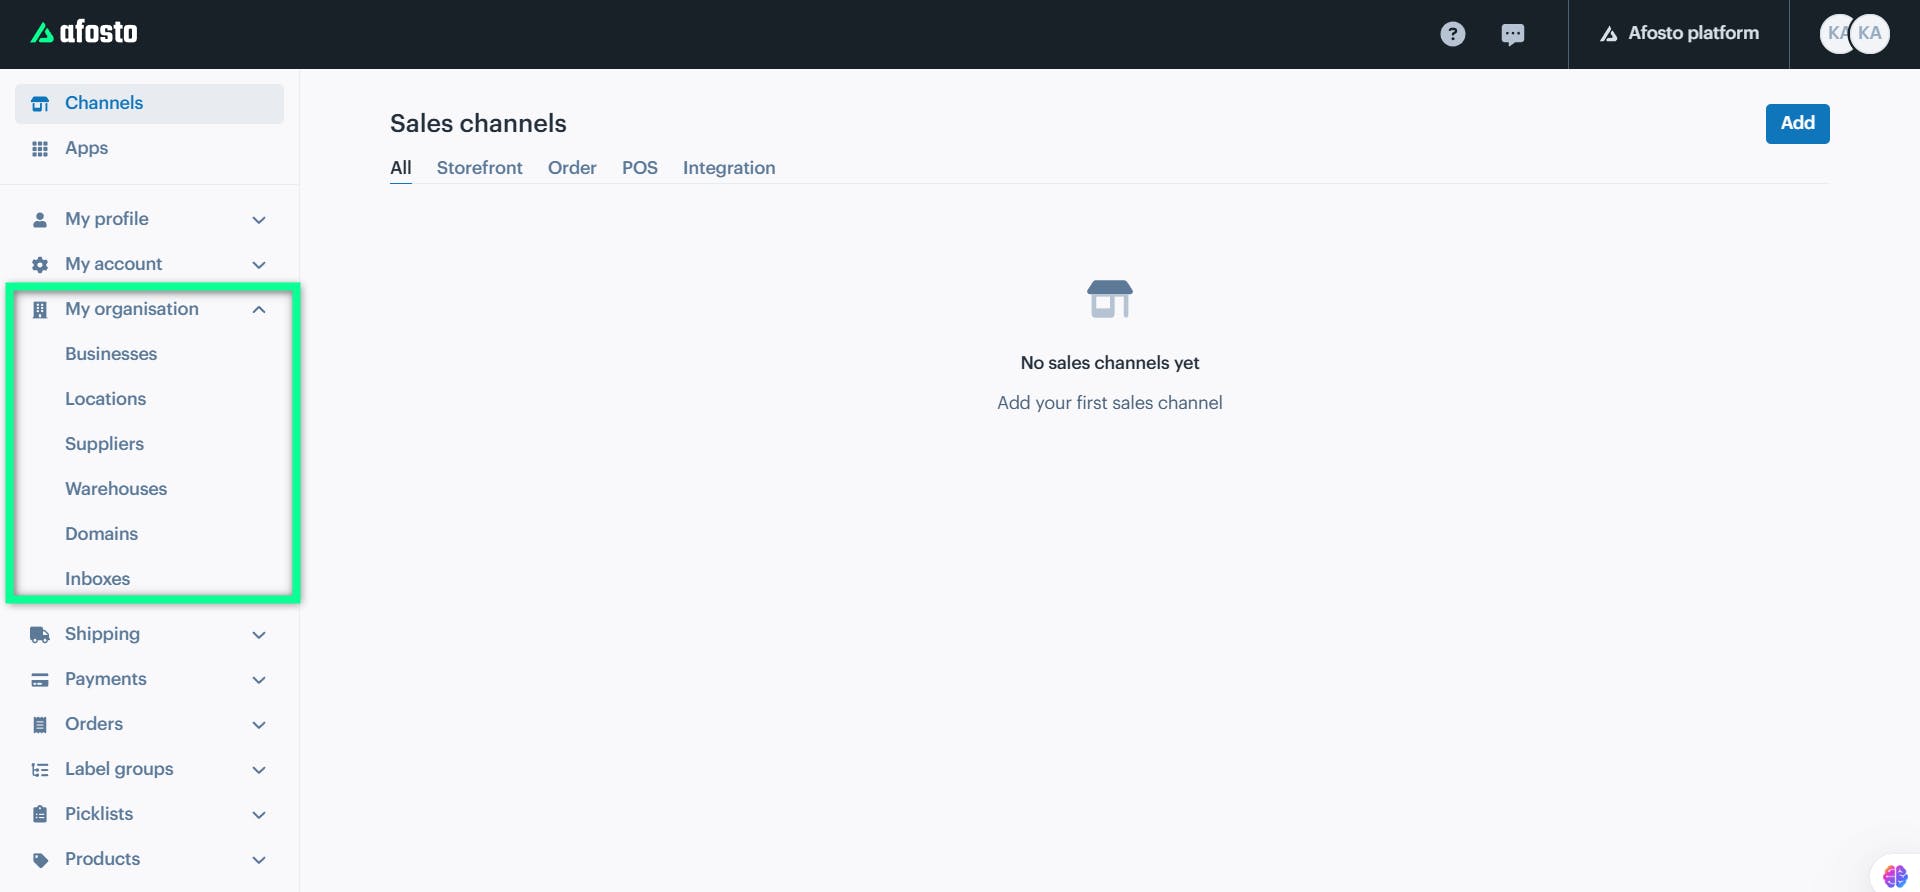
After clicking the My Organization module, you will view the following sub-modules:
-
Businesses
-
Locations
-
Suppliers
-
Warehouses
-
Domains
-
Inboxes
Let’s explore each section in detail to understand their functionalities.
Businesses
The Businesses section answers the question “Who sells it?”. A business is a selling entity, such as your online store or a physical shop. You need to create a business for each selling party. For example, if you have both an online store and a physical store, they would be two separate businesses.
Why do I need this? You need to add businesses first because they form the base for adding locations and warehouses. Without a business, you cannot add locations or warehouses.
Click the “Businesses” module from the left sidebar of the Afosto screen.
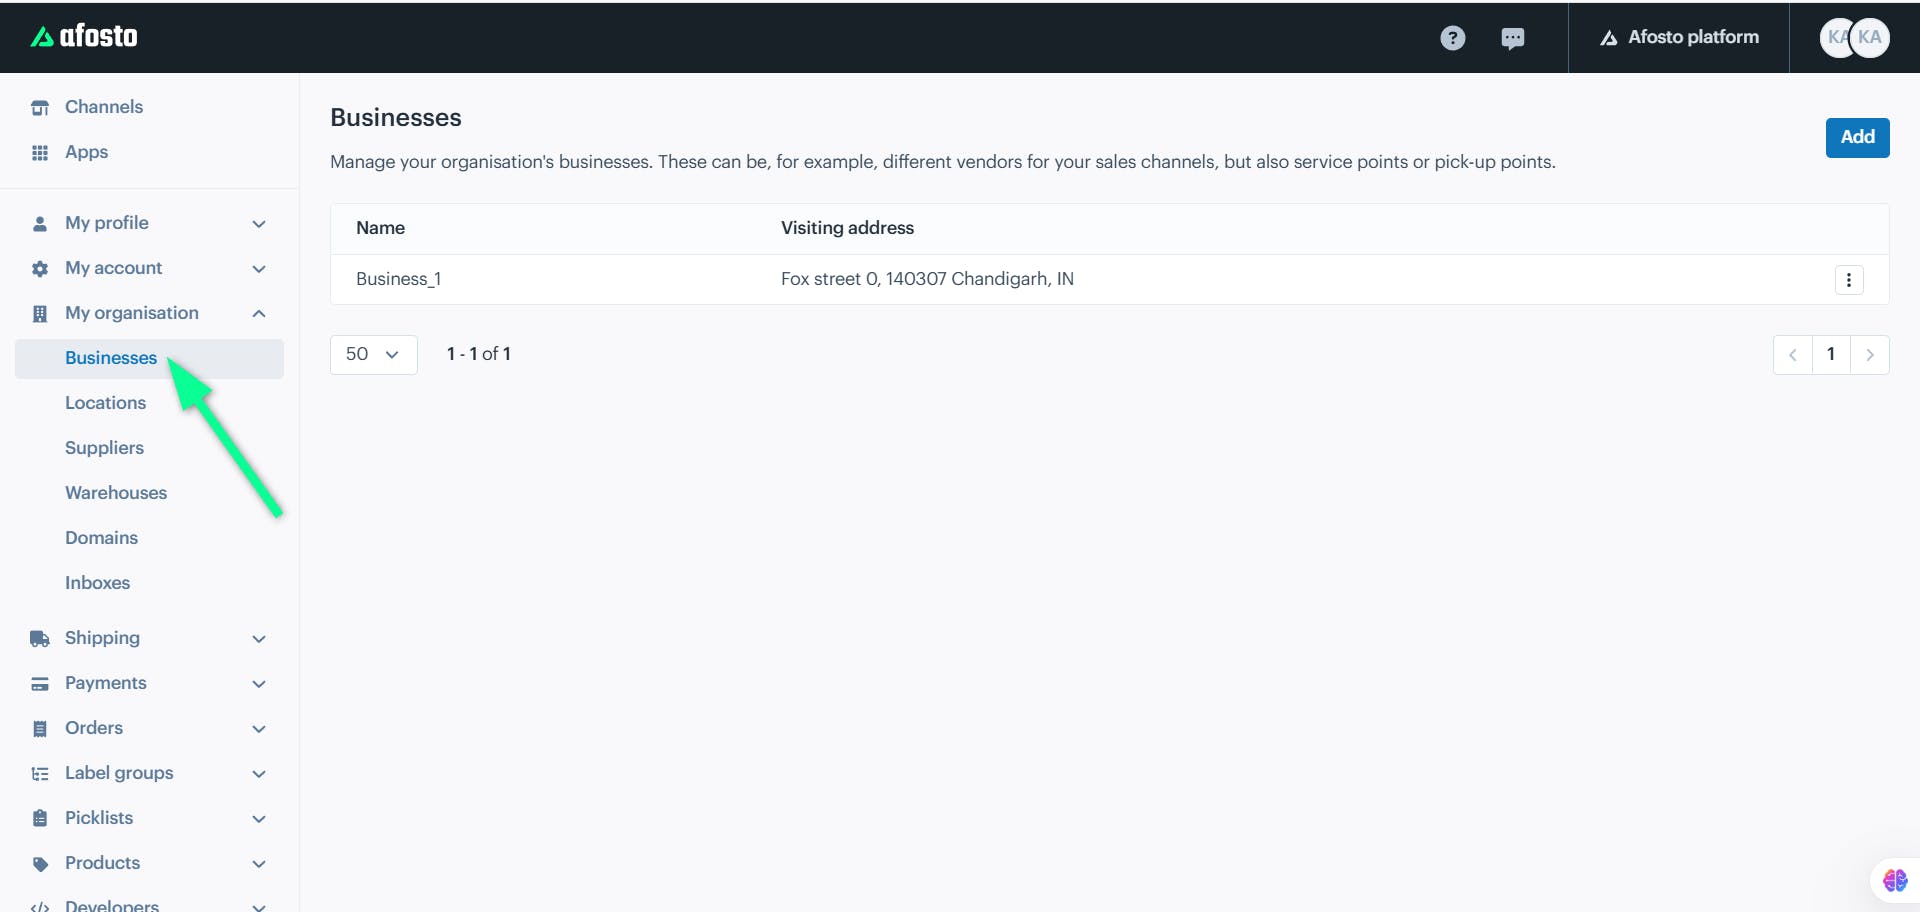
Click the "Add" button in the top-right corner of the screen.
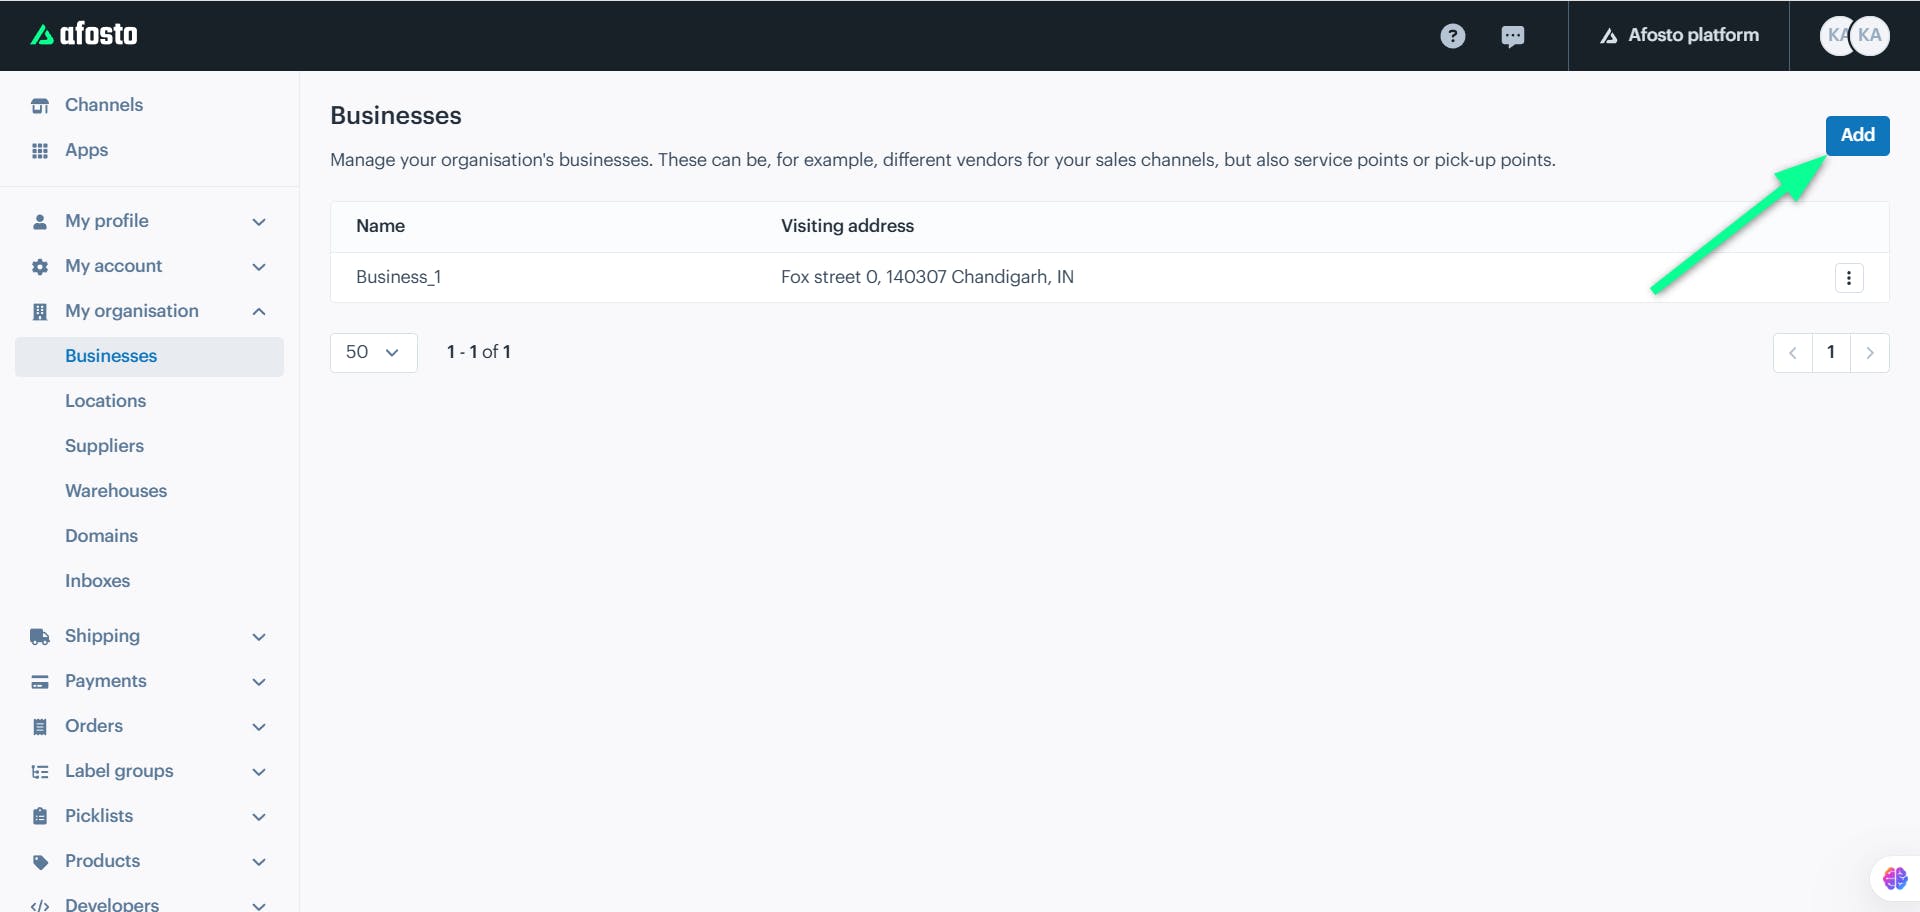
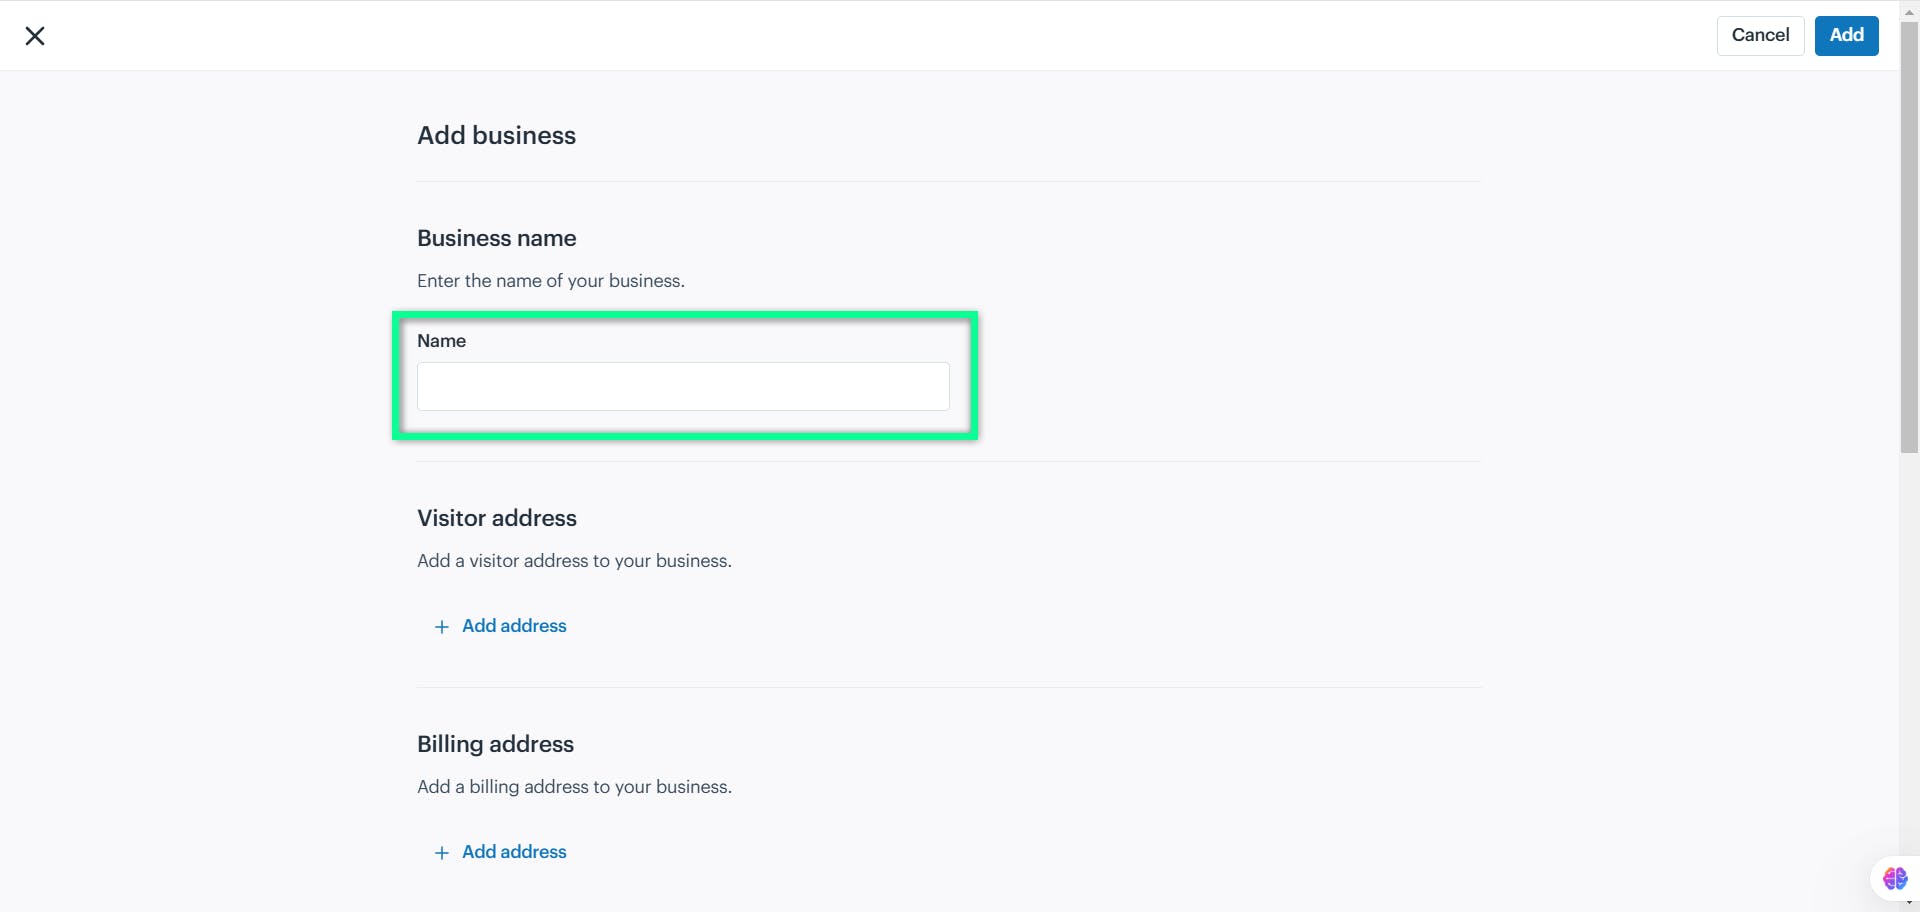
A new screen opens, enabling you to input details for adding a business. It includes fields for:
-
Business Name
-
Visitor Address
-
Billing Address
-
VAT Numbers
-
Phone Number
-
Opening Hours
Below is a detailed overview of the fields and corresponding actions for the business section:
Business Name
Enter your business name in the text field to serve as its identifier.
Visitor Address
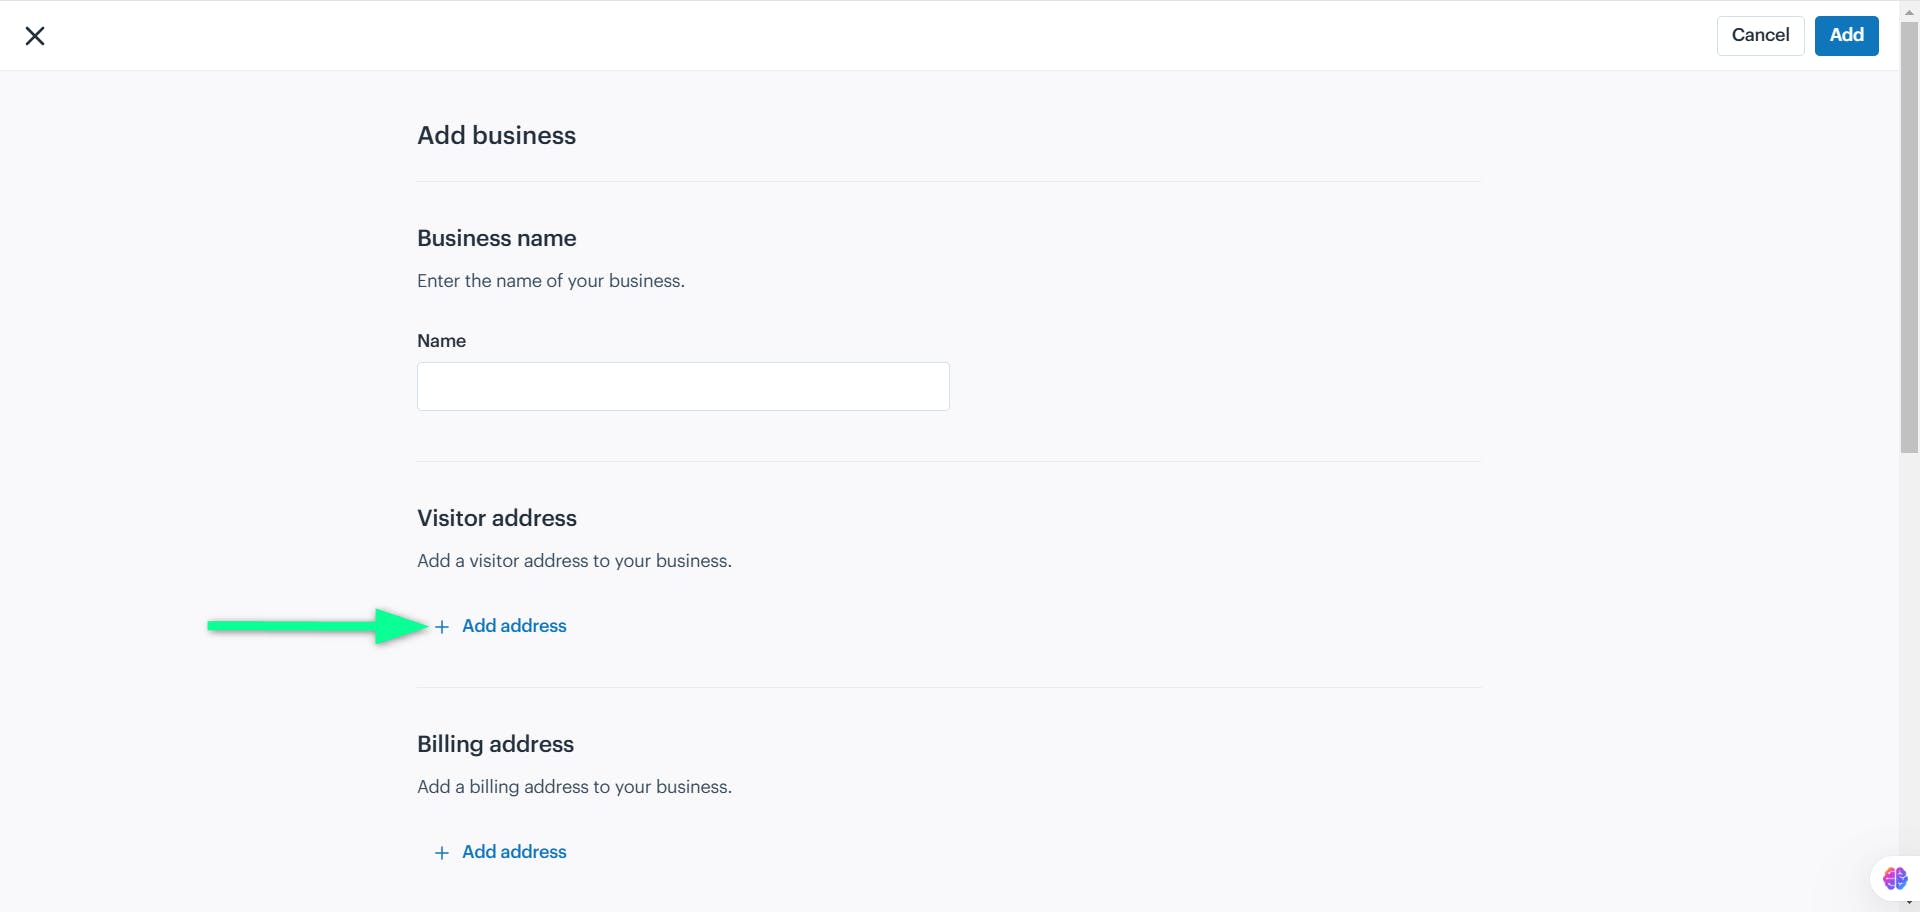
The Visitor Address is the location where customers or visitors can reach your business. It includes details like street, city, postal code, and country.
Click the "+ Add Address" action button to enter the visitor address for your business.
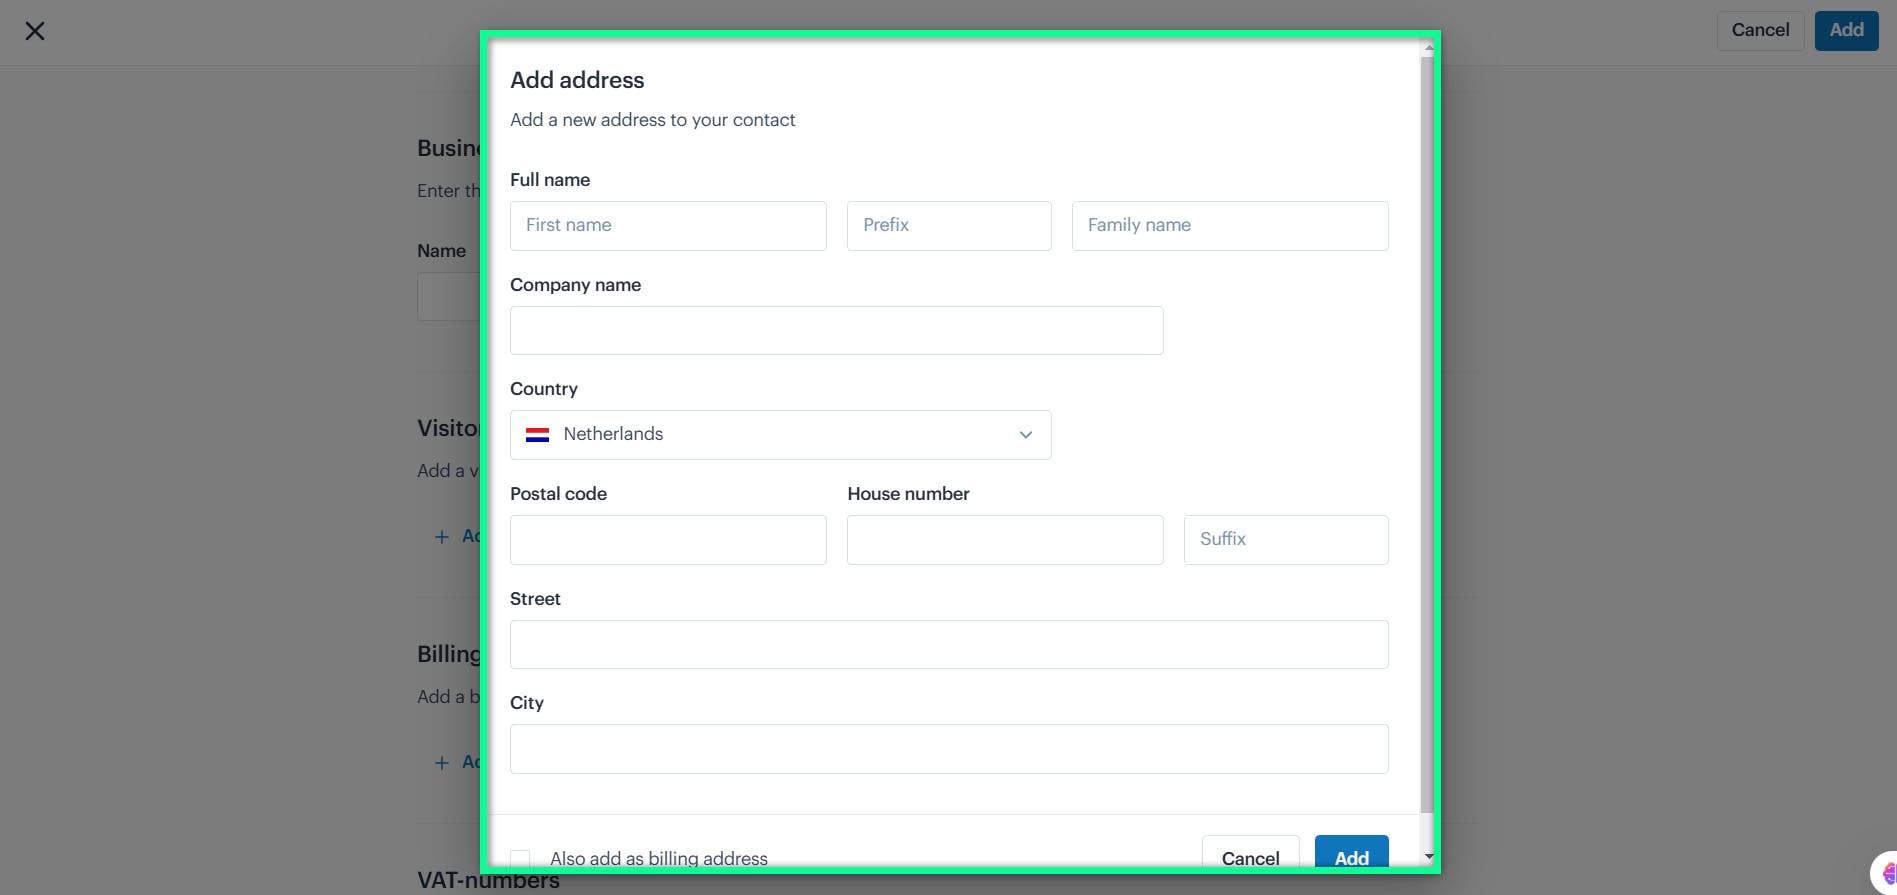
The Add Address window appears, allowing you to enter detailed business address information.
| Field | Description |
|---|---|
| Full Name | Enter the first name, optional prefix, and family name of the contact person. |
| Company Name | Provide the name of the associated company, if applicable. |
| Country | Select the country from the dropdown menu. |
| Postal Code | Input the postal code of the address. |
| House Number & Suffix | Enter the house number and optional suffix for the address. |
| Street | Provide the street name where the business is located. |
| City | Enter the city name for the address. |
| Also Add as Billing Address | Check this box if you want the visitor address to also serve as the billing address. |
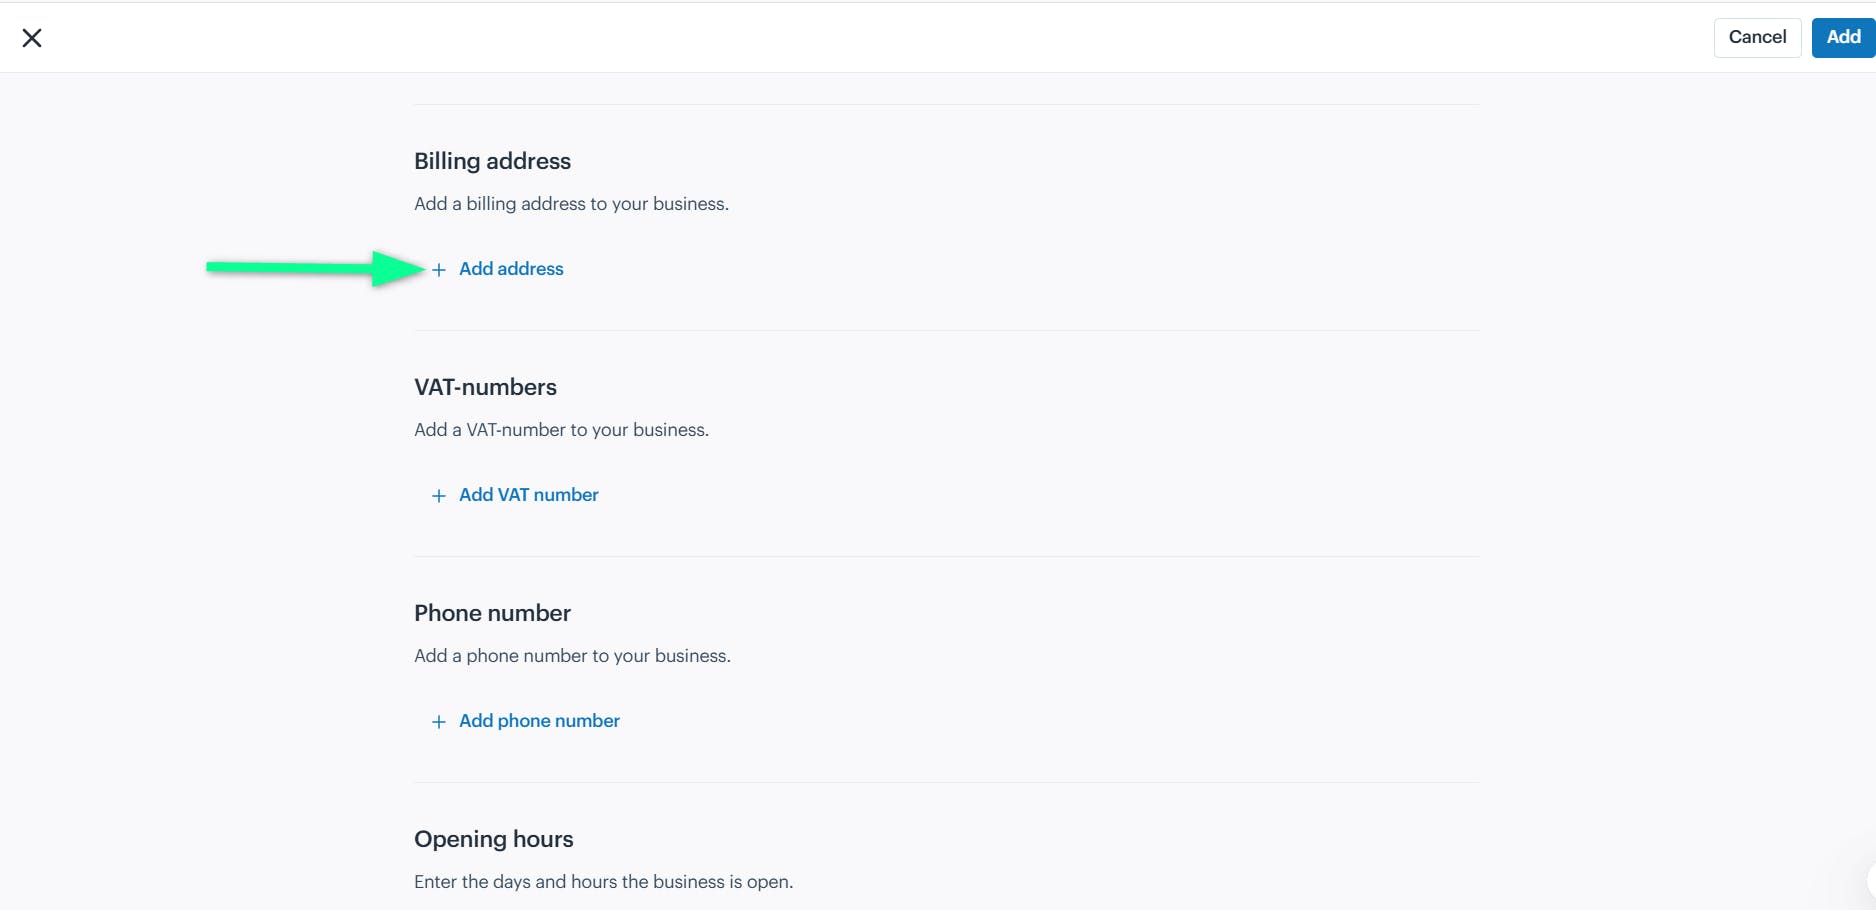
Billing Address
The Billing Address is used for invoicing and payment purposes, detailing the location associated with financial transactions.
Click the "+ Add address" action button to add the billing address.
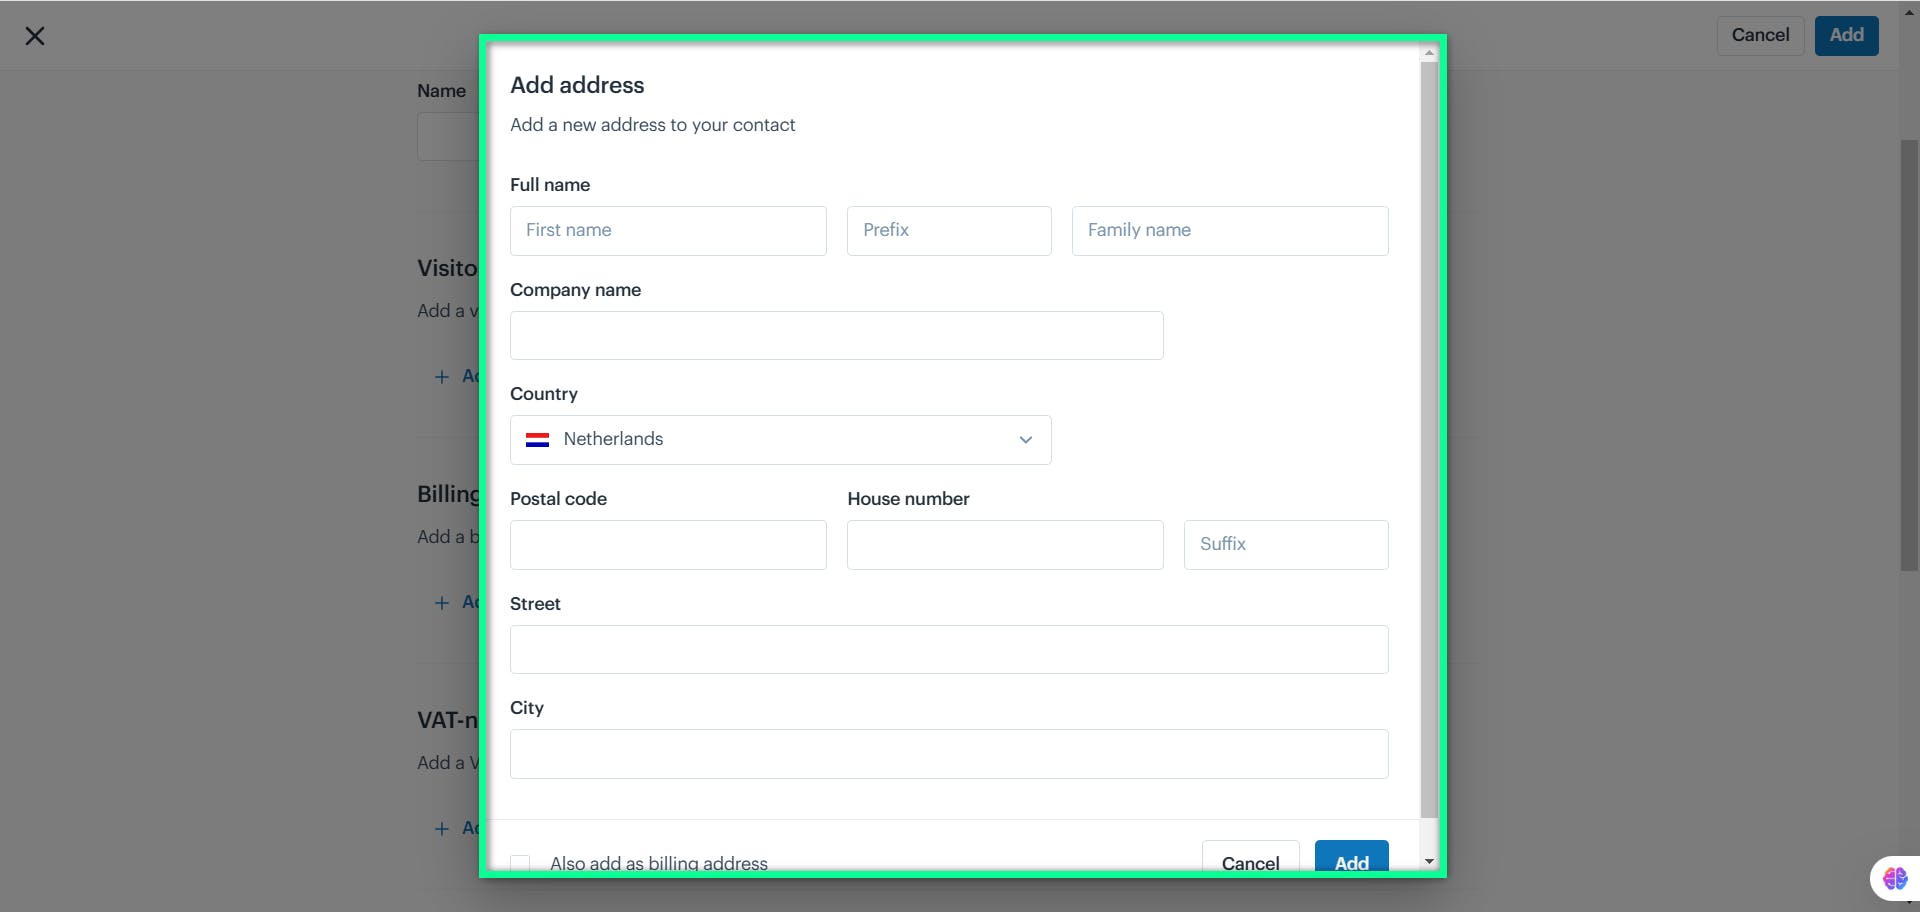
The Add Address window will open, displaying the following details:
| Field | Description |
|---|---|
| Full Name | Enter the first name, optional prefix, and family name of the contact person. |
| Company Name | Input the name of the company associated with the address, if applicable. |
| Country | Select the country from the dropdown list. |
| Postal Code | Enter the postal code for the address. |
| House Number & Suffix | Provide the house number and an optional suffix such as apartment or additional detail. |
| Street | Input the street name where the address is located. |
| City | Enter the city of the address. |
| Also Add as Visitor Address | Check this box to use this address as the visitor address. |
VAT Numbers
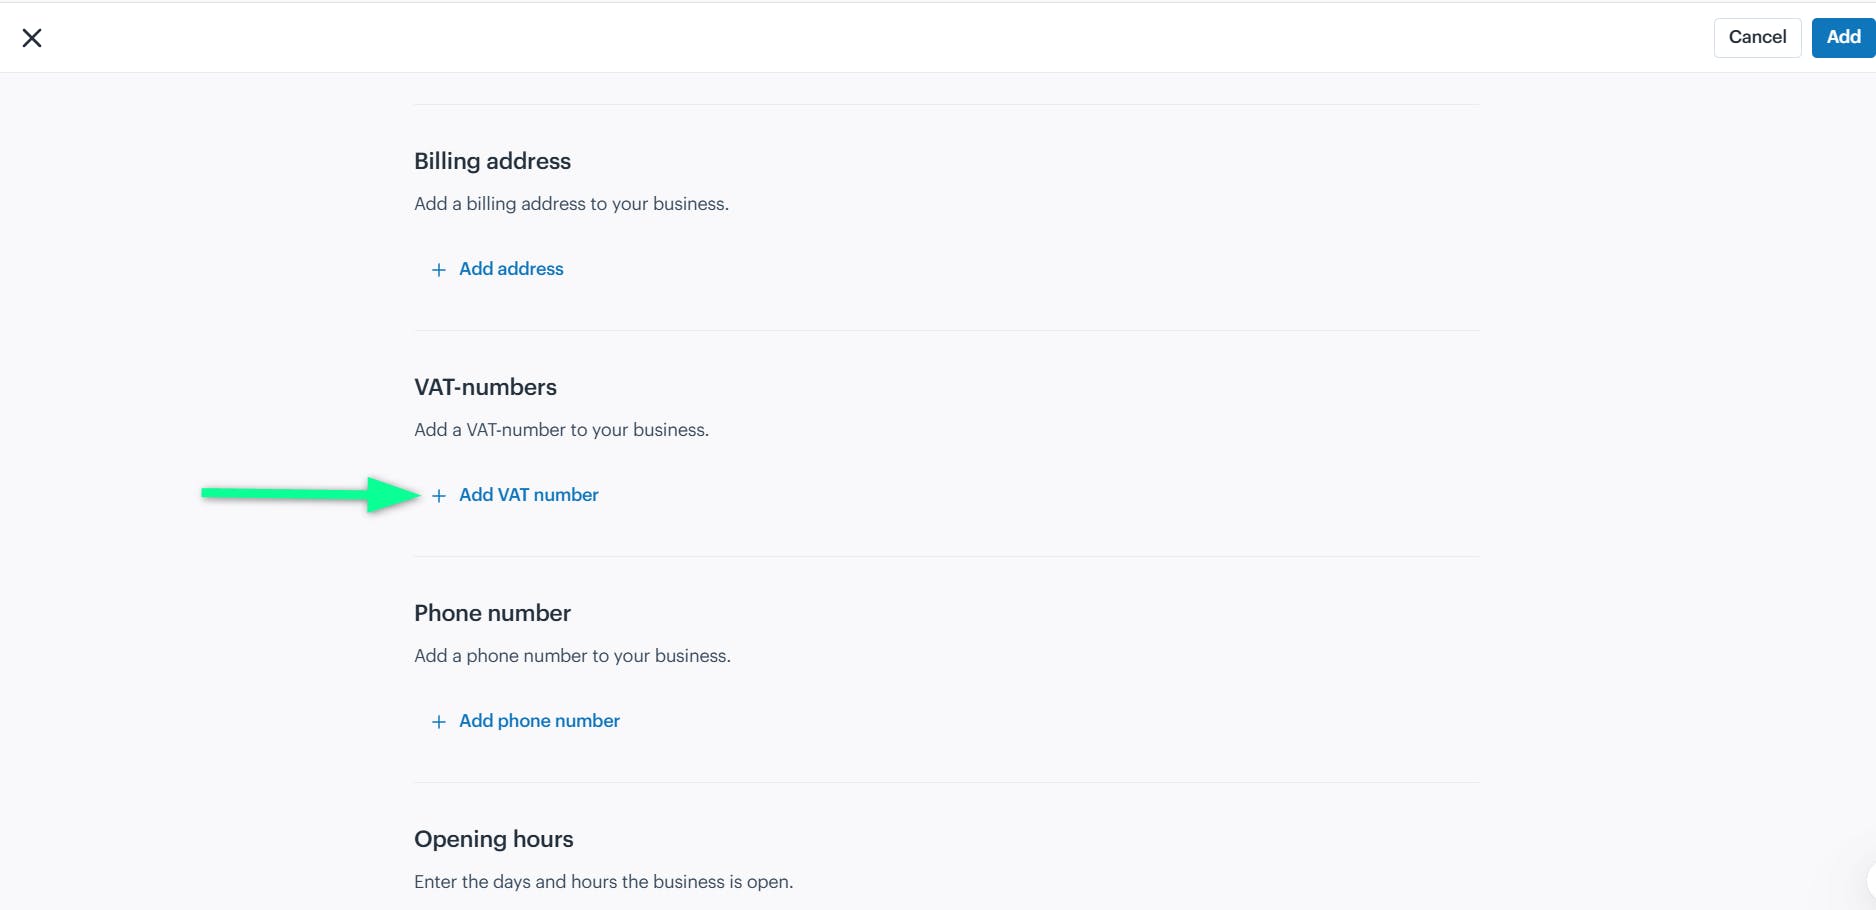
VAT Numbers are tax identification numbers used for processing tax-related transactions for businesses within specific regions. Click the " + Add VAT number" action button to enter the business's VAT ID details.
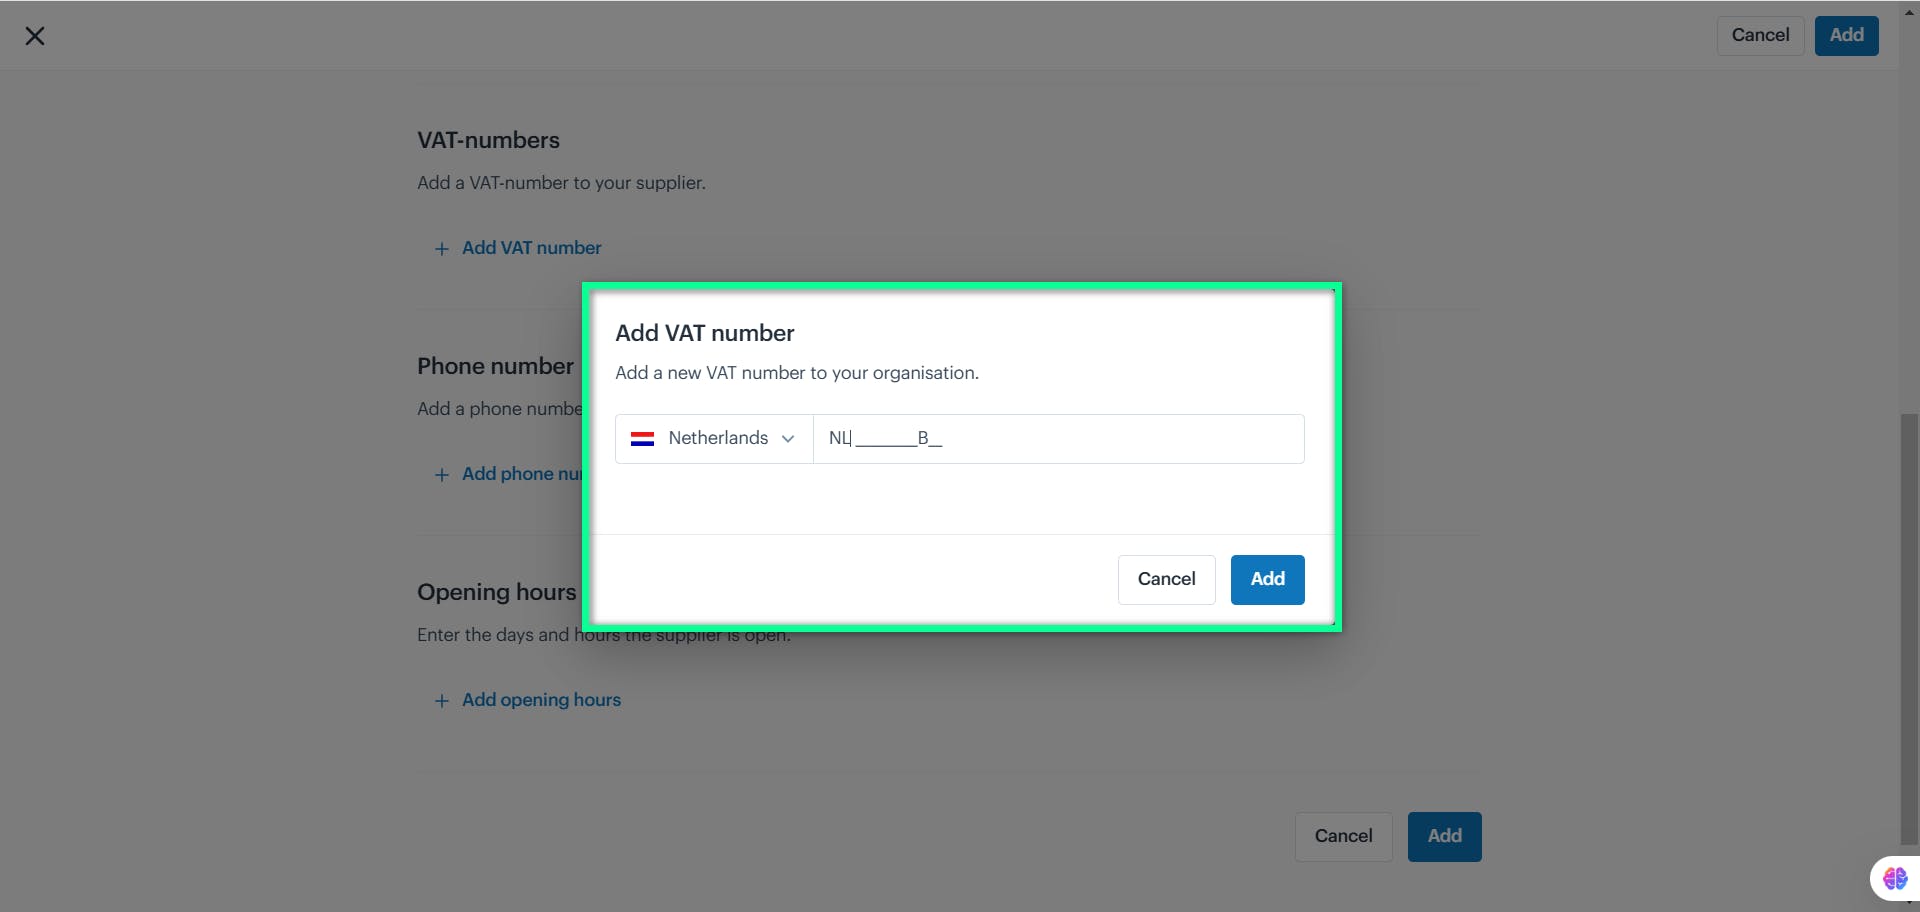
The Add VAT Number window opens, allowing you to select a country and enter the VAT number in the correct format.
Phone Number
The Phone Number is the contact number for the business, used for communication and support.
Click the "+ Add phone number" action button to enter an accurate contact number.
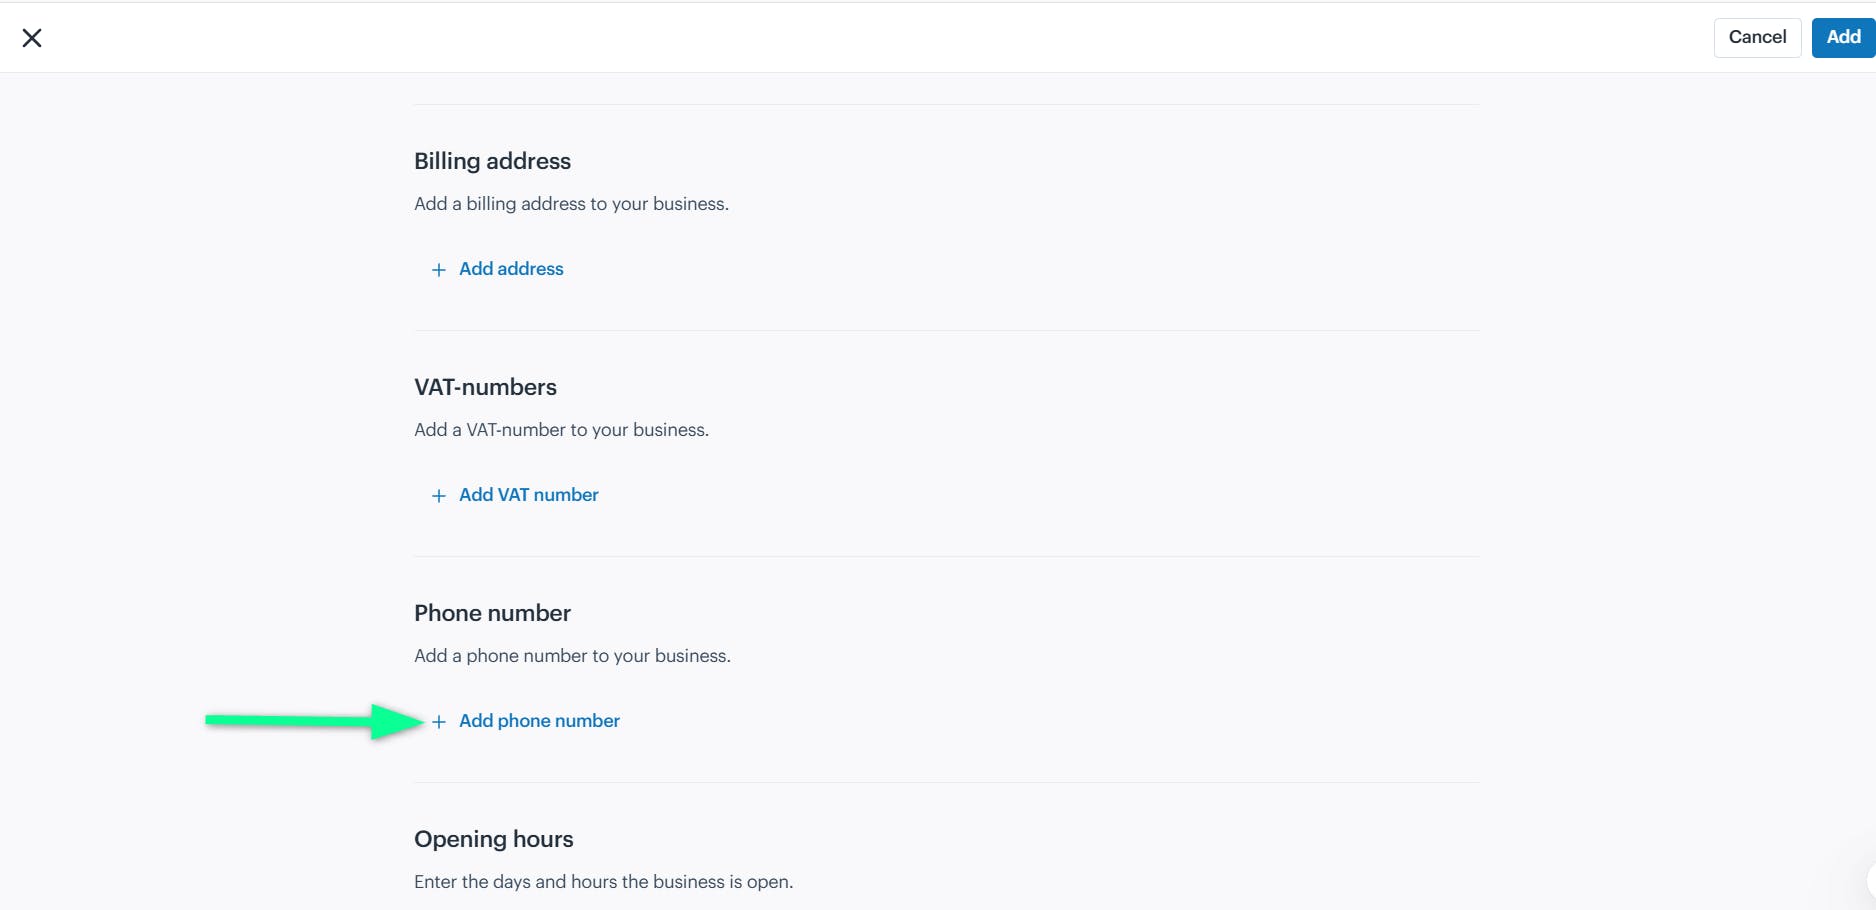
The Add Phone Number window will appear, allowing you to input a phone number.
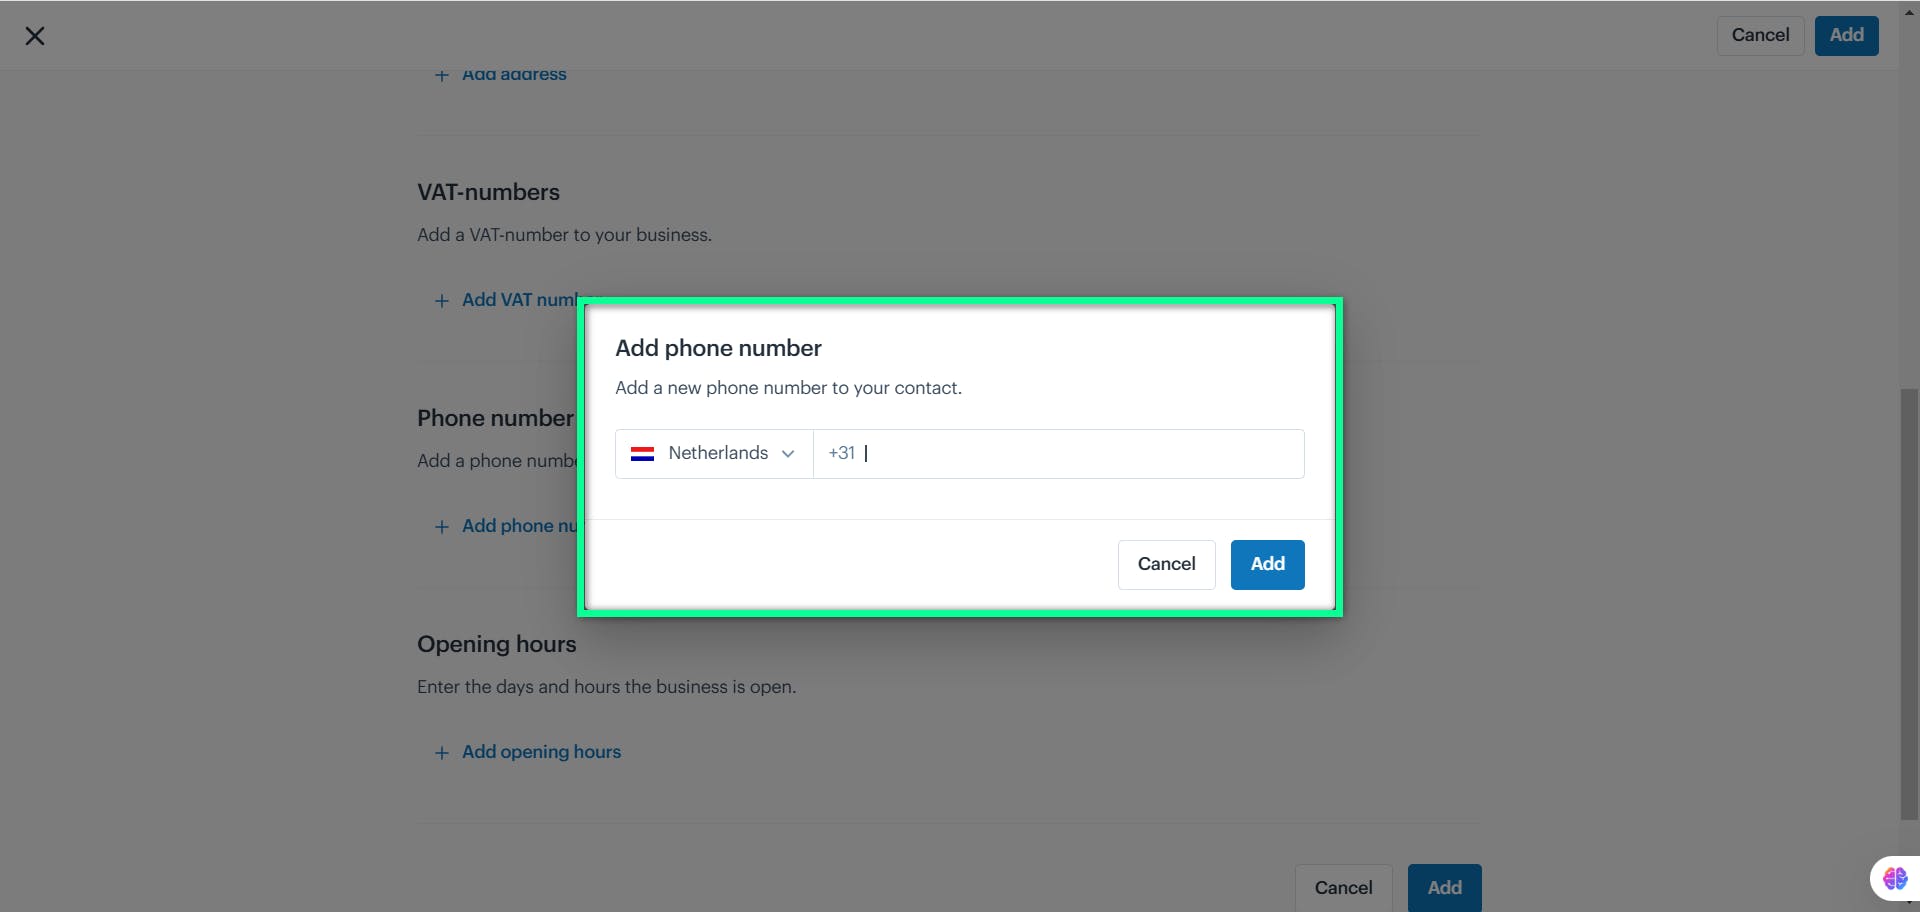
Opening Hours
Opening Hours specify the days and times when a business or location operates.
Click the "+ Add opening hours" action button to set the opening hours.
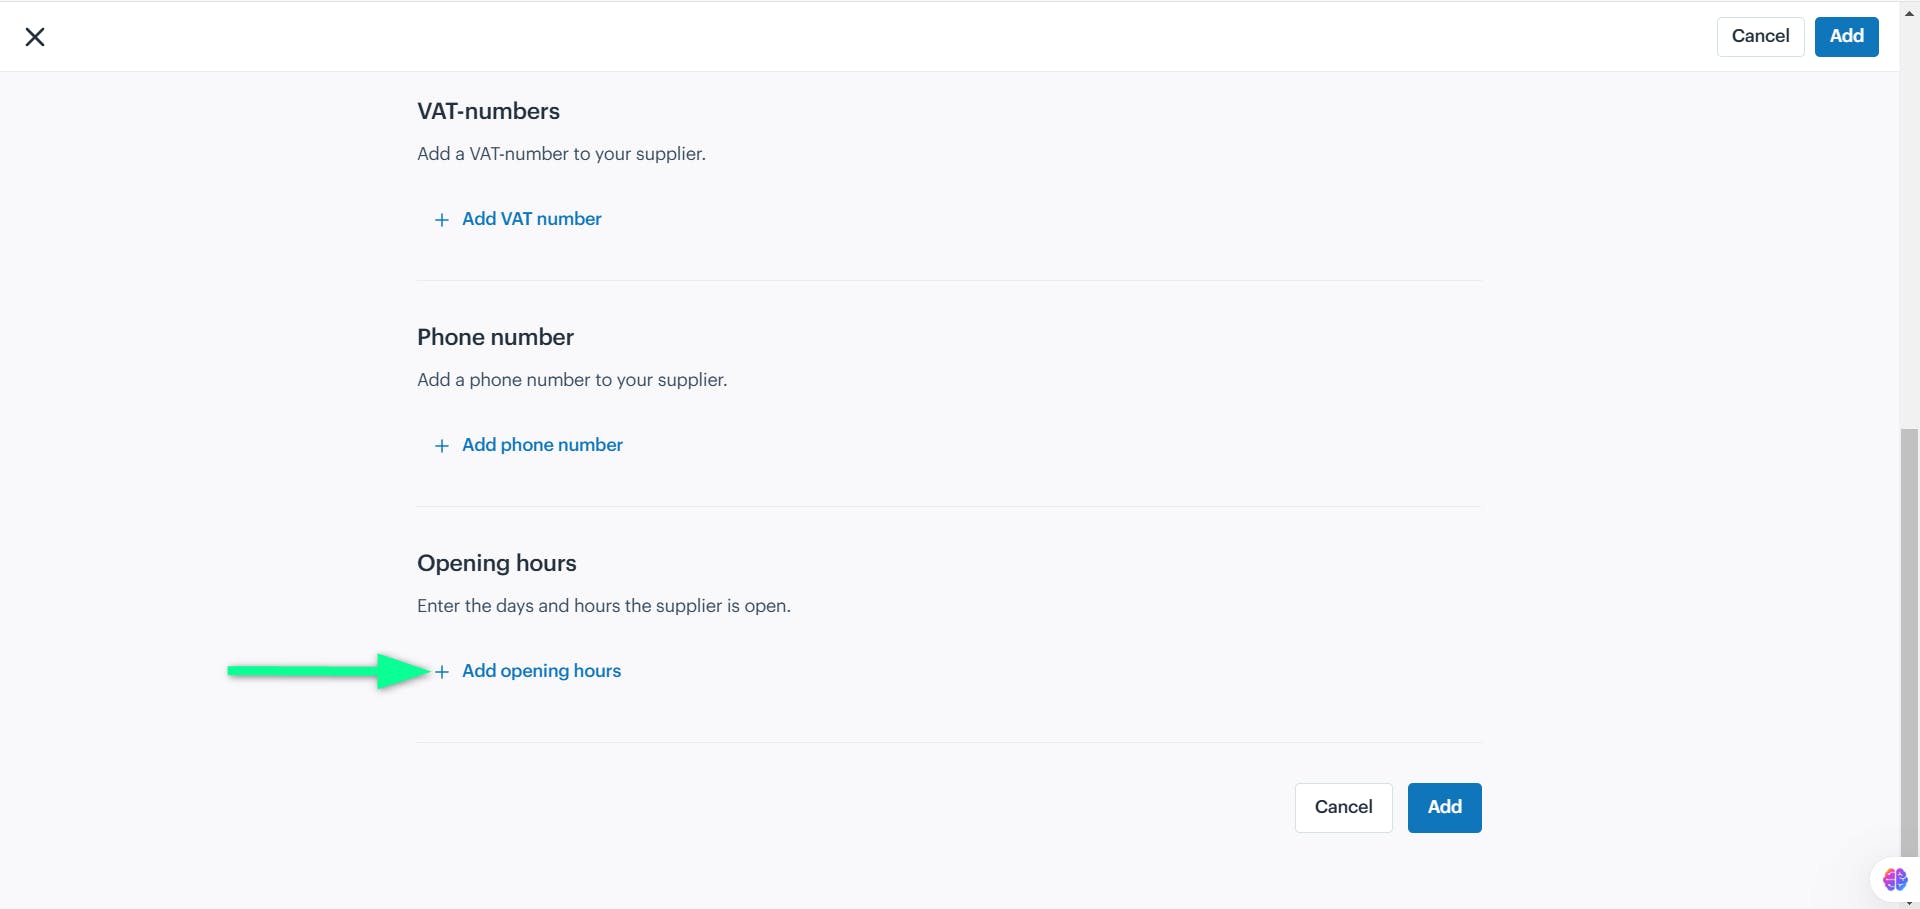
The Add Opening Hours window will open, letting you set the business's operating hours.
| Field | Description |
|---|---|
| On the Days | Select the operational days of the week by checking the corresponding boxes, e.g., Monday, Tuesday. |
| Open From | Specify the opening time using the dropdown menu for hours and minutes. |
| To | Specify the closing time using the dropdown menu for hours and minutes. |
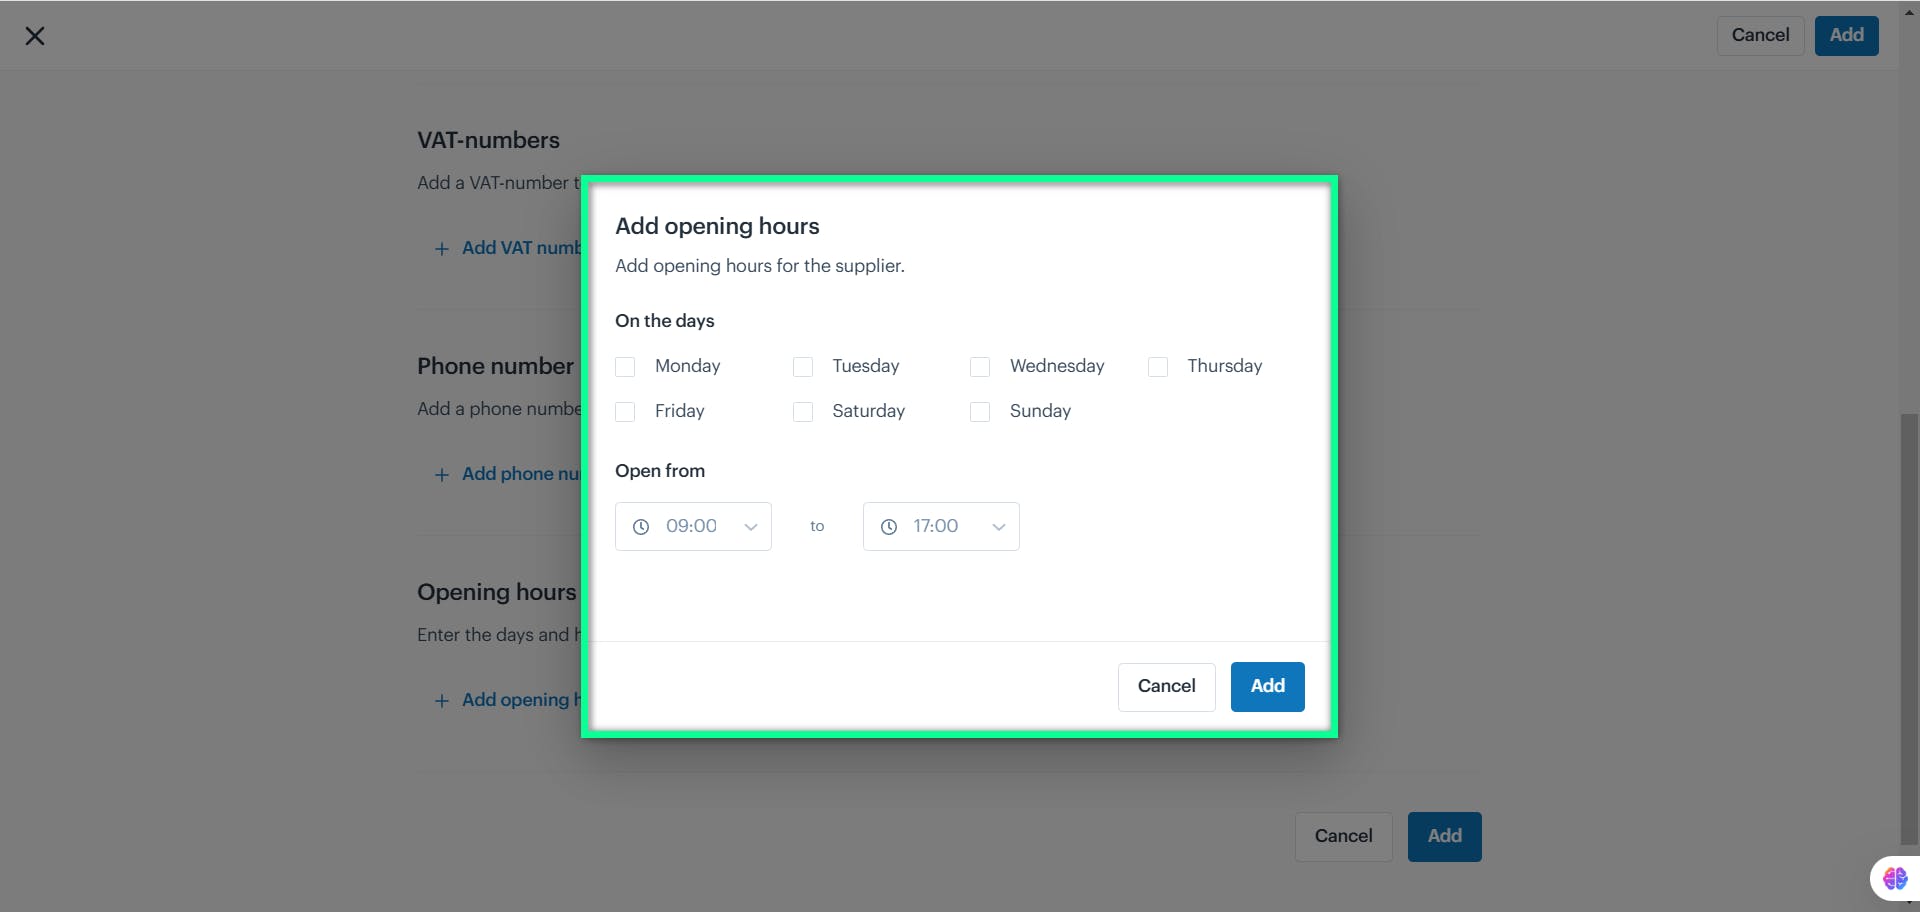
After completing the Add Business form, Click the “Add” button to save the entry that will appear on the Businesses screen.
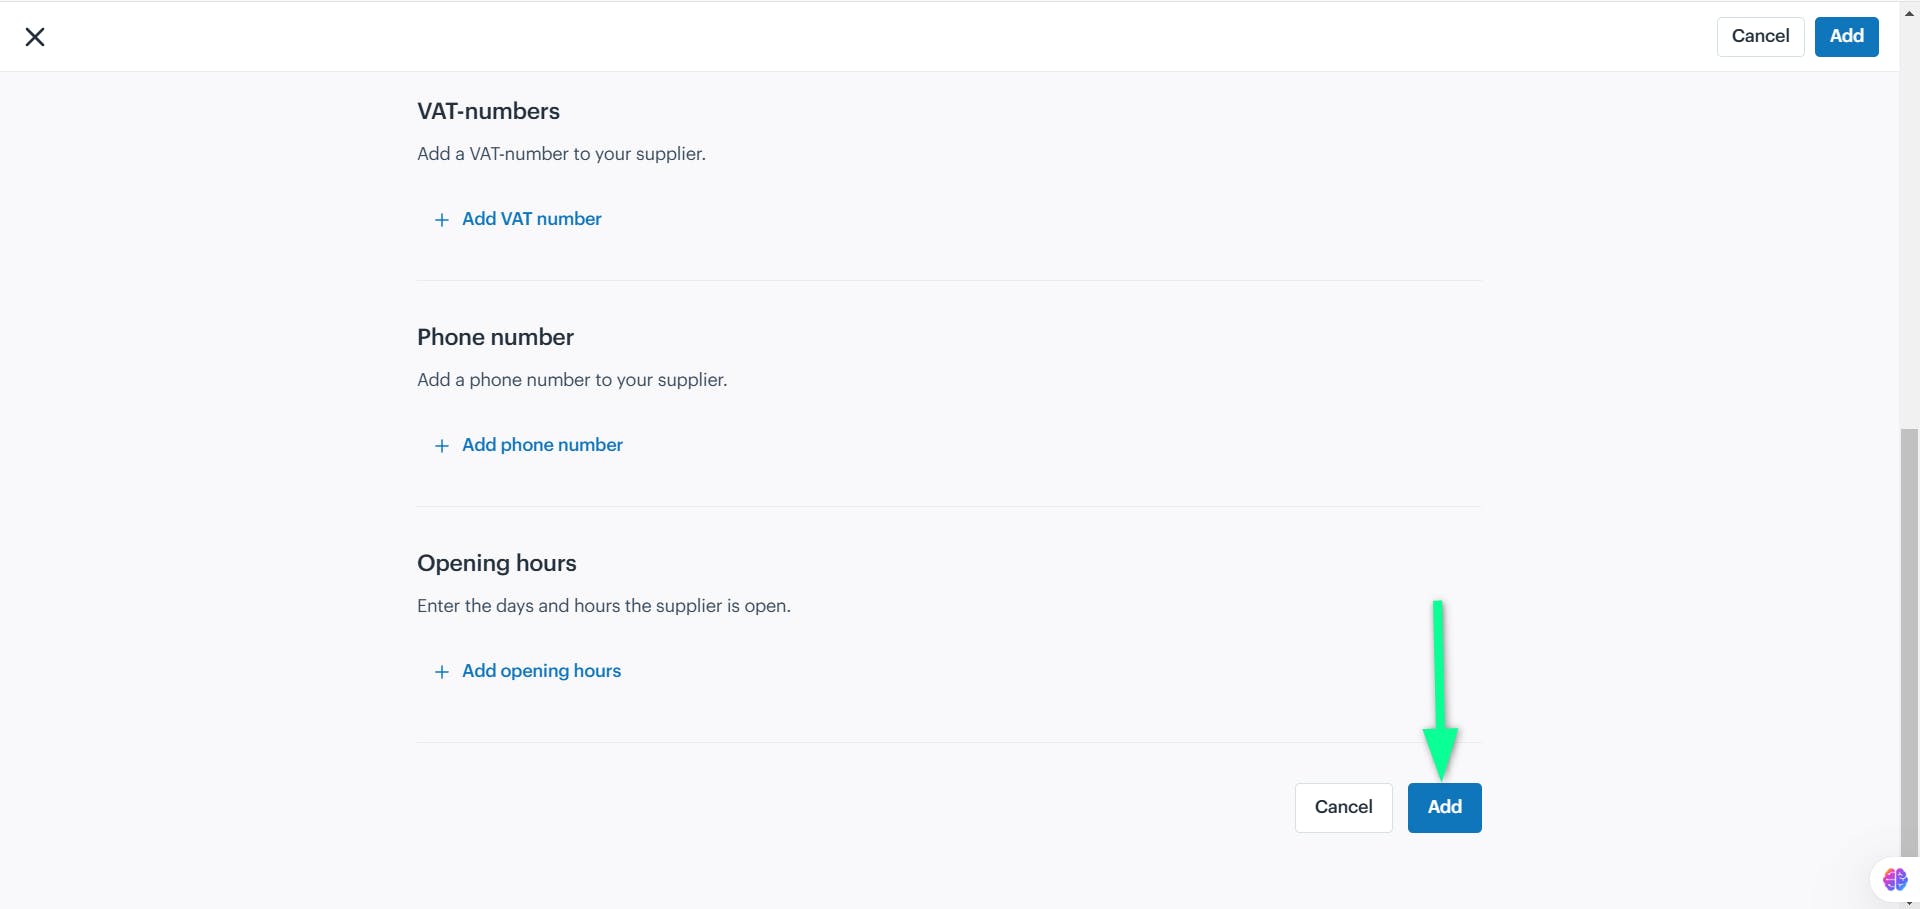
Business details will be added as a new entry on the Businesses page
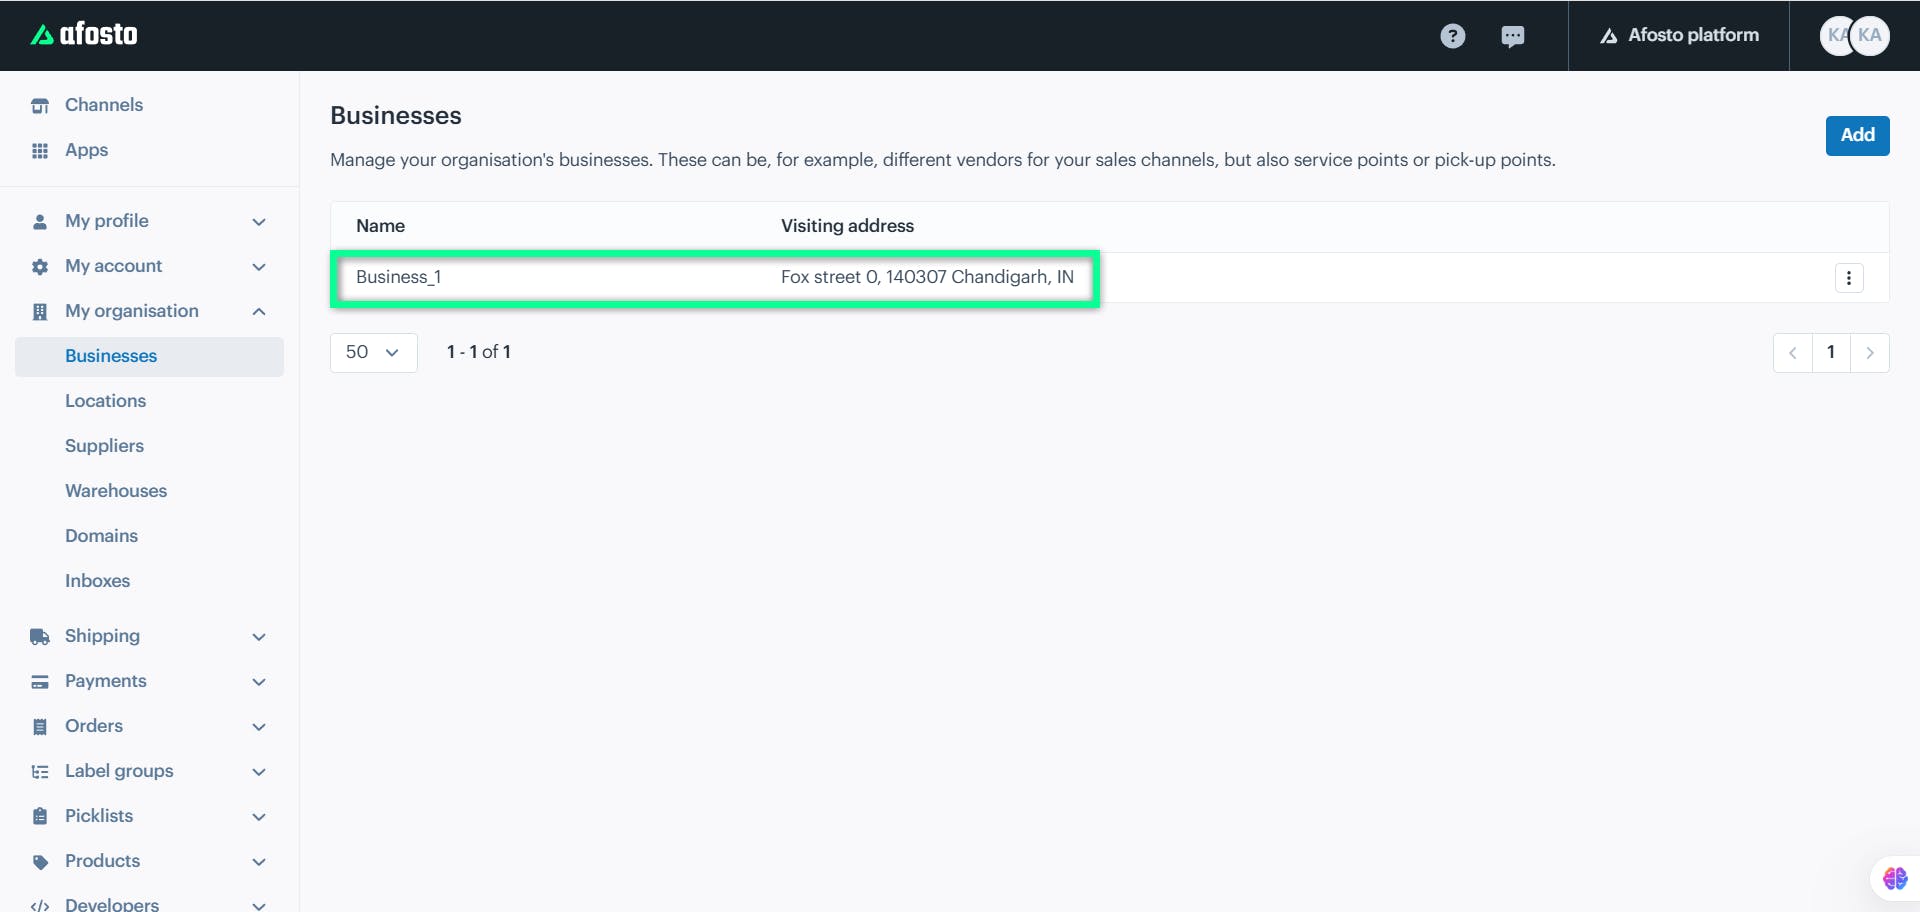
To delete a desired entry, click the ellipses icon (three dots) next to it and select the "Delete" option
Locations
The Locations section answers the question “Where is it located?”. A location represents the physical place where products are stored, shipped, or picked up. Every physical location your business operates from must be added to Afosto, and it will be linked to a business.
Why do I need this? Locations tell the system where your inventory is. If you want to add a warehouse, you must add a location first.
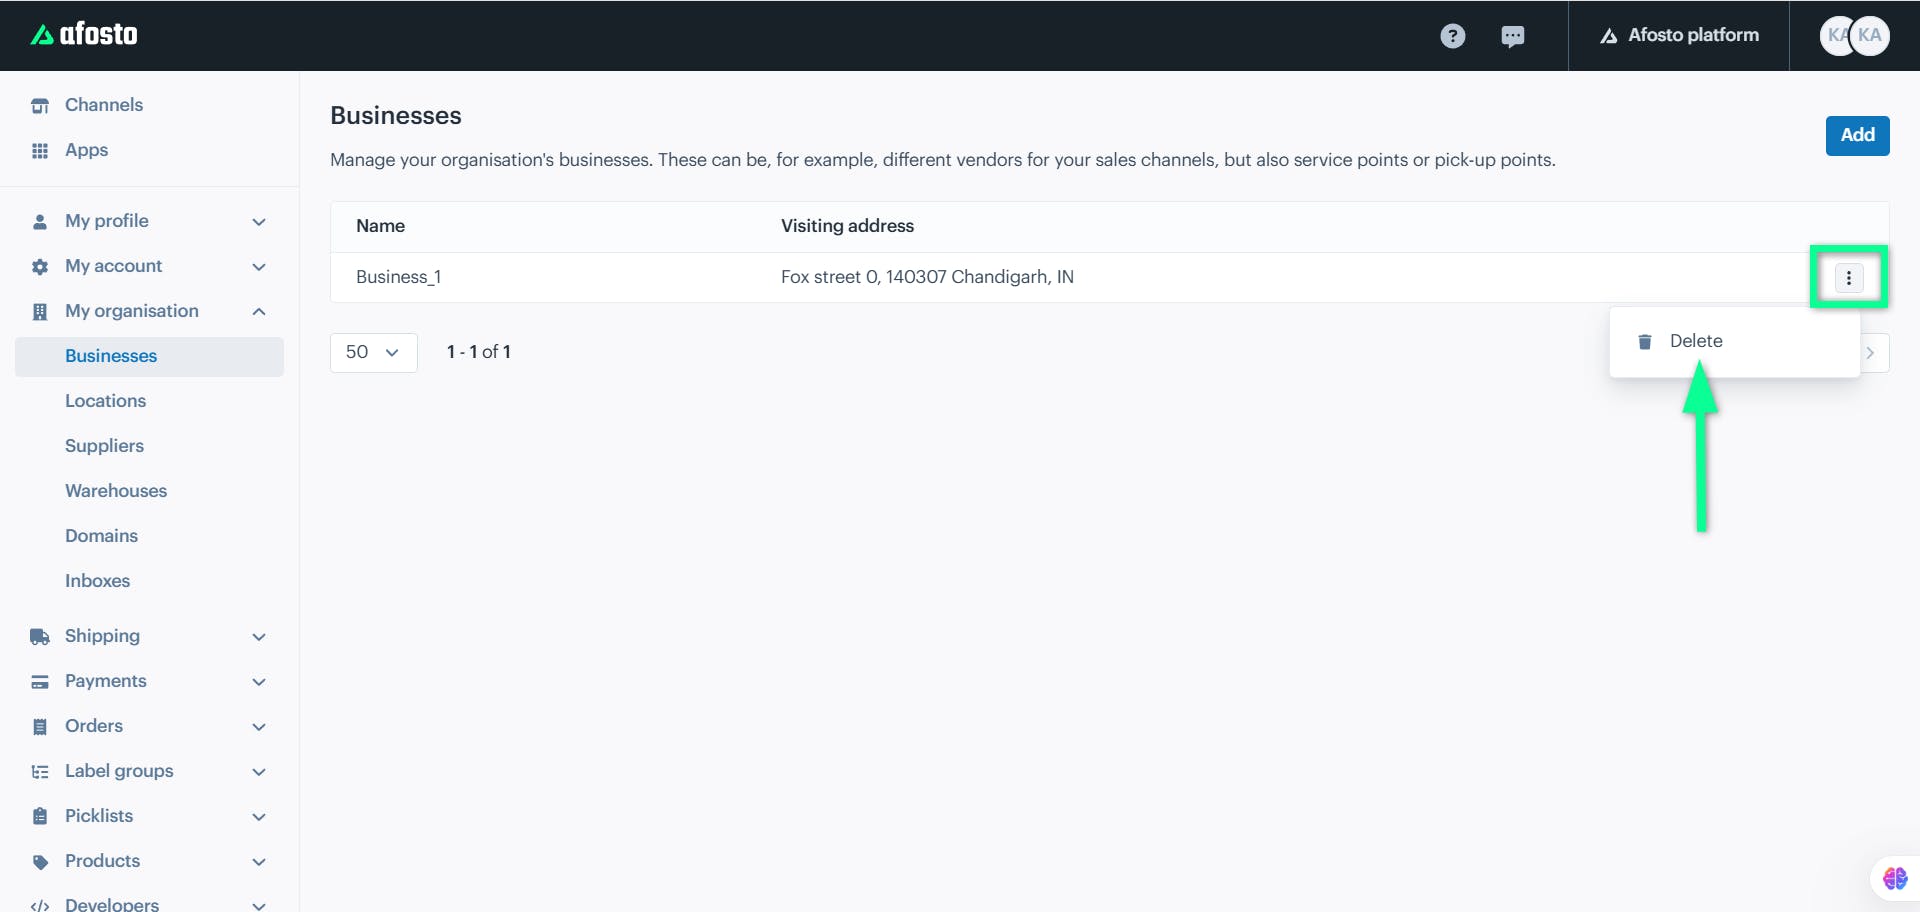
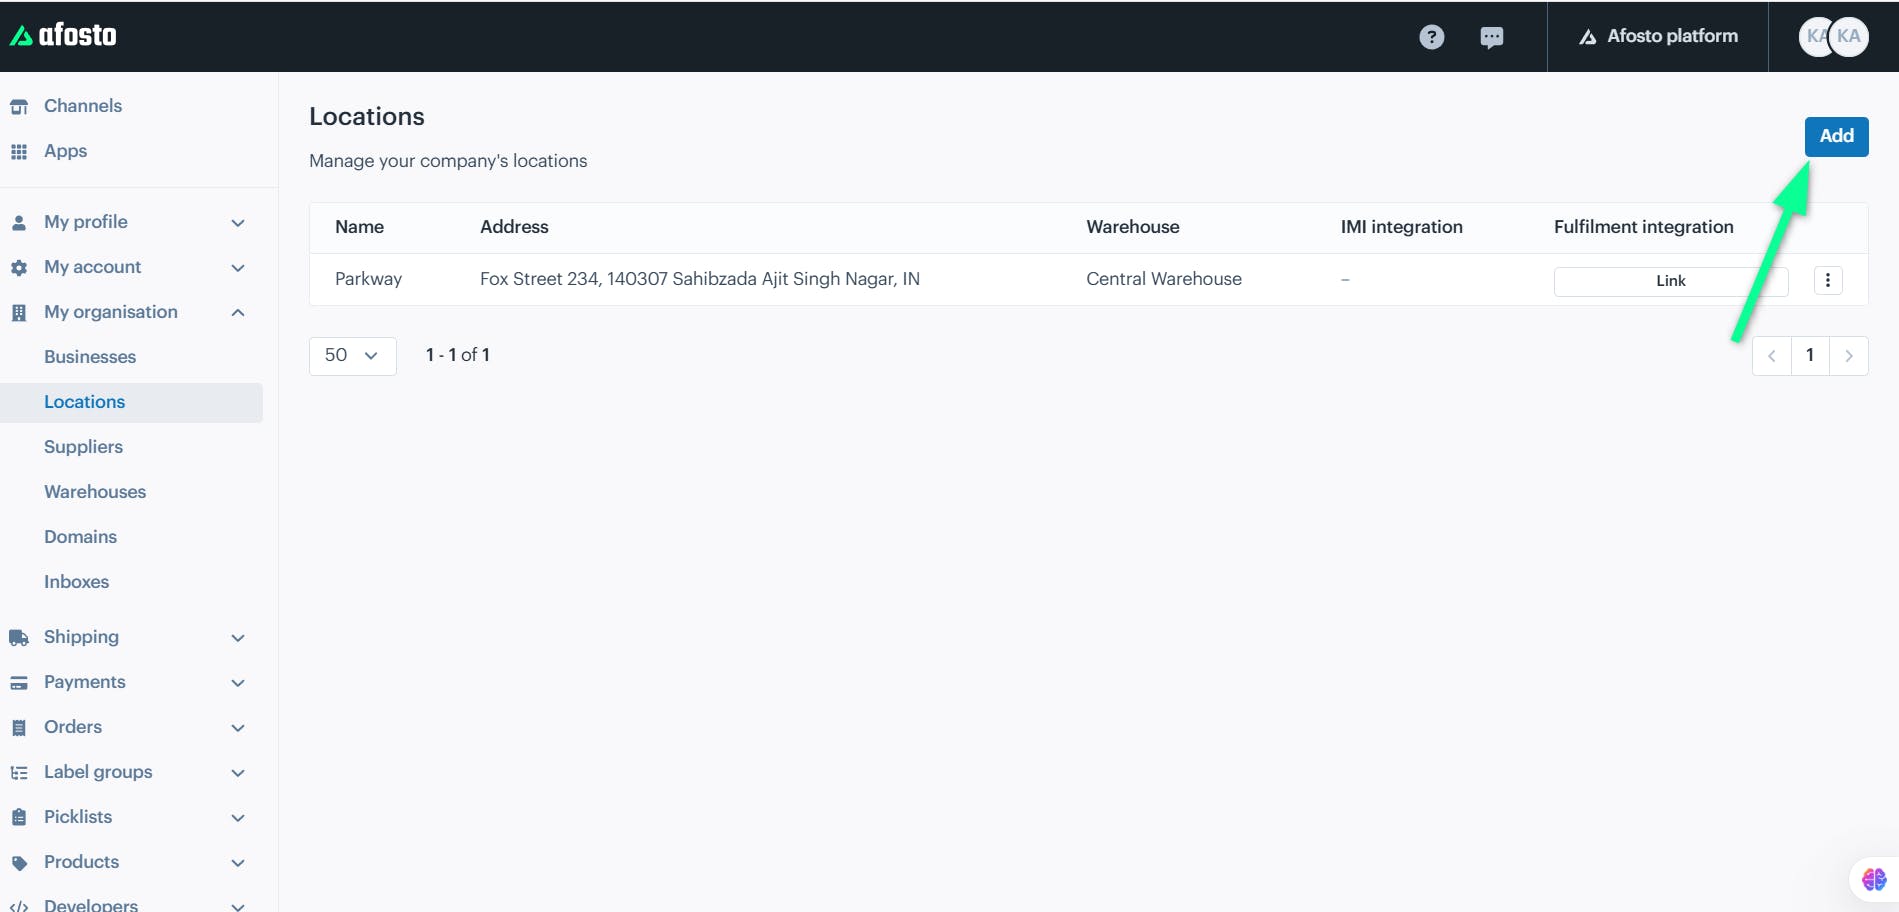
Click the “Locations” module from the left sidebar of the Afosto screen.
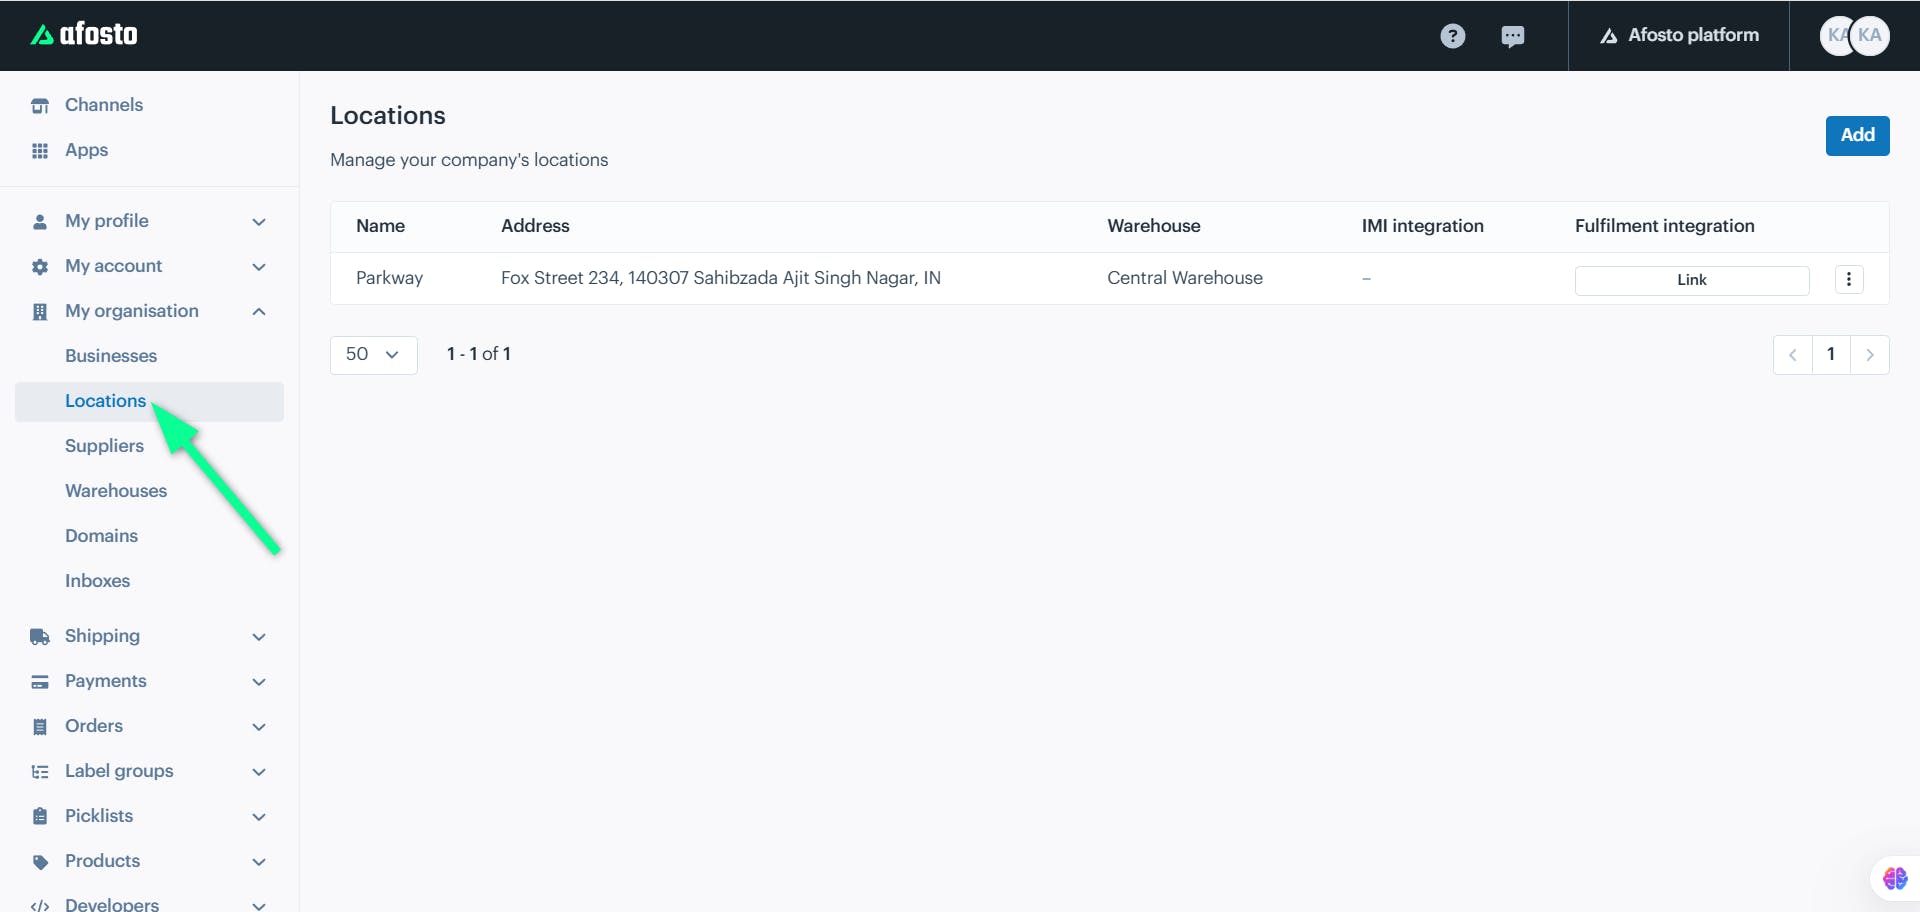
Click the "Add" button at the top-right corner of the window to add locations.
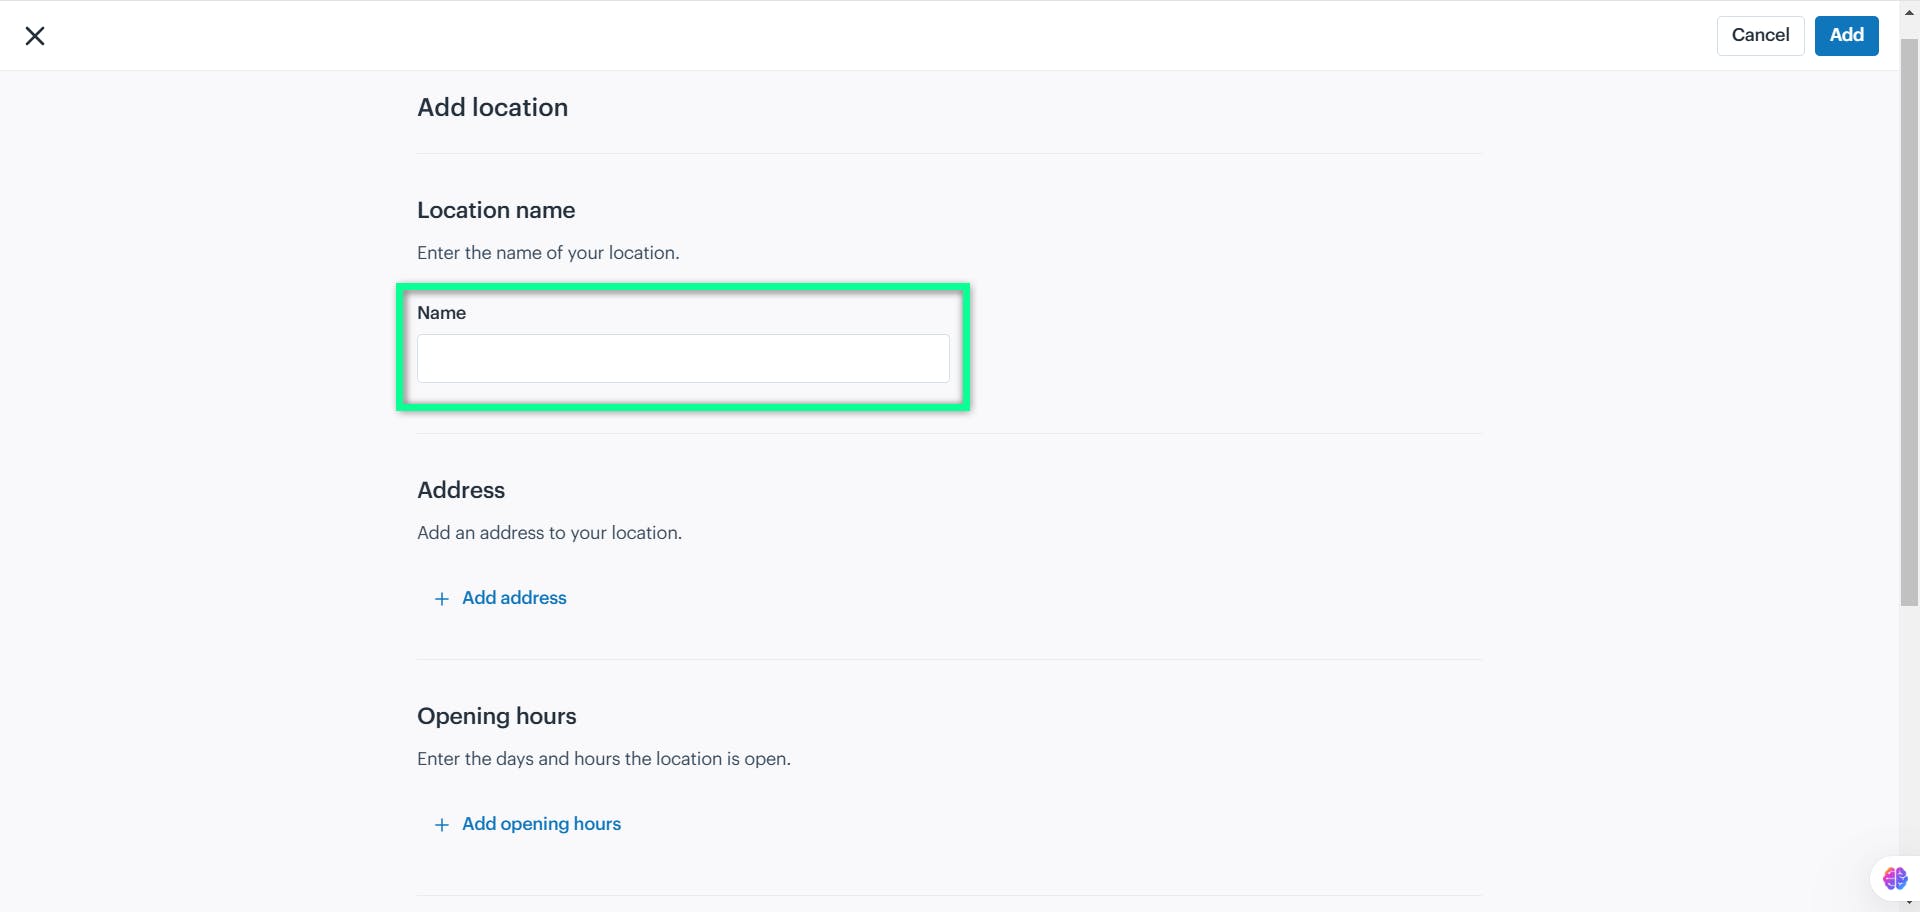
A new screen opens, enabling you to input details for adding a location. It includes fields for:
-
Location name
-
Address
-
Opening hours
-
Cut off times
Below is a detailed overview of the fields and corresponding actions for the business section:
Location name
Enter the location name in the location Name field.
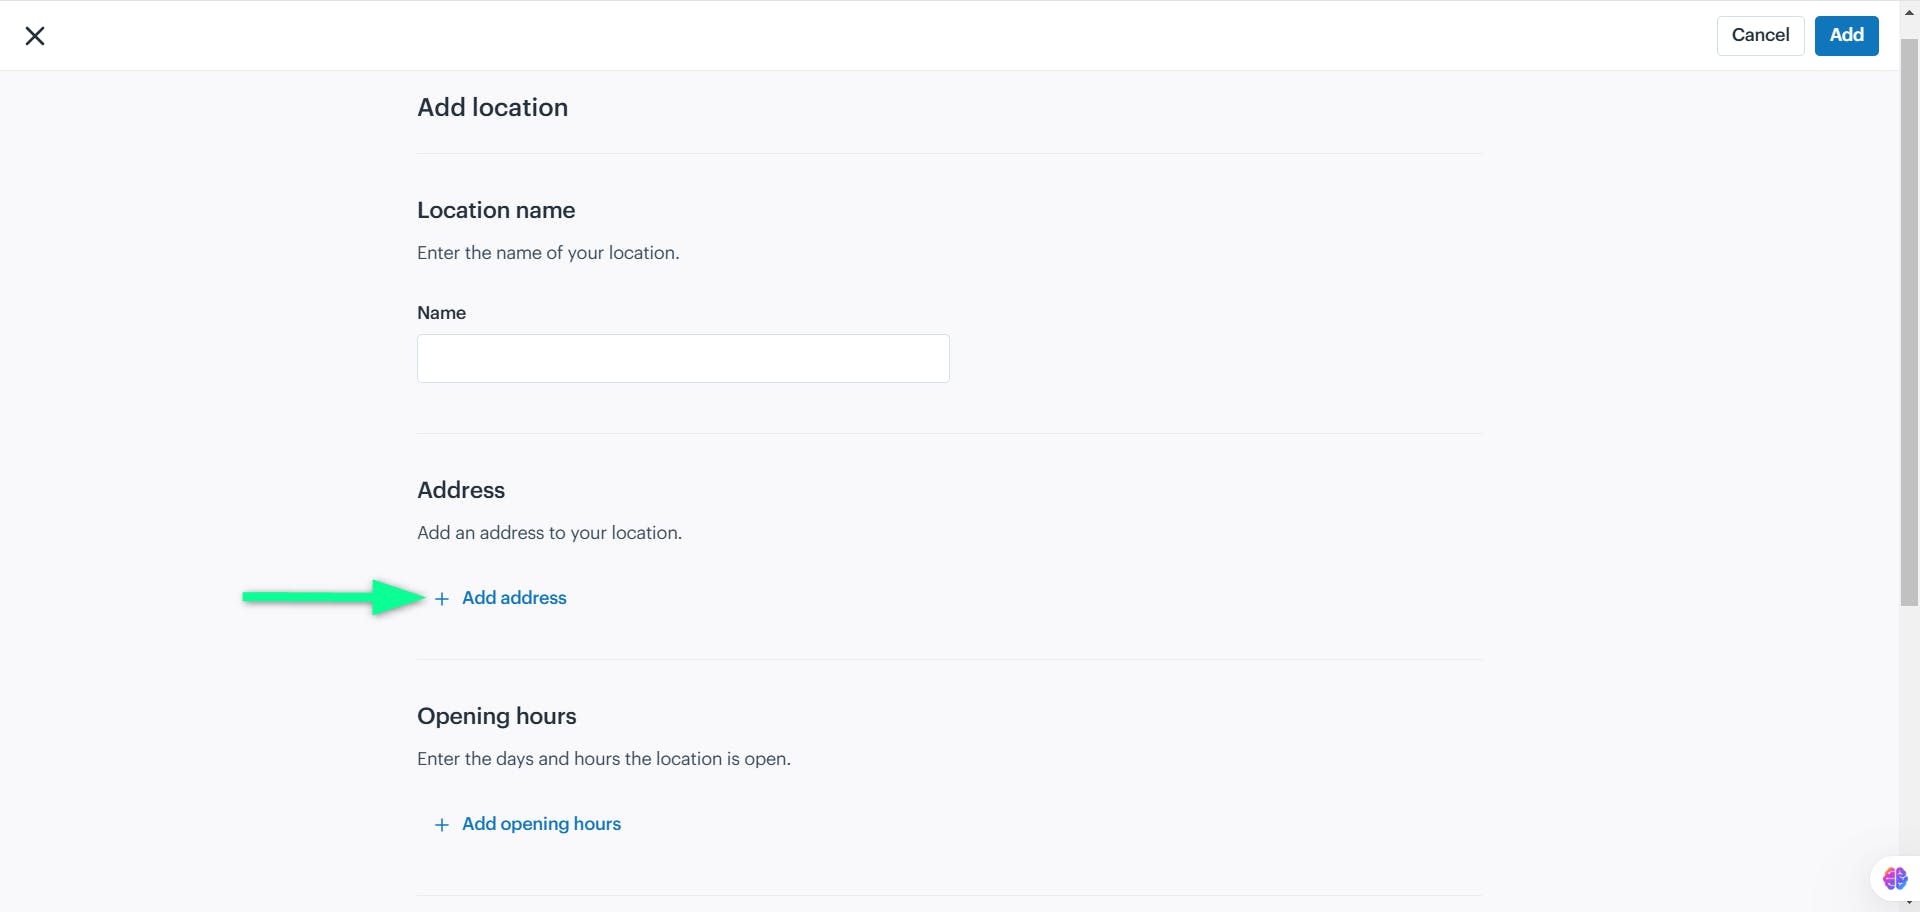
Address
Click the "+ Add address" button to input the location address.
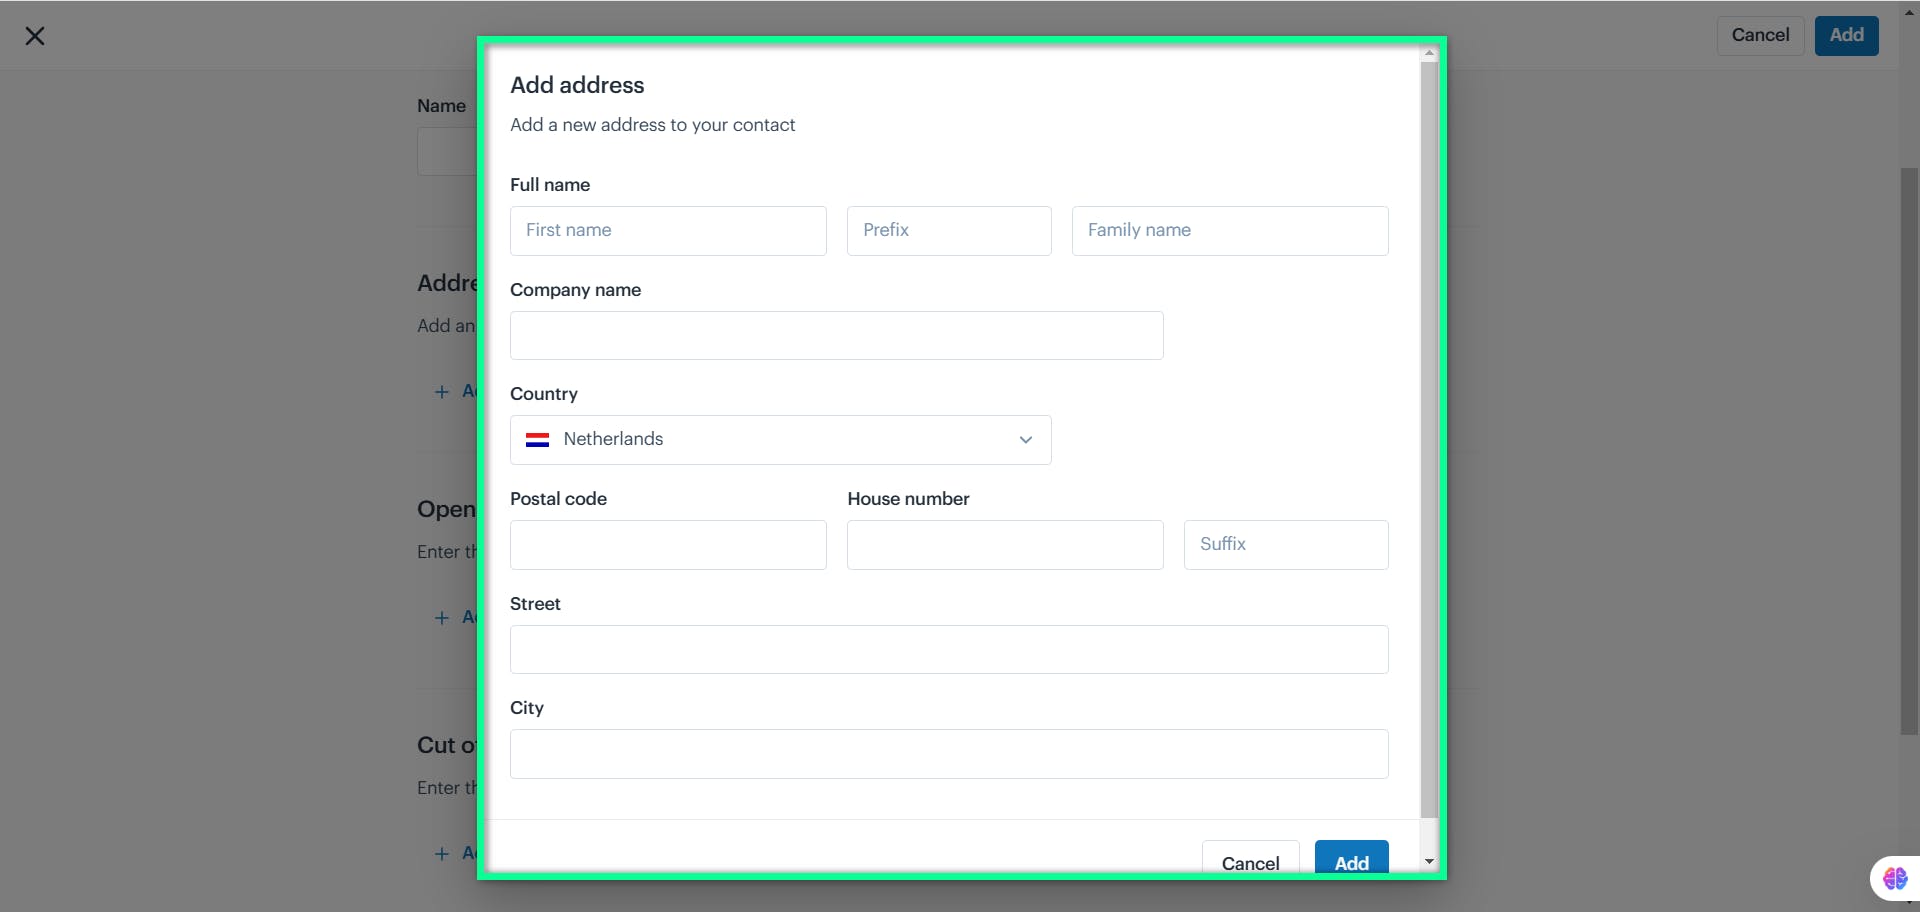
The Add Address window opens, allowing you to input the required address details.
| Field | Description |
|---|---|
| Full Name | Enter the first name, optional prefix, and family name of the contact person. |
| Company Name | Input the name of the company associated with the address. |
| Country | Select the country from the dropdown list. |
| Postal Code | Enter the postal code for the address. |
| House Number & Suffix | Provide the house number and an optional suffix such as apartment or additional detail. |
| Street | Specify the street name. |
| City | Enter the city of the address. |
Opening Hours
Click the "+ Add opening hours" action button to specify the operational days and times for the location.
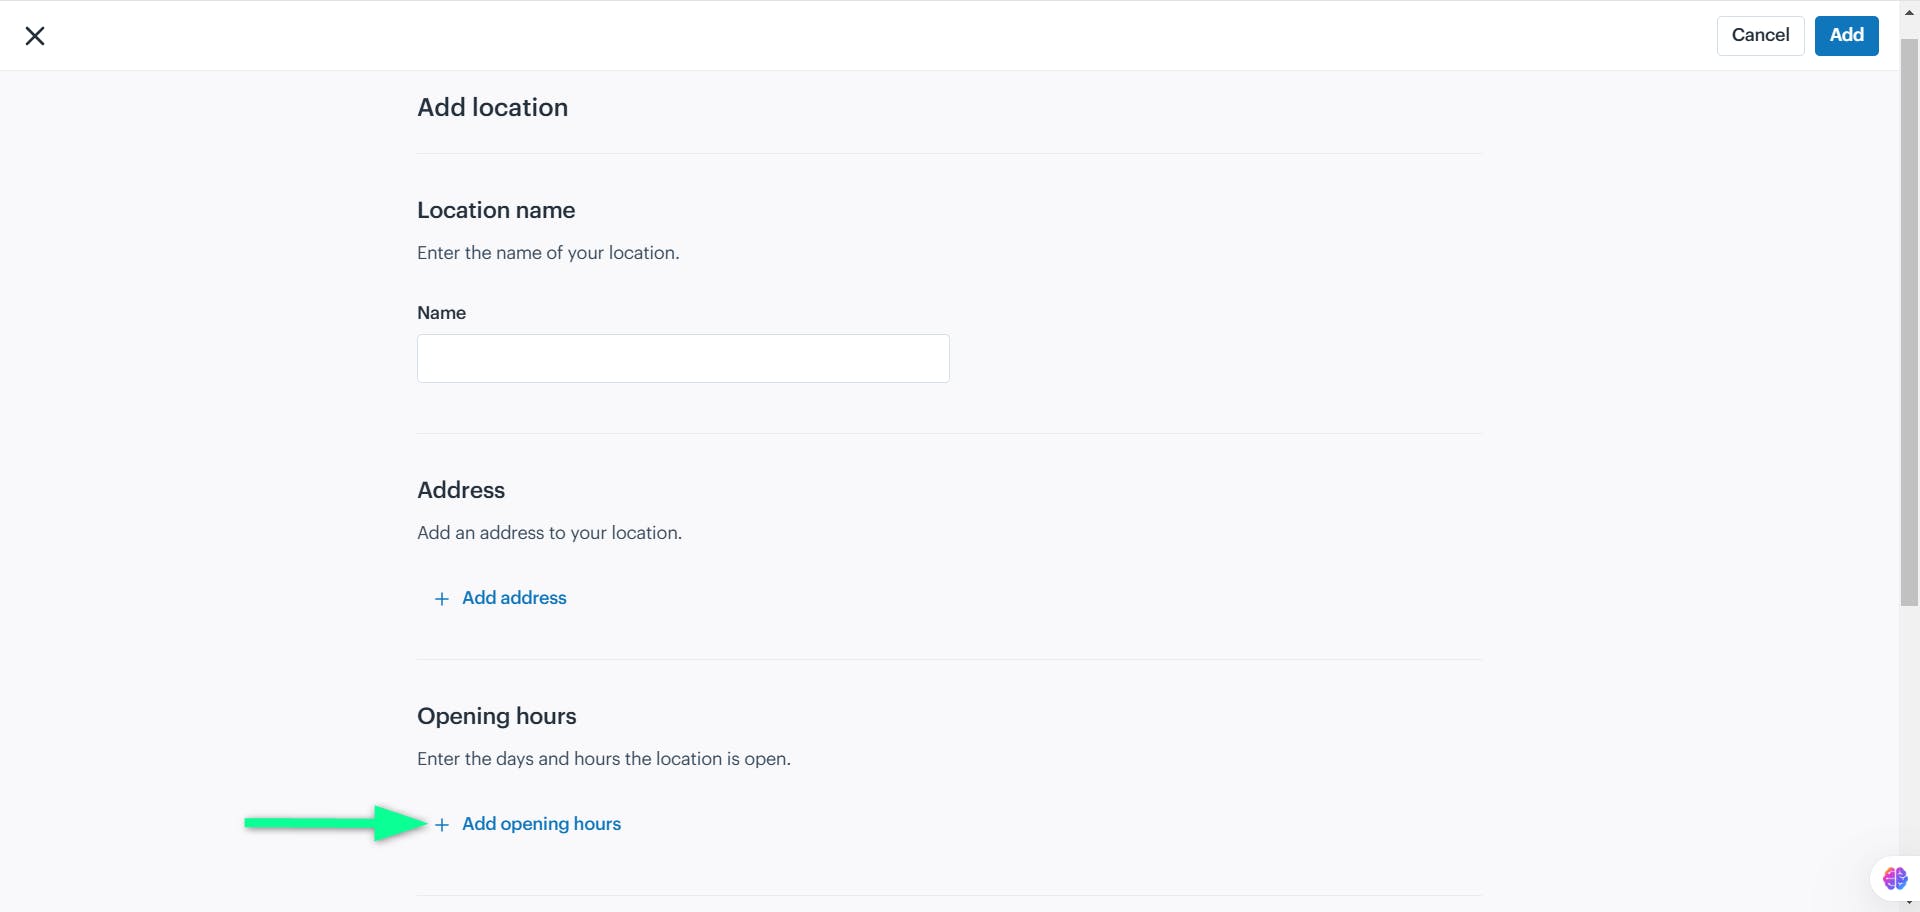
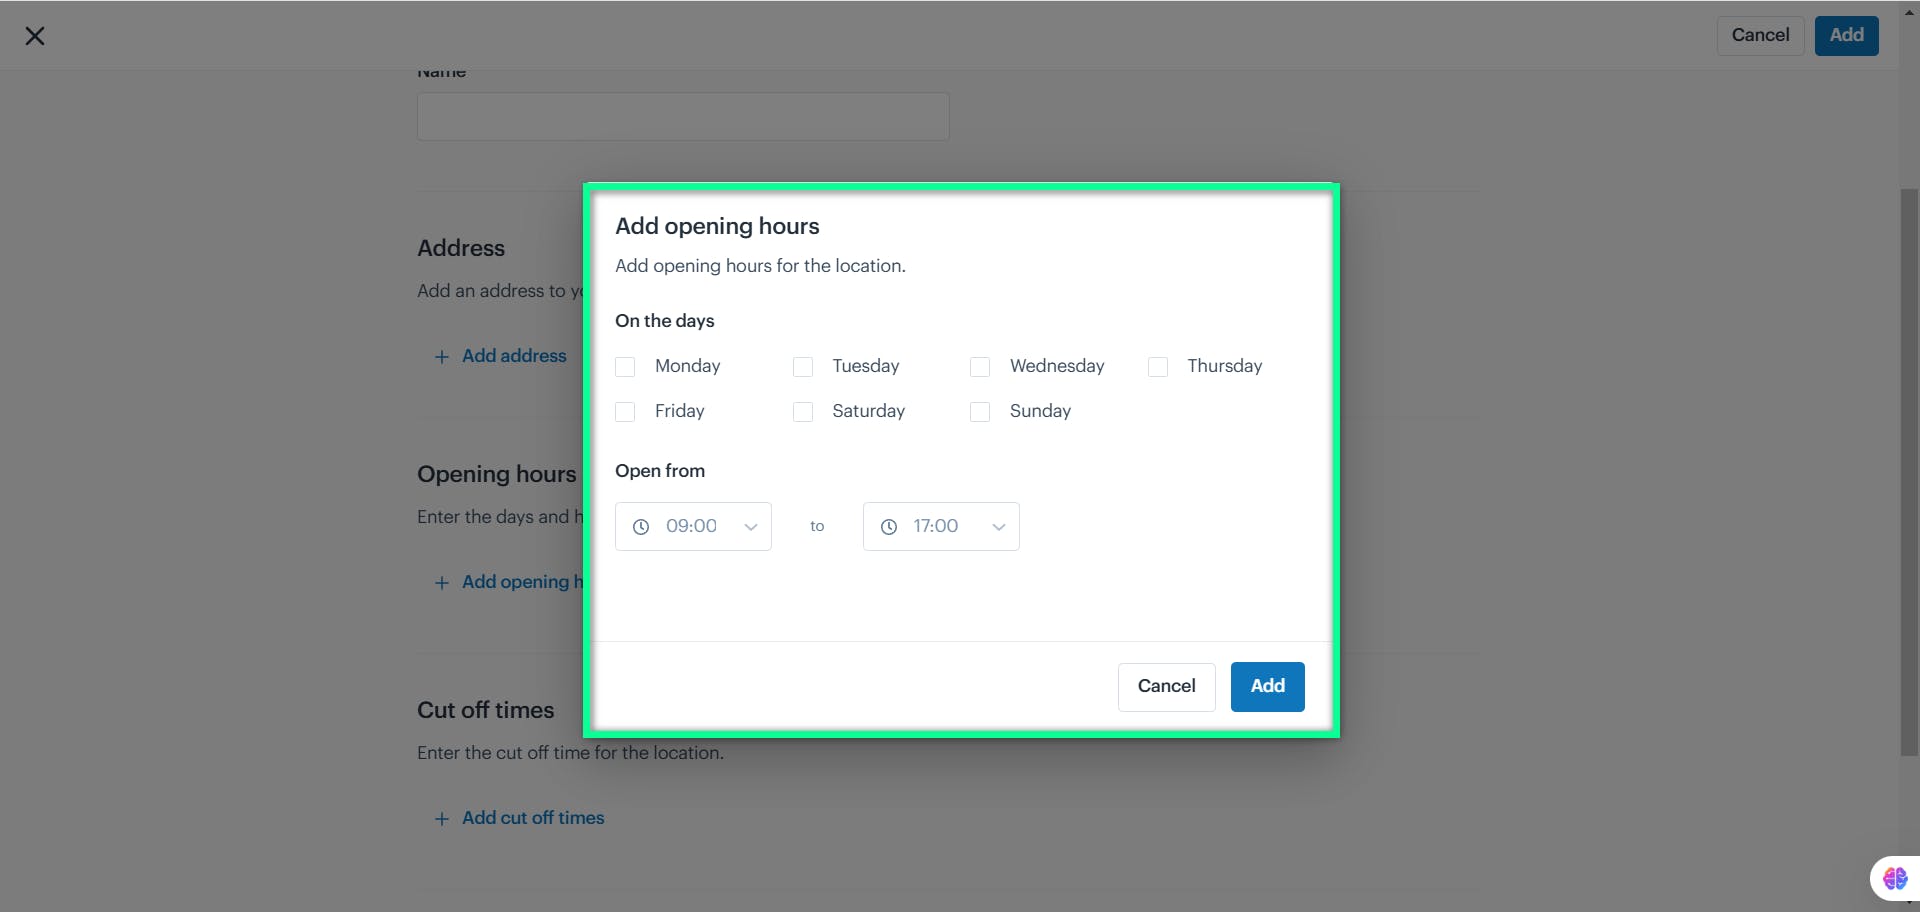
The "Add Opening Hours" window opens, allowing you to set the location of the operating hours.
| Field | Description |
|---|---|
| On the Days | Select the operational days of the week by checking the corresponding boxes, e.g., Monday, Tuesday. |
| Open From | Specify the opening time using the dropdown menu for hours and minutes. |
| To | Specify the closing time using the dropdown menu for hours and minutes. |
Cut off times
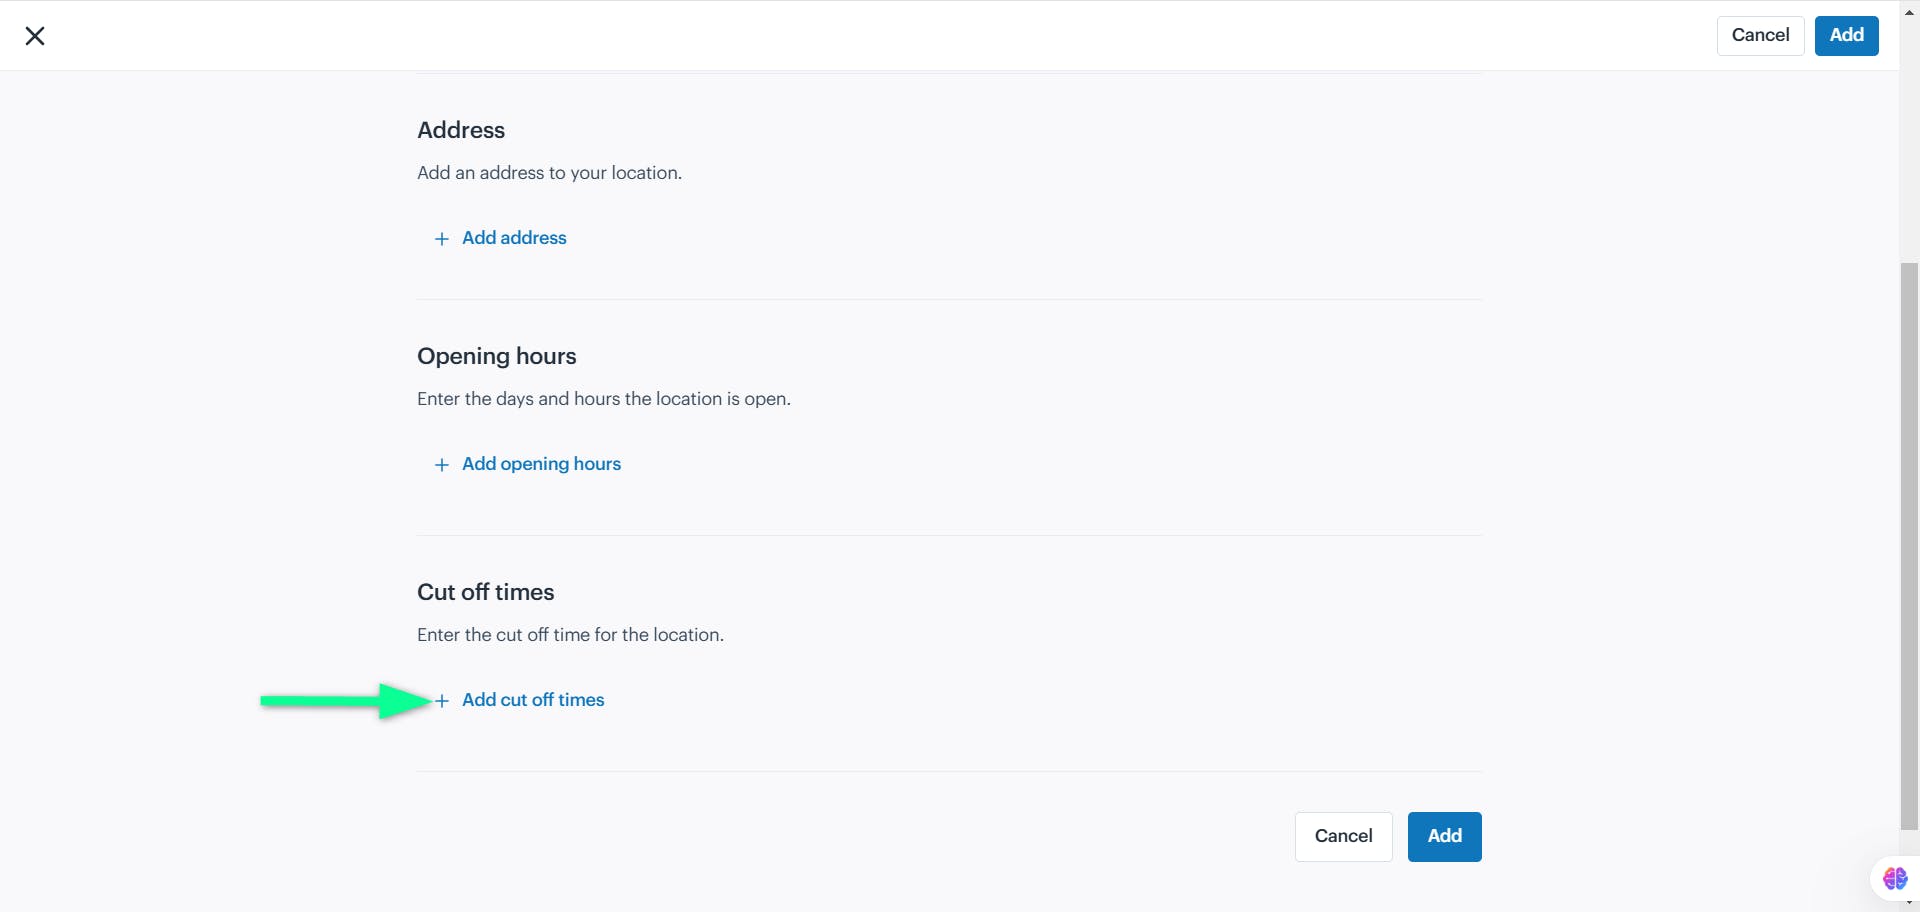
Click the "+ Add cut-off times" to define the cut-off times for order processing or other activities at the location.
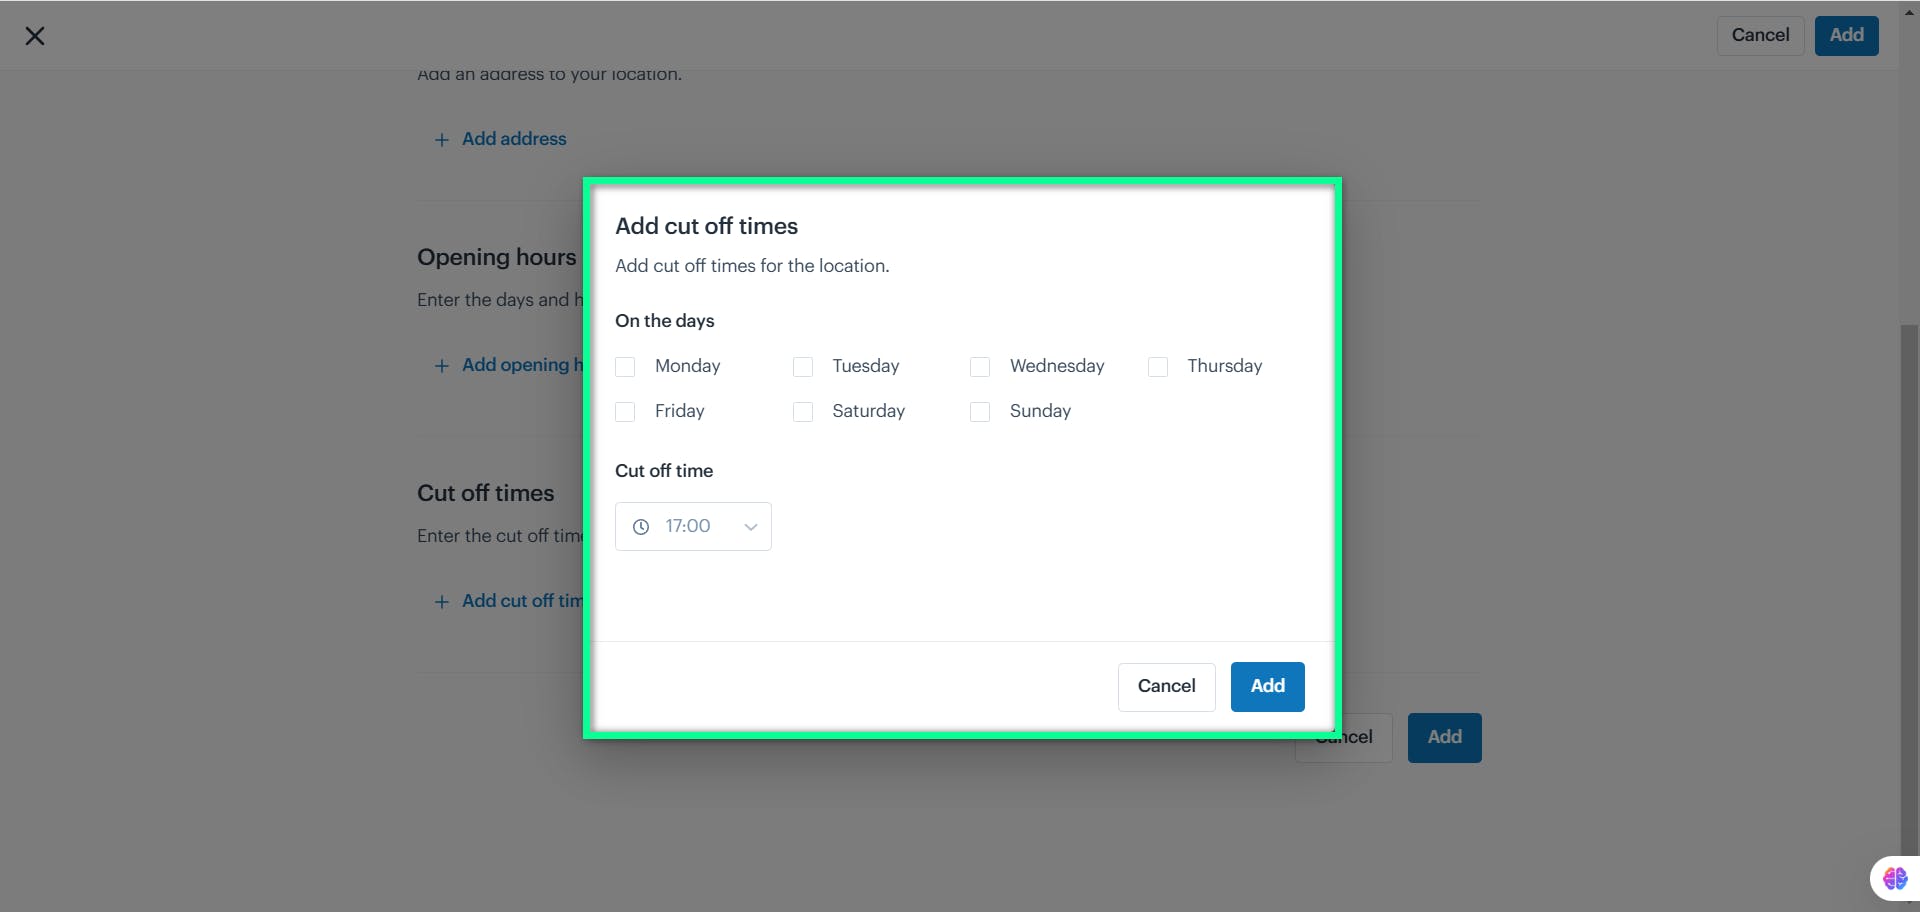
The "+ Add cut-off times" window will open, allowing you to set cut-off times by selecting days and specifying times.
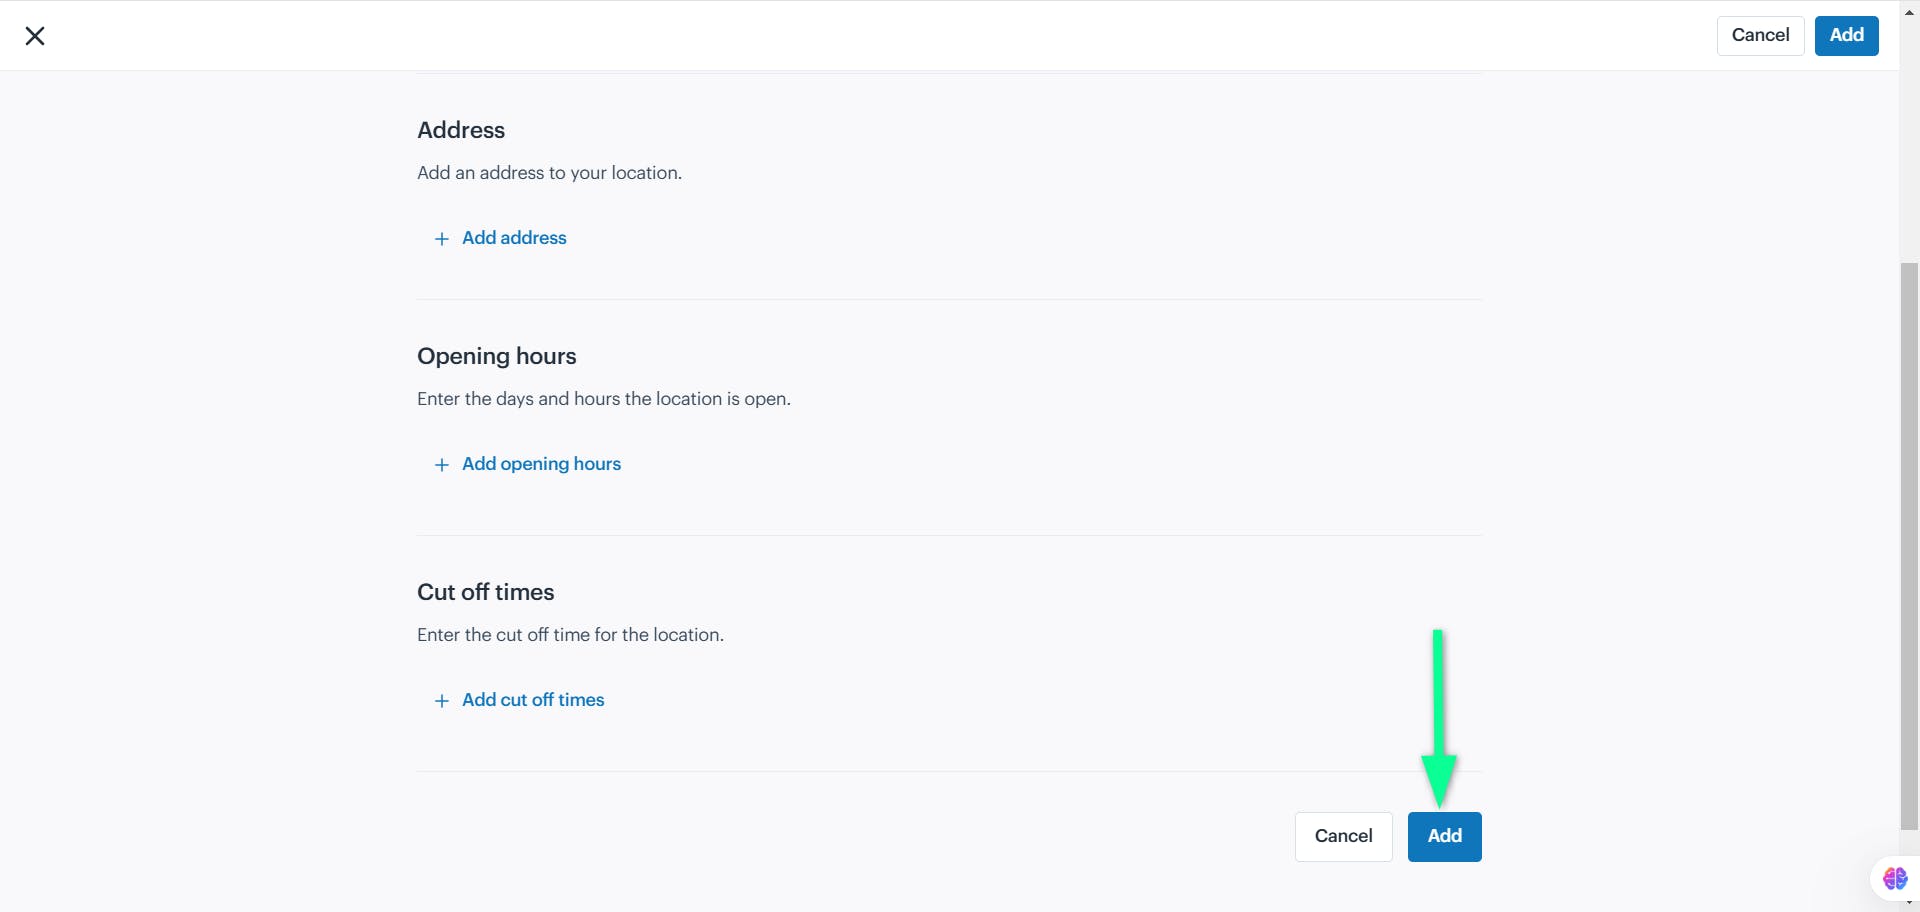
Click the "Add" button to save the location.
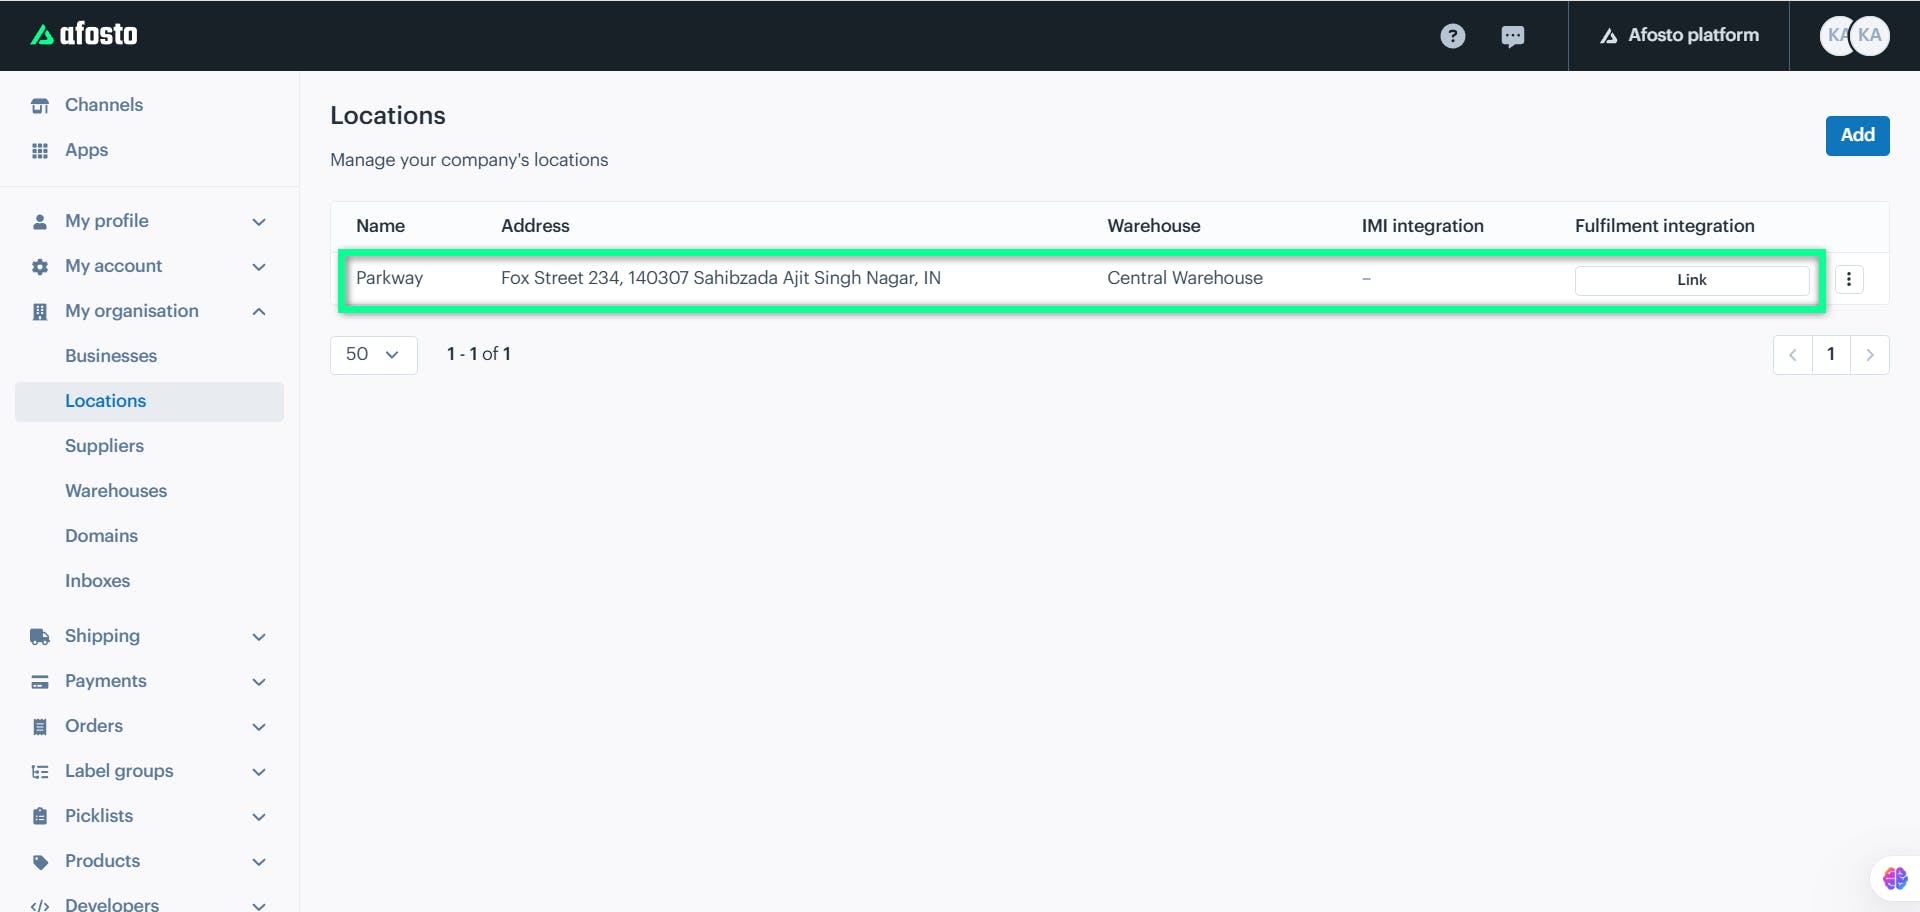
Location details will be added as a new entry on the Locations page
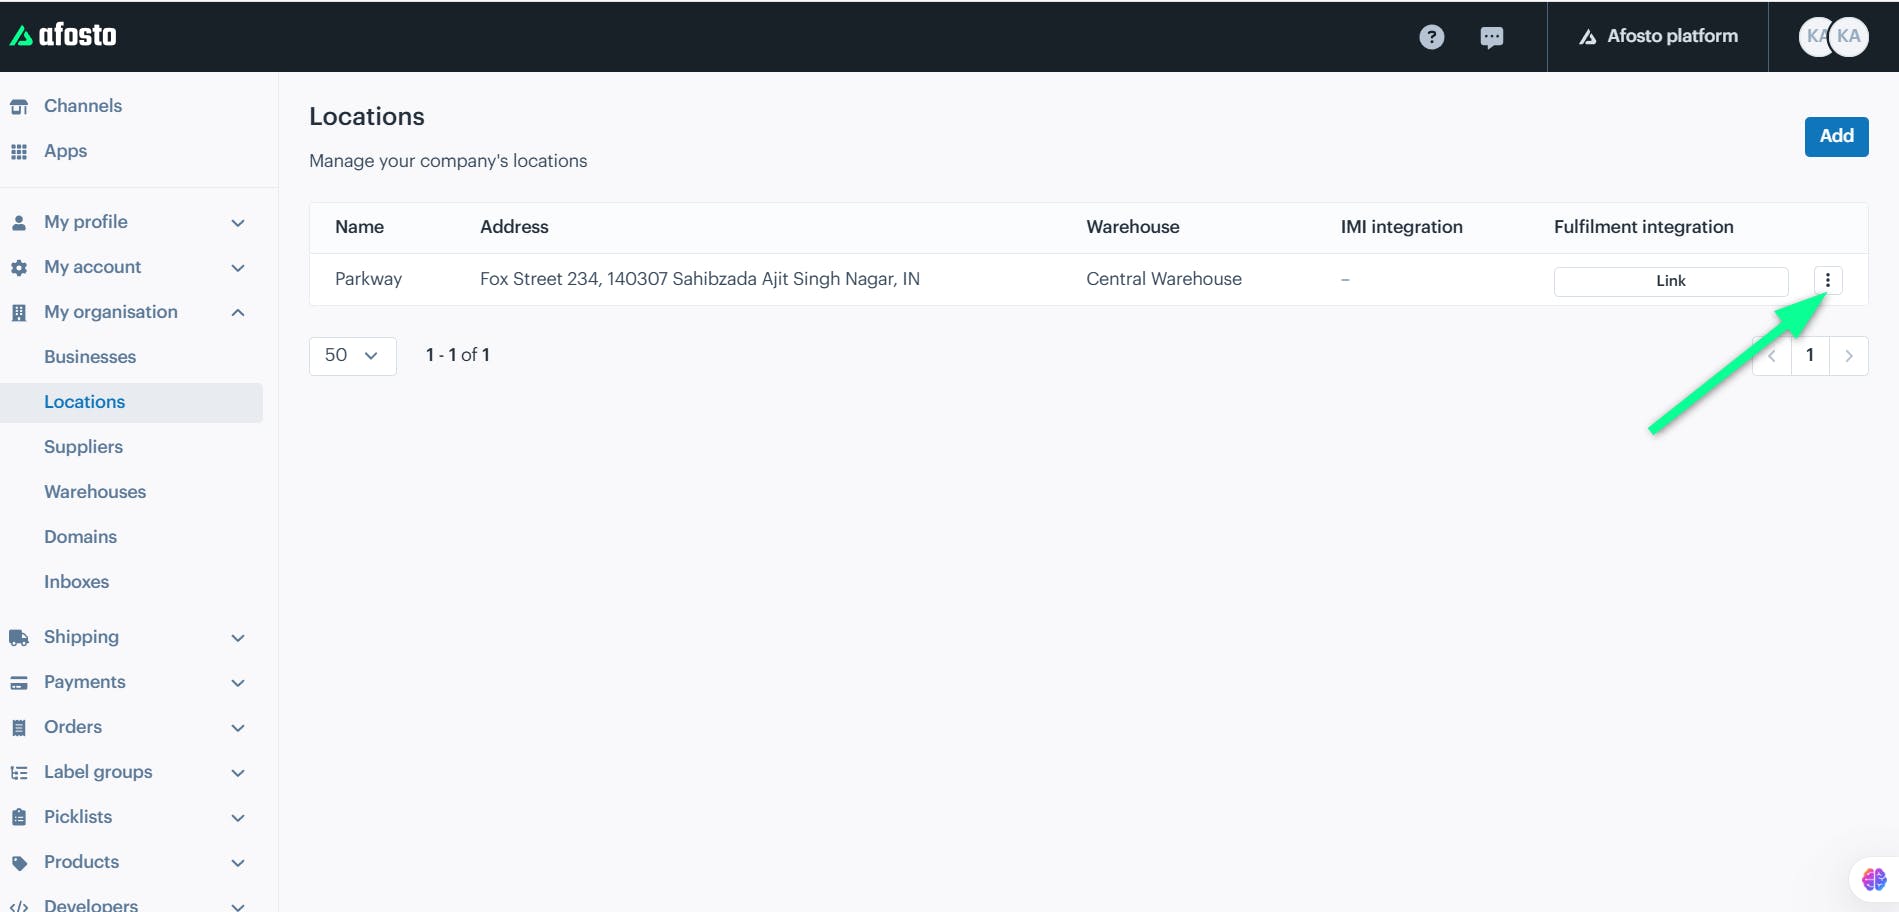
To delete a desired entry, click the ellipses icon (three dots) next to it and select the "Delete" option.
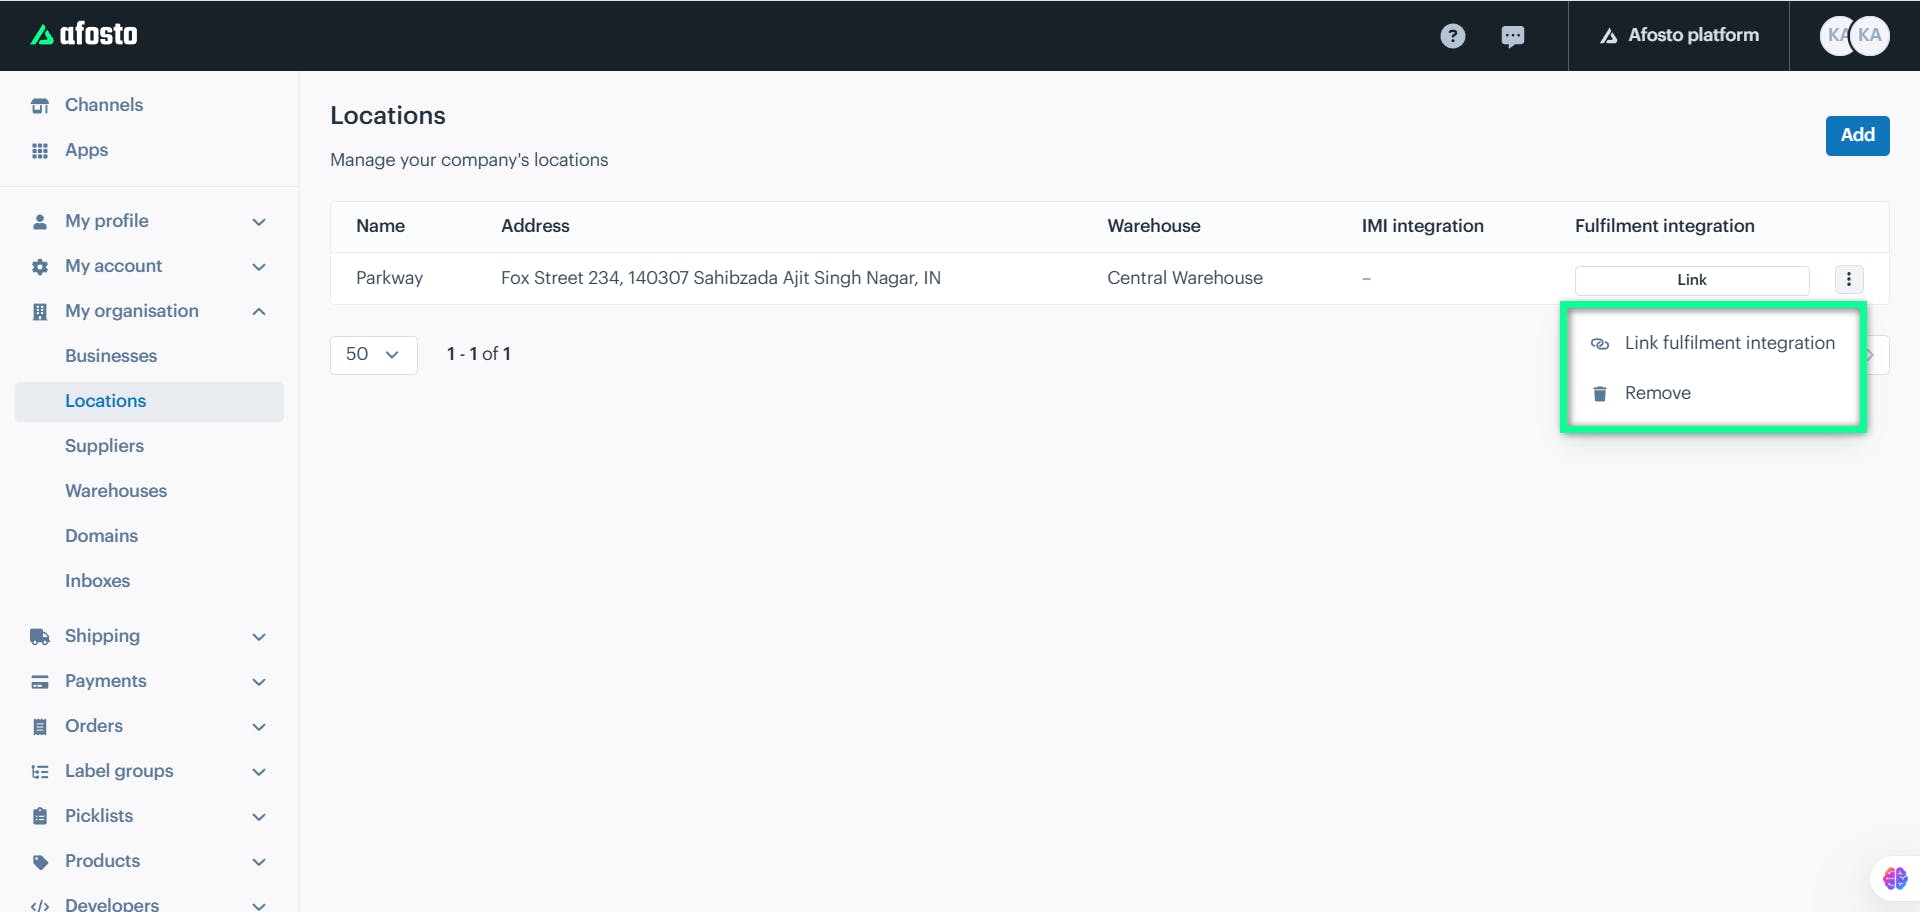
The "Link Fulfillment Integration" option allows you to connect the location to a fulfillment service, while the "Remove" option deletes the linked fulfillment integration from the location.
Suppliers
The Suppliers section allows you to track incoming inventory and create resupply lists for each supplier.
Why do I need this? Suppliers make it easier to manage and replenish your inventory, ensuring you always have the stock you need.
Click the “Suppliers” module from the left sidebar of the Afosto screen.
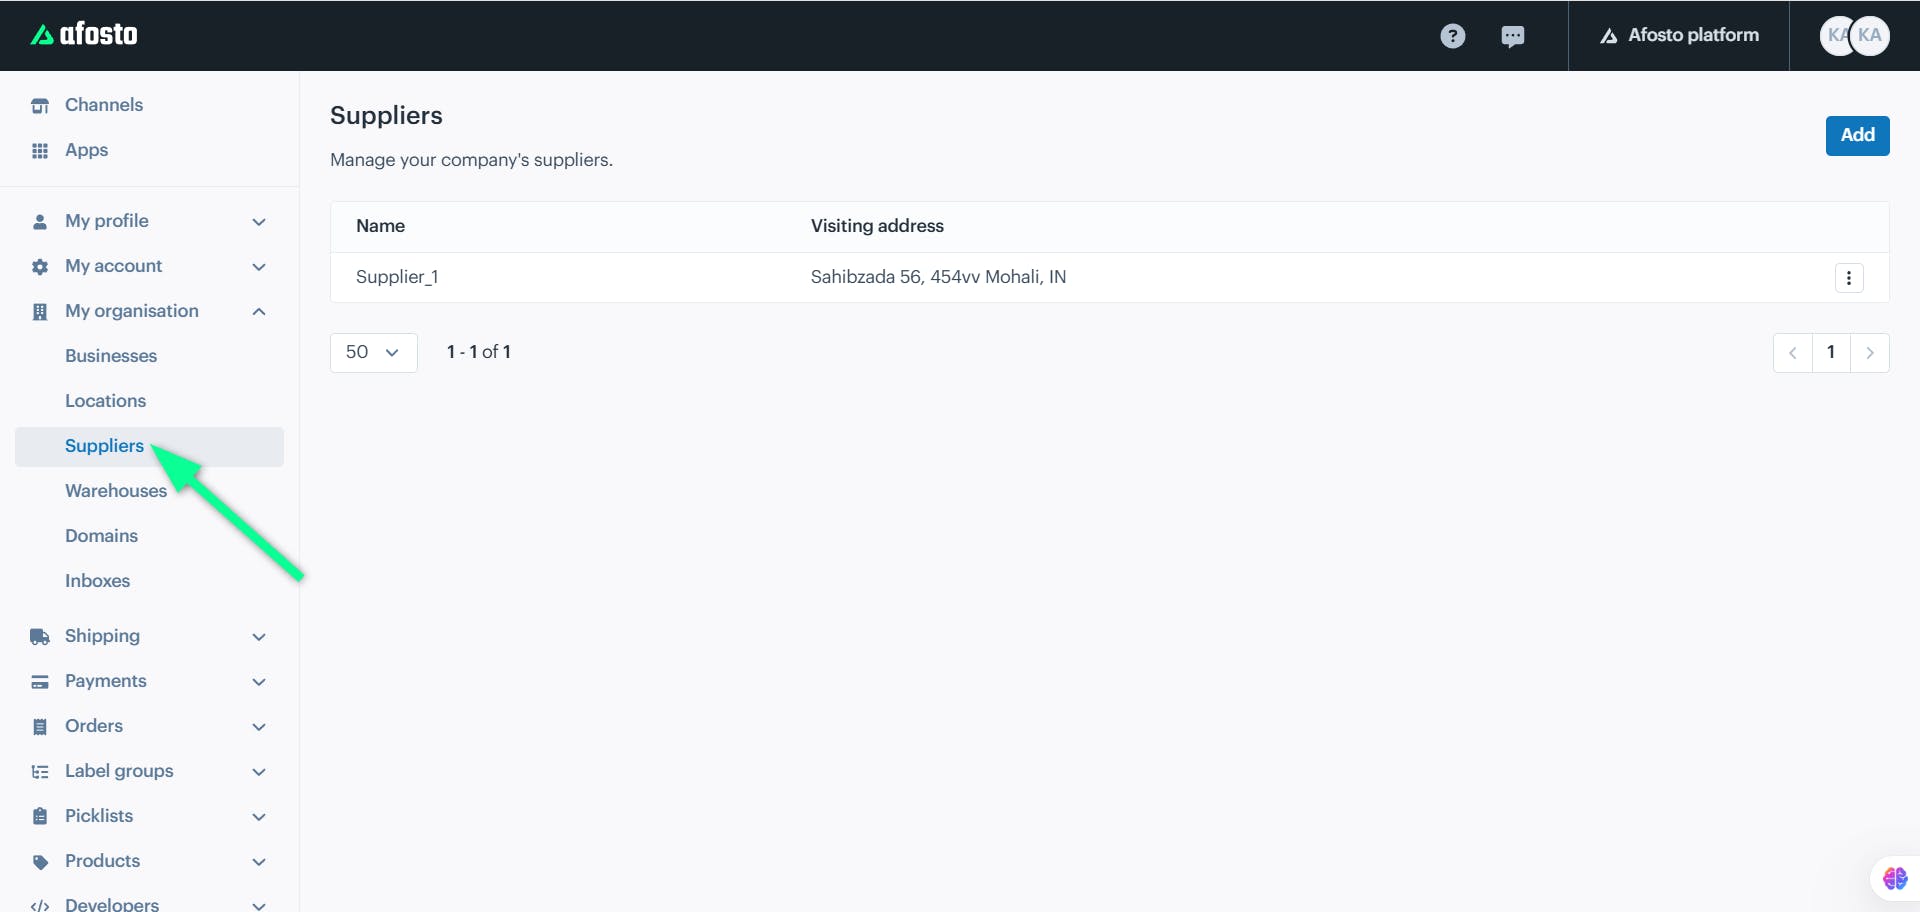
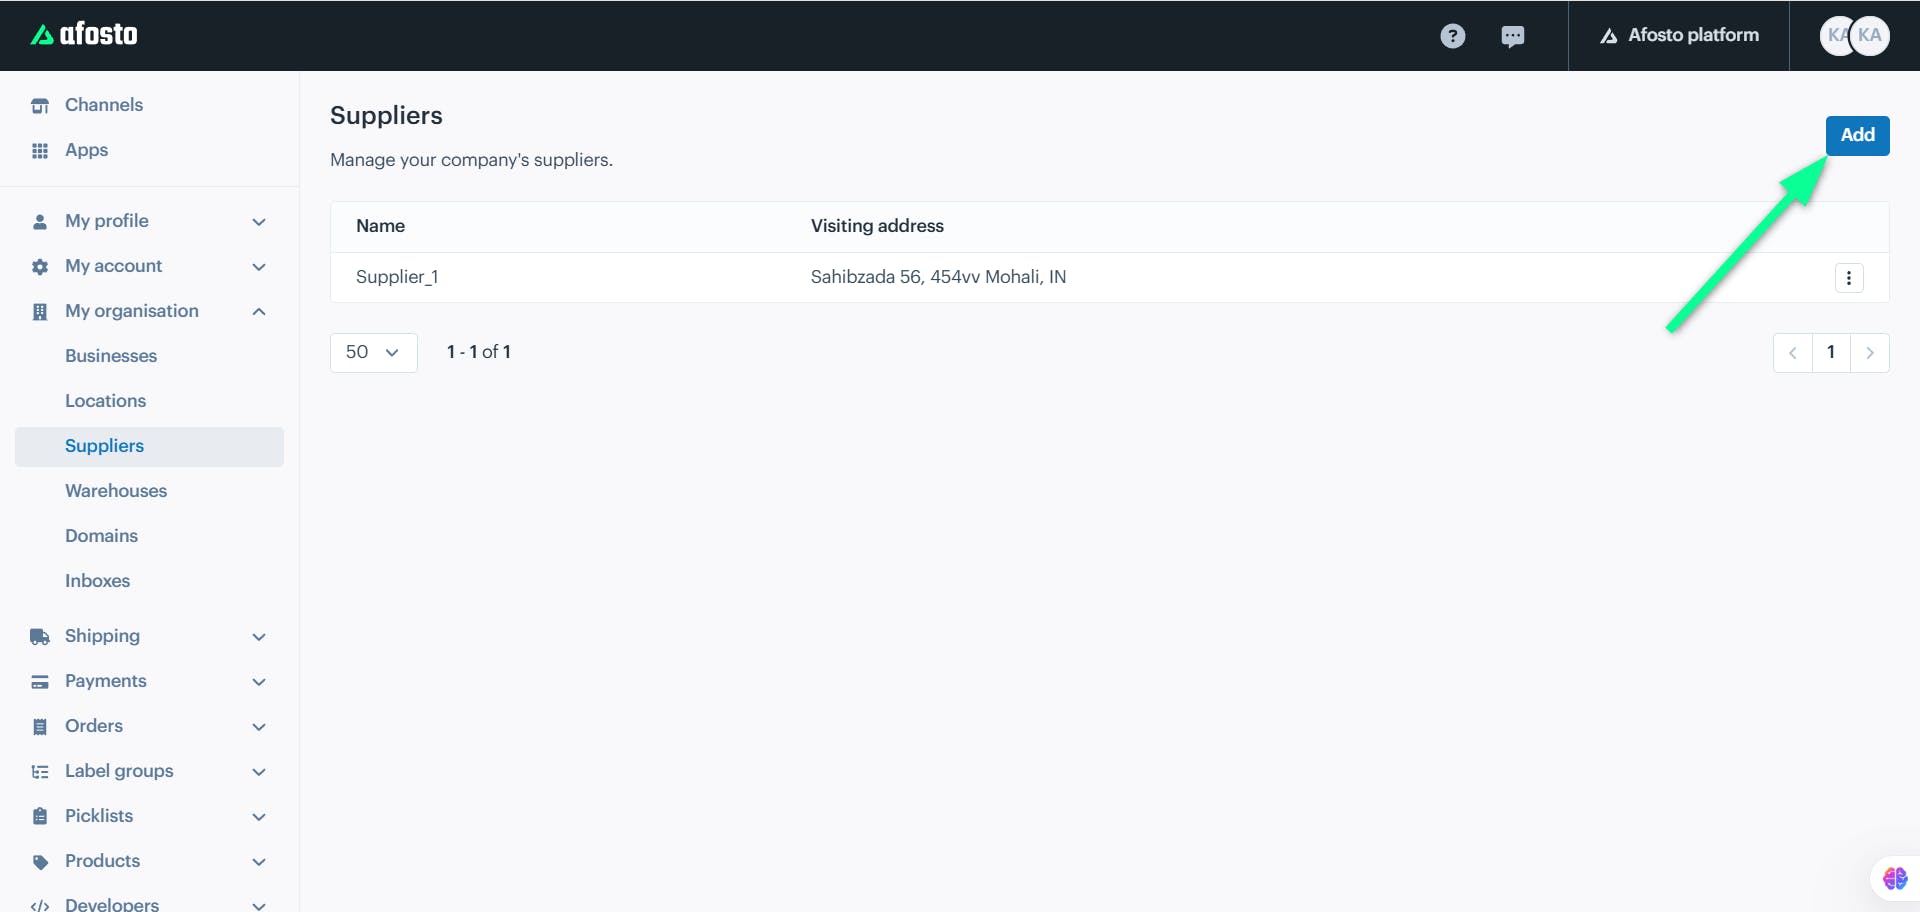
Click the "Add" button on the top-right corner of the screen.
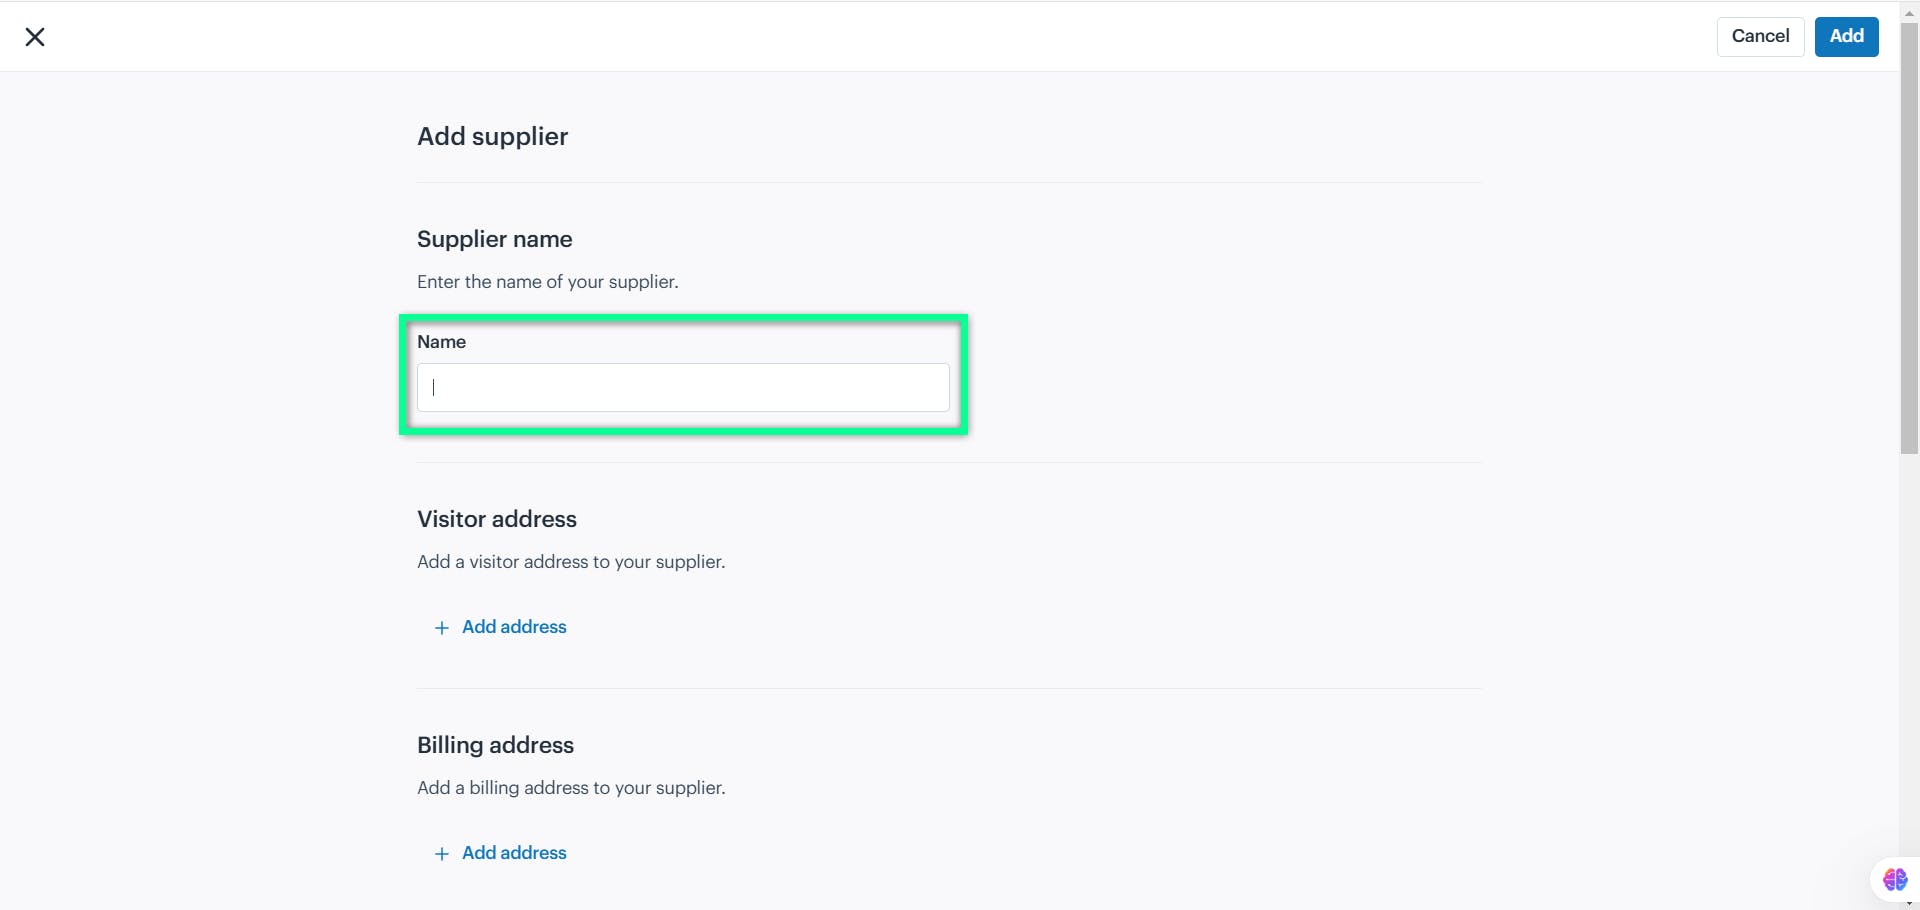
A new screen opens, enabling you to input details for adding a business. It includes fields for:
-
Supplier Name
-
Visitor Address
-
Billing Address
-
VAT Numbers
-
Phone Numbers
-
Opening Hours
Below is a detailed overview of the fields and corresponding actions for the business section:
Supplier Name
Enter the supplier's name.
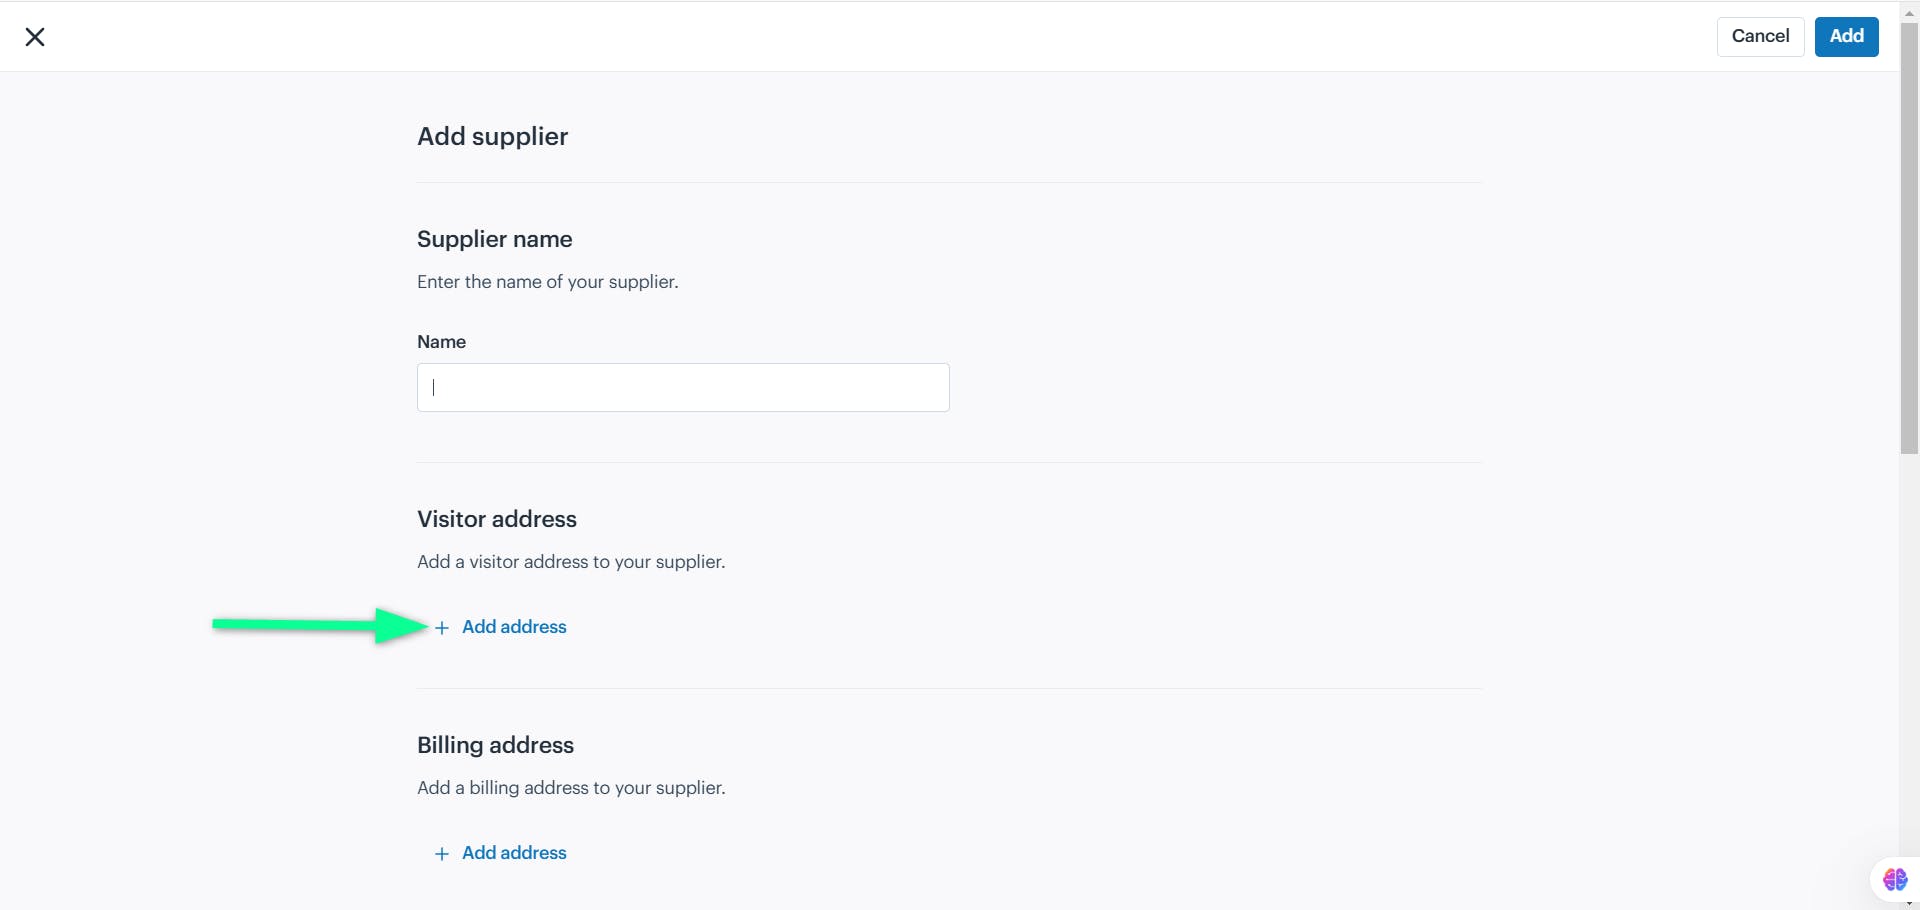
Visitor Address
Add the supplier visitor address by clicking the "+ Add Address" action button.
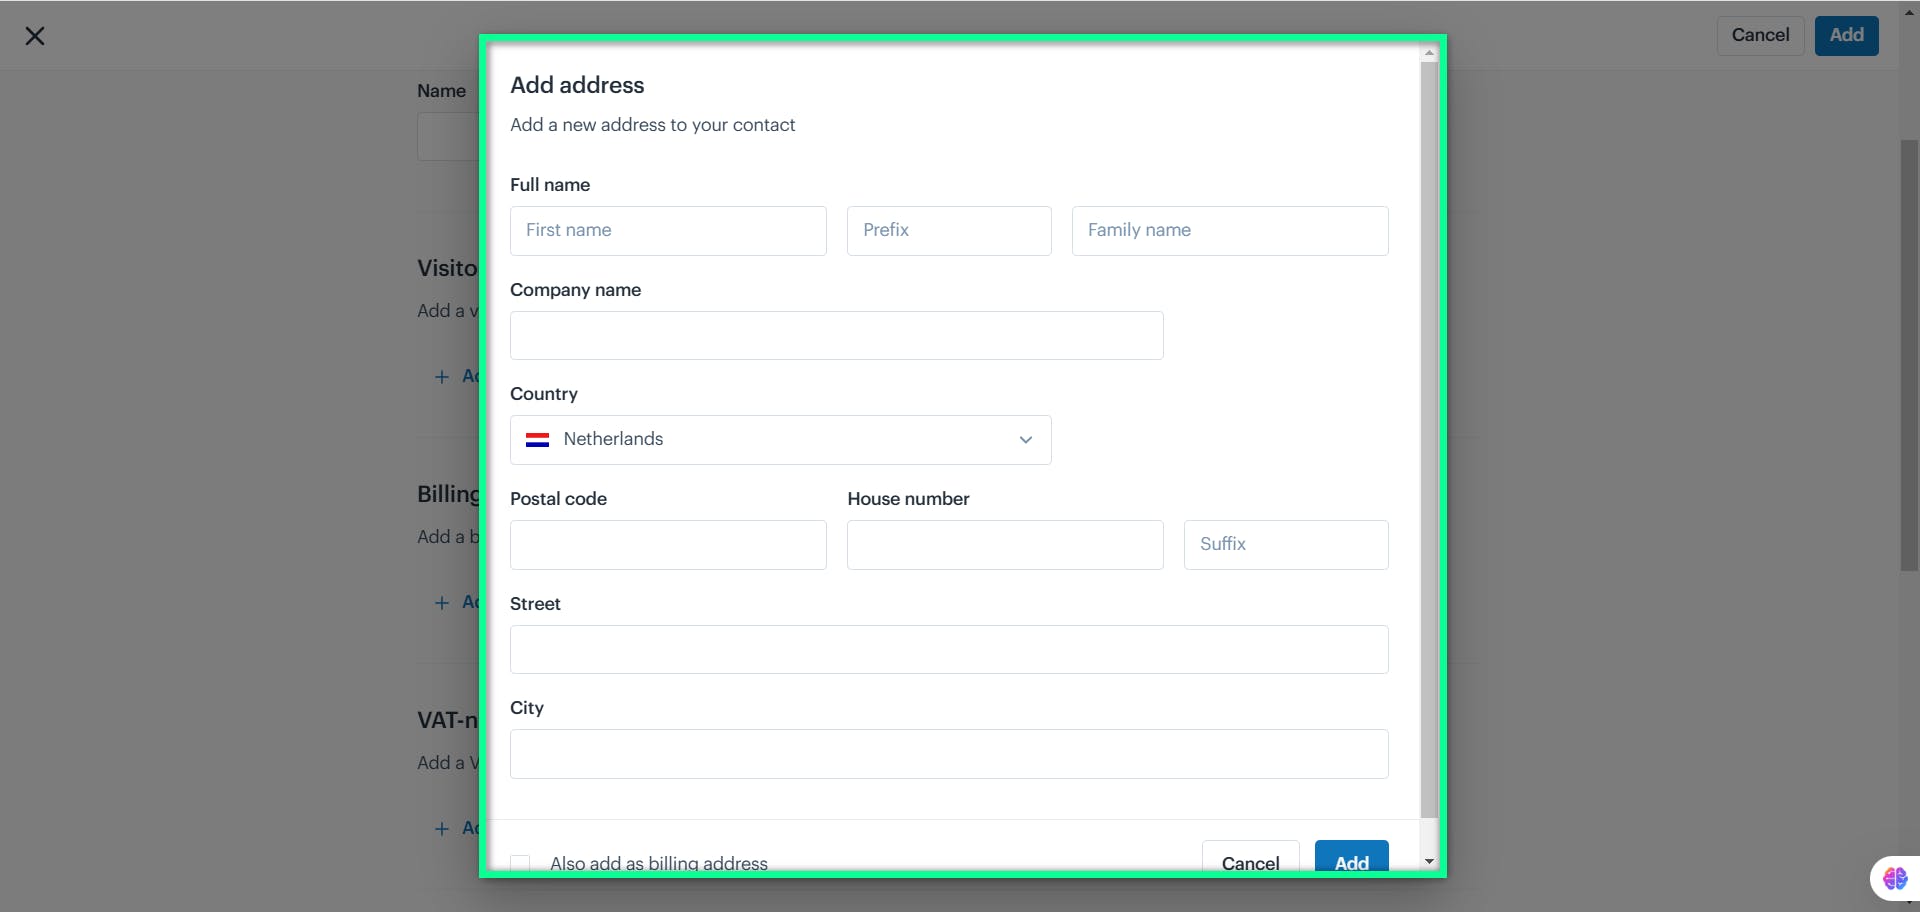
The "Add Address" window appears, allowing you to enter detailed business address information.
| Field | Description |
|---|---|
| Full Name | Enter the first name, optional prefix, and family name of the contact person. |
| Company Name | Provide the name of the associated company, if applicable. |
| Country | Select the country from the dropdown menu. |
| Postal Code | Input the postal code of the address. |
| House Number & Suffix | Enter the house number and optional suffix for the address. |
| Street | Provide the street name where the business is located. |
| City | Enter the city name for the address. |
| Also Add as Billing Address | Check this box to use the visitor address as the billing address. |
Billing Address
Click the "+ Add address" action button to add the billing address.
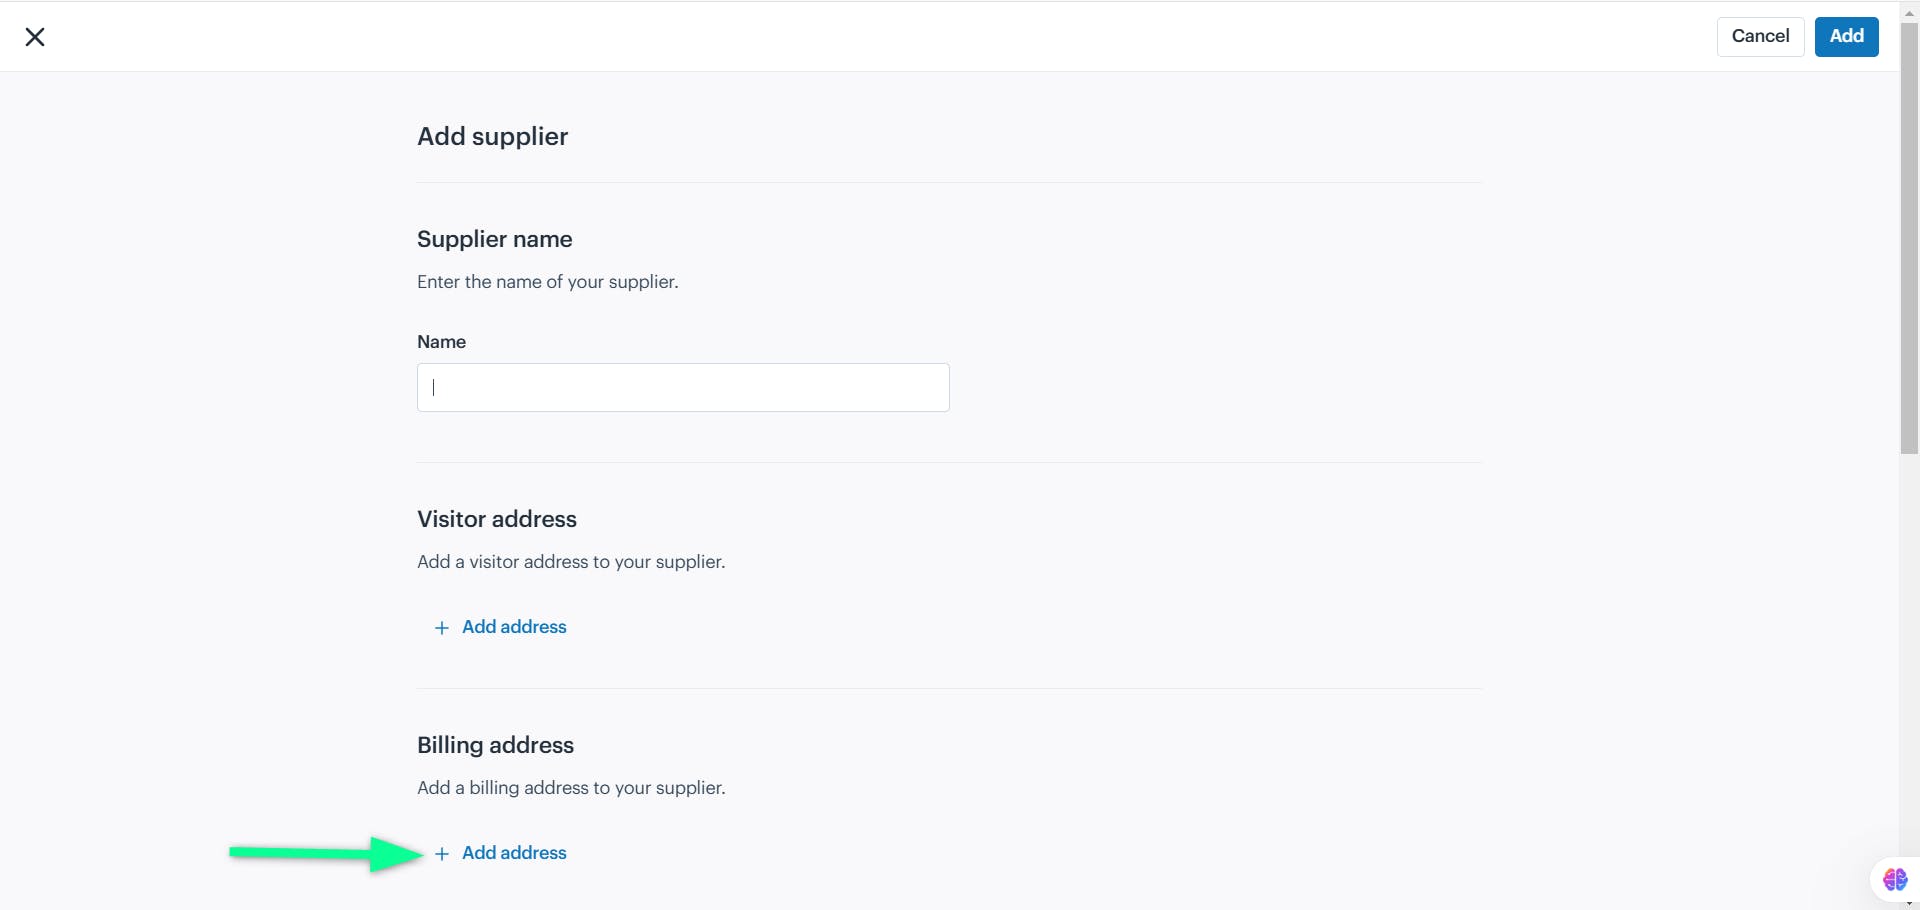
The Add Address window will open, displaying the following details:
| Field | Description |
|---|---|
| Full Name | Enter the first name, optional prefix, and family name of the contact person. |
| Company Name | Input the name of the company associated with the address, if applicable. |
| Country | Select the country from the dropdown list. |
| Postal Code | Enter the postal code for the address. |
| *House Number & Suffix | Provide the house number and an optional suffix such as apartment or additional detail. |
| Street | Input the street name where the address is located. |
| City | Enter the city of the address. |
| Also Add as Visitor Address | Check this option to use this address as the visitor address. |
VAT Numbers
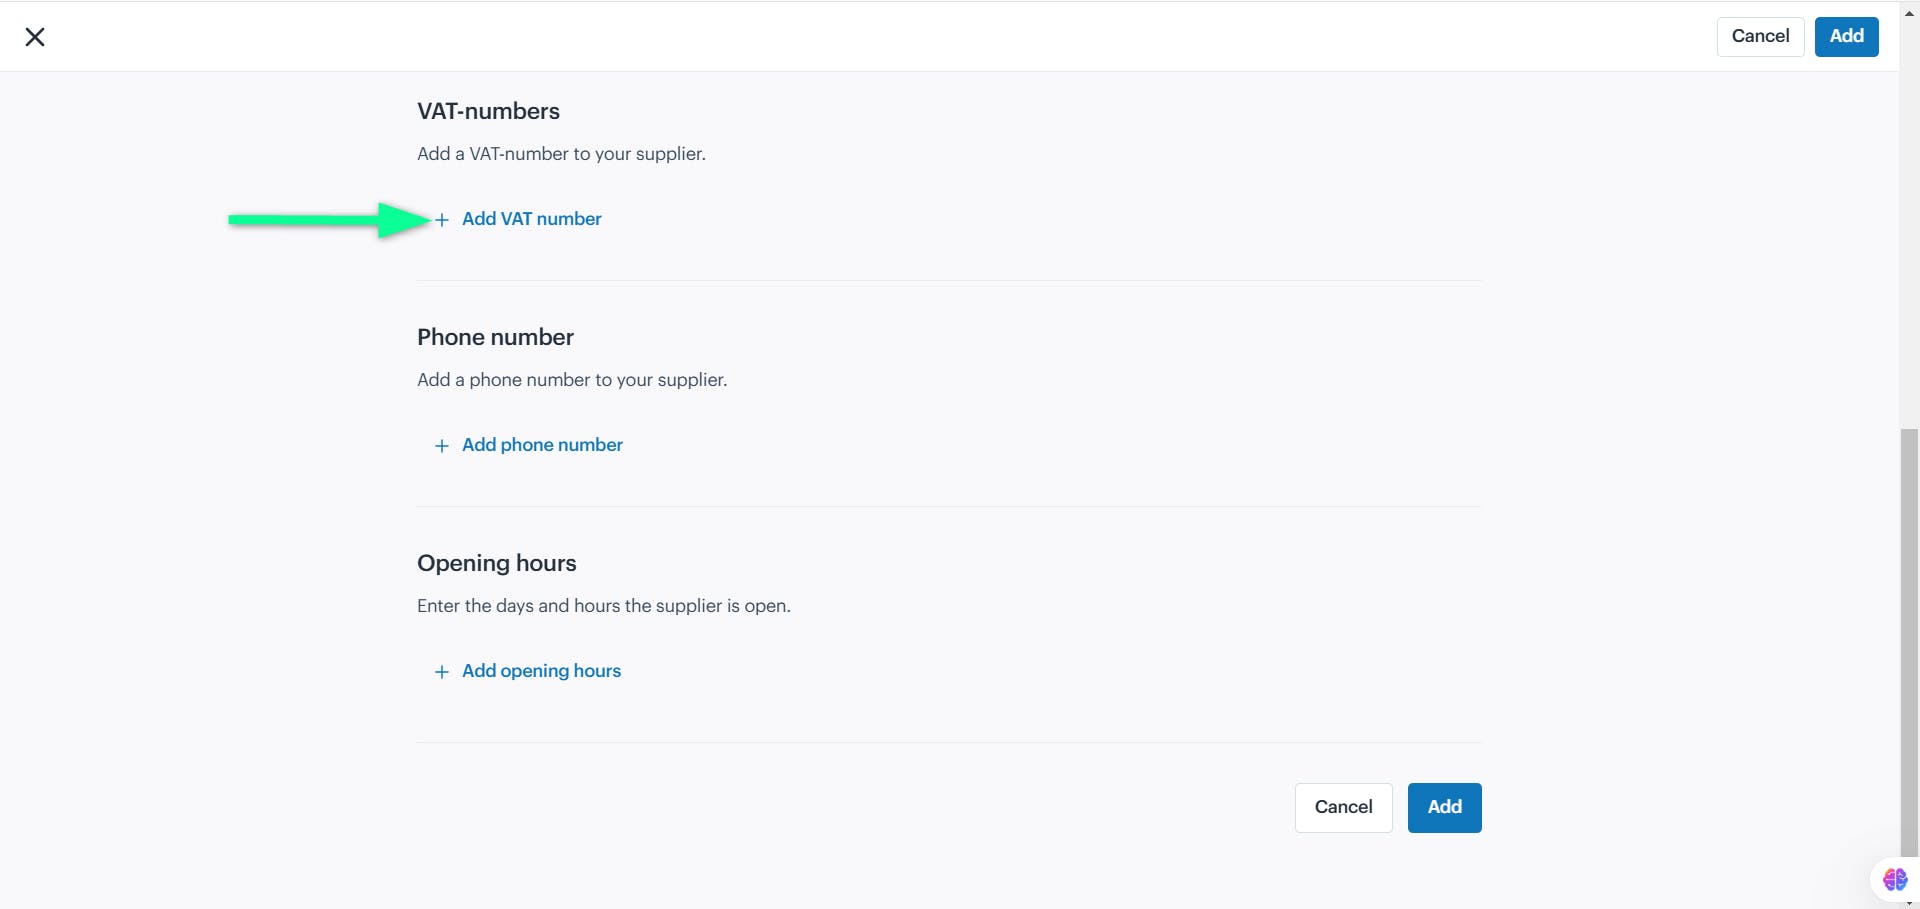
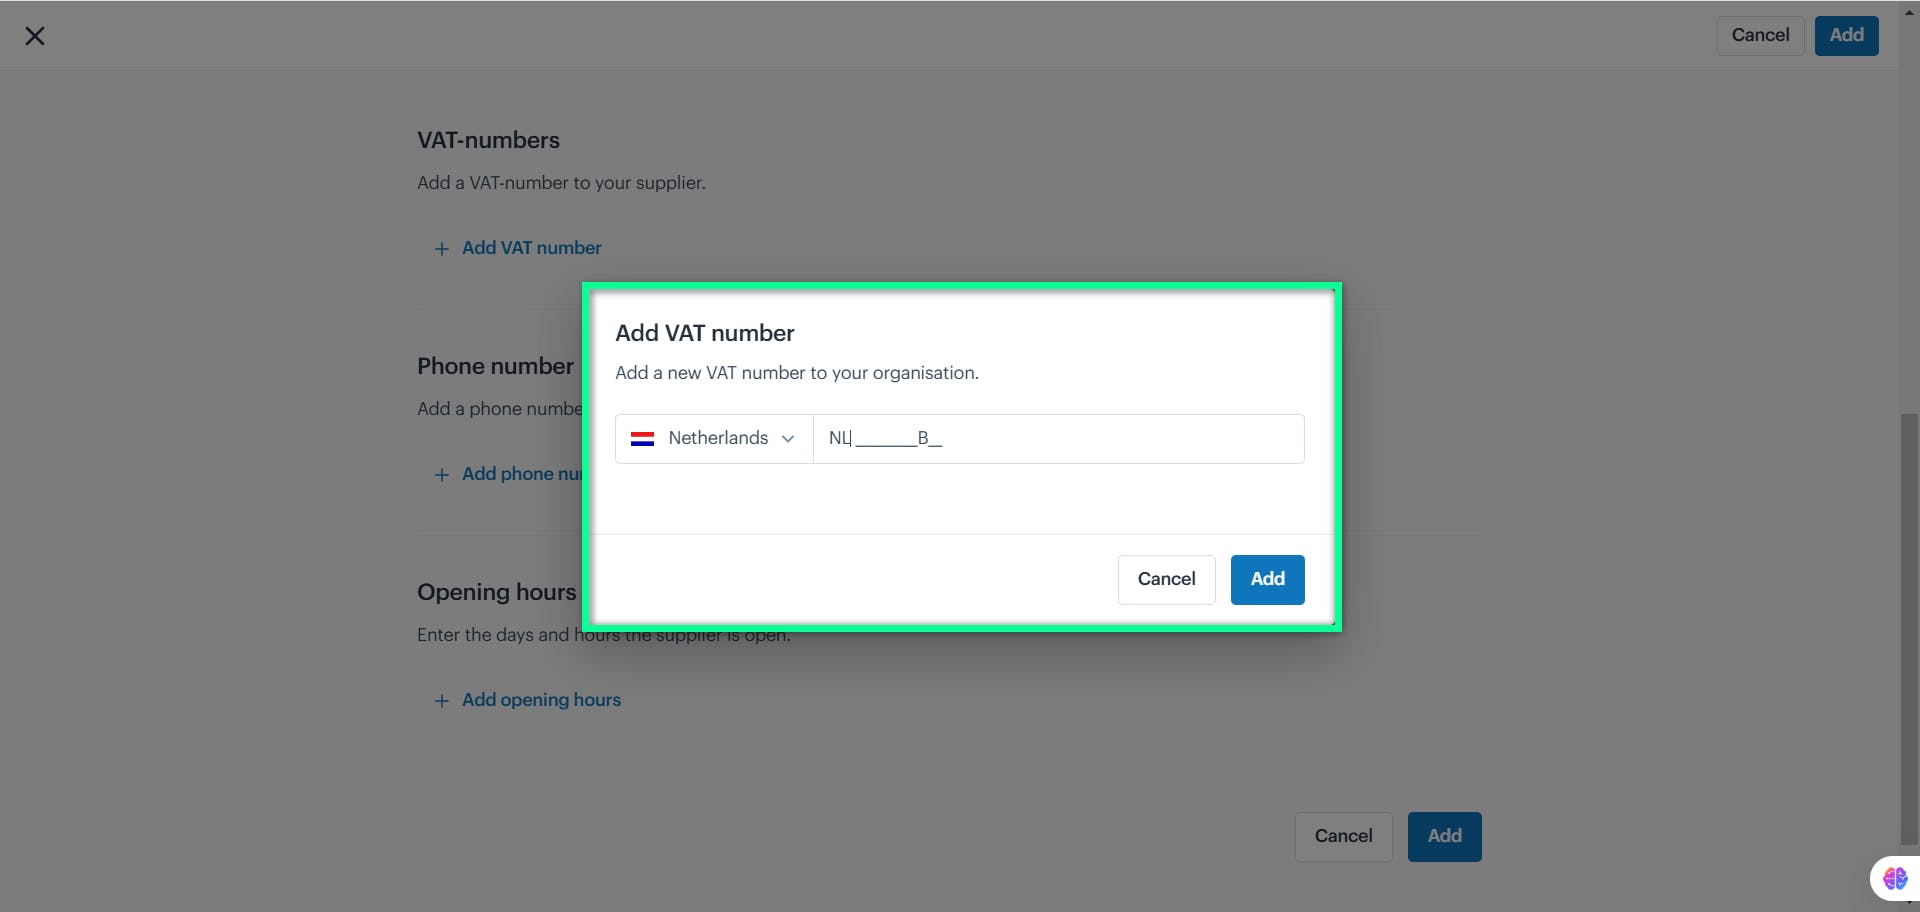
Click the " + Add VAT number" action button to enter the supplier’s VAT ID for tax purposes.
The "Add VAT Number" window opens, allowing you to select a country and enter the VAT number in the correct format.
Phone Number
Click the "+ Add phone number" action button to enter an accurate contact number for the business.
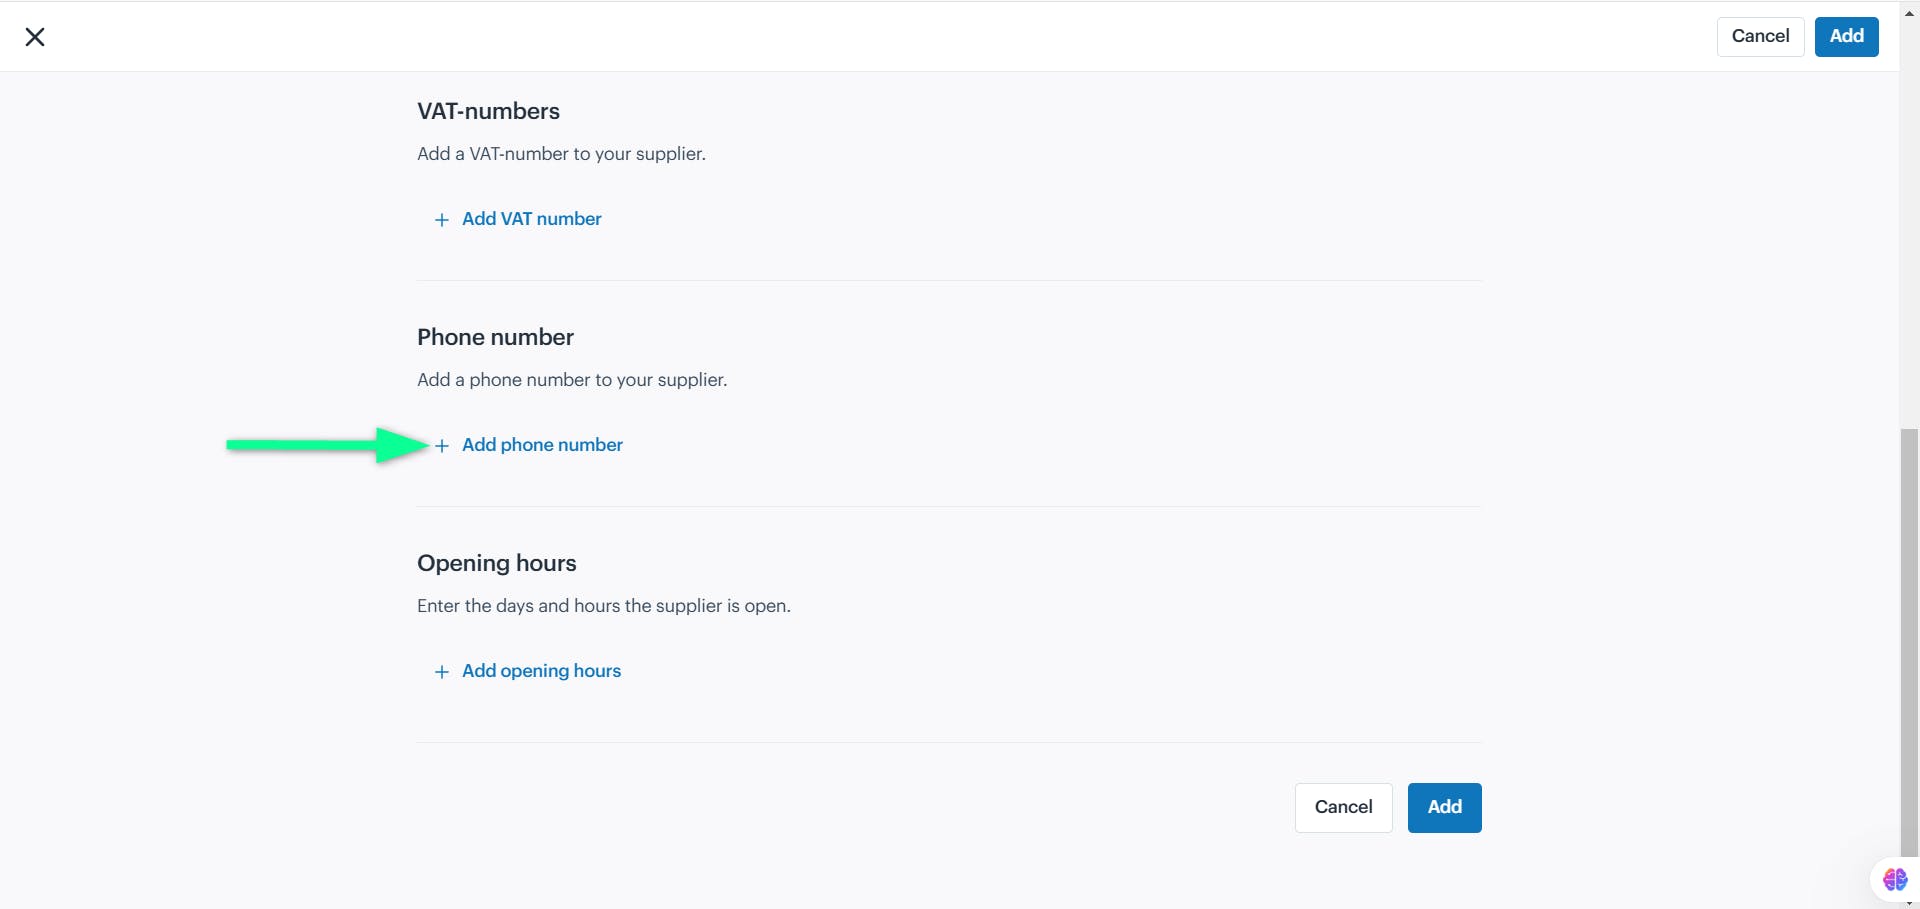
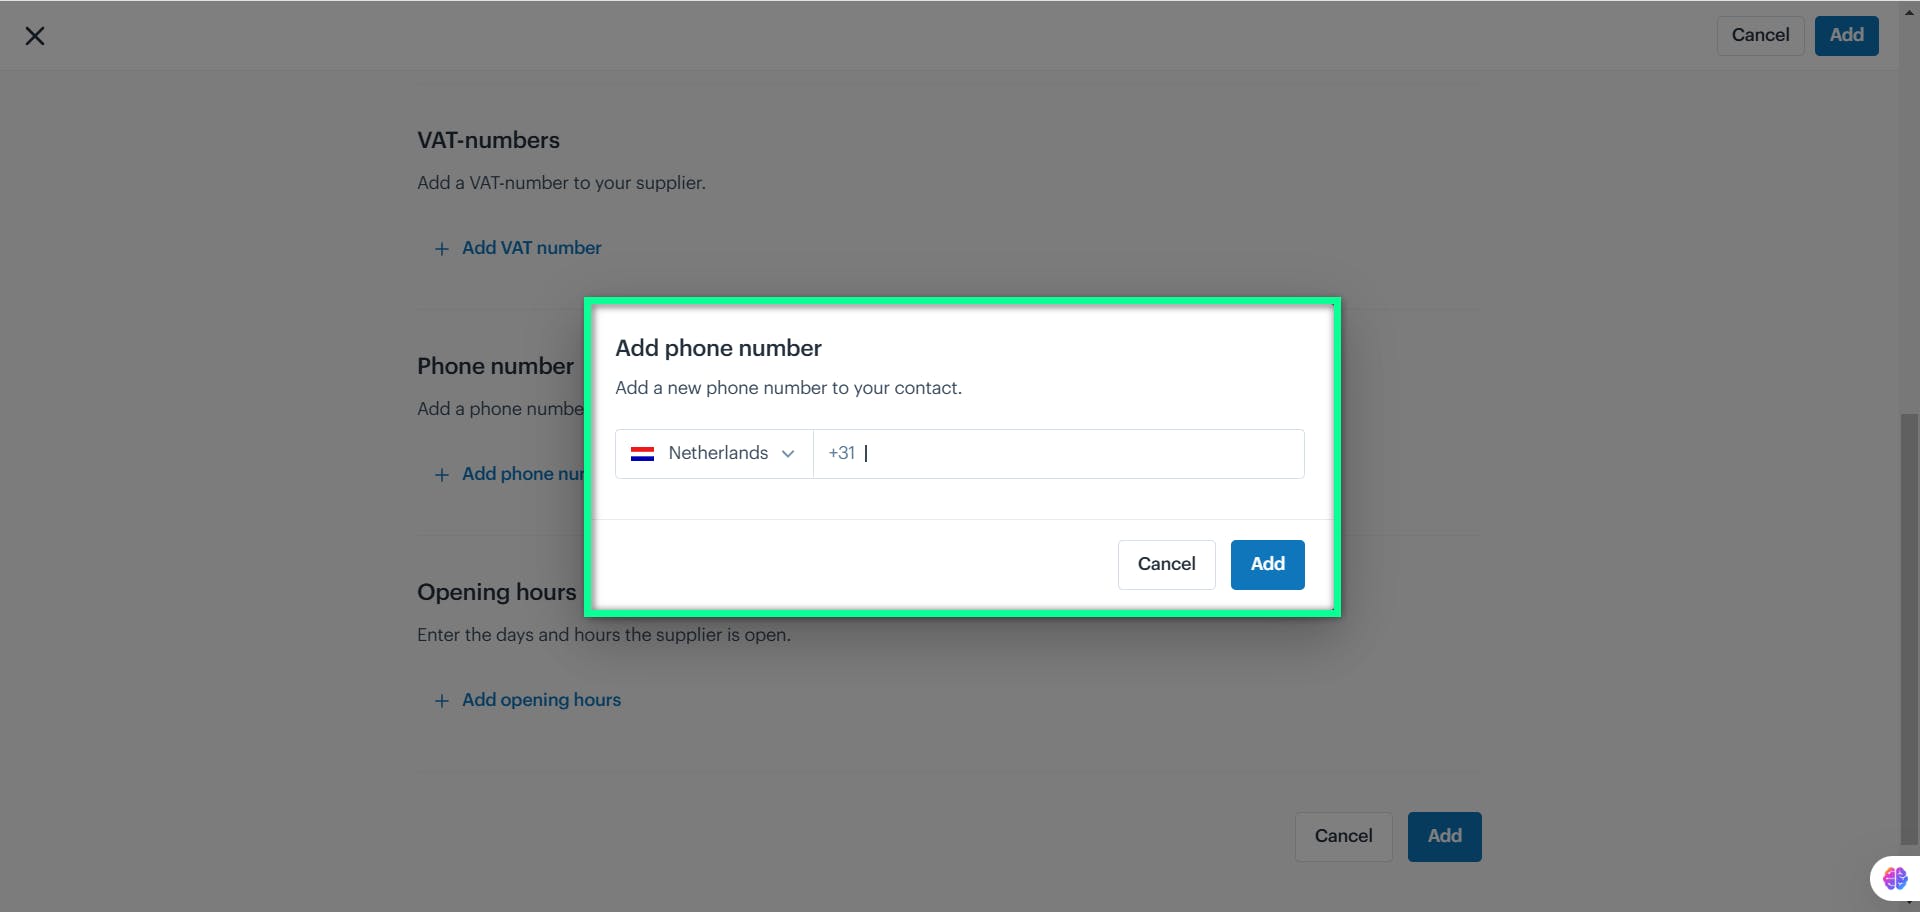
The Add Phone Number window will appear, allowing you to input a phone number.
Opening Hours
Click the "+Add opening hours" action button to set the business's regular operating days and times.
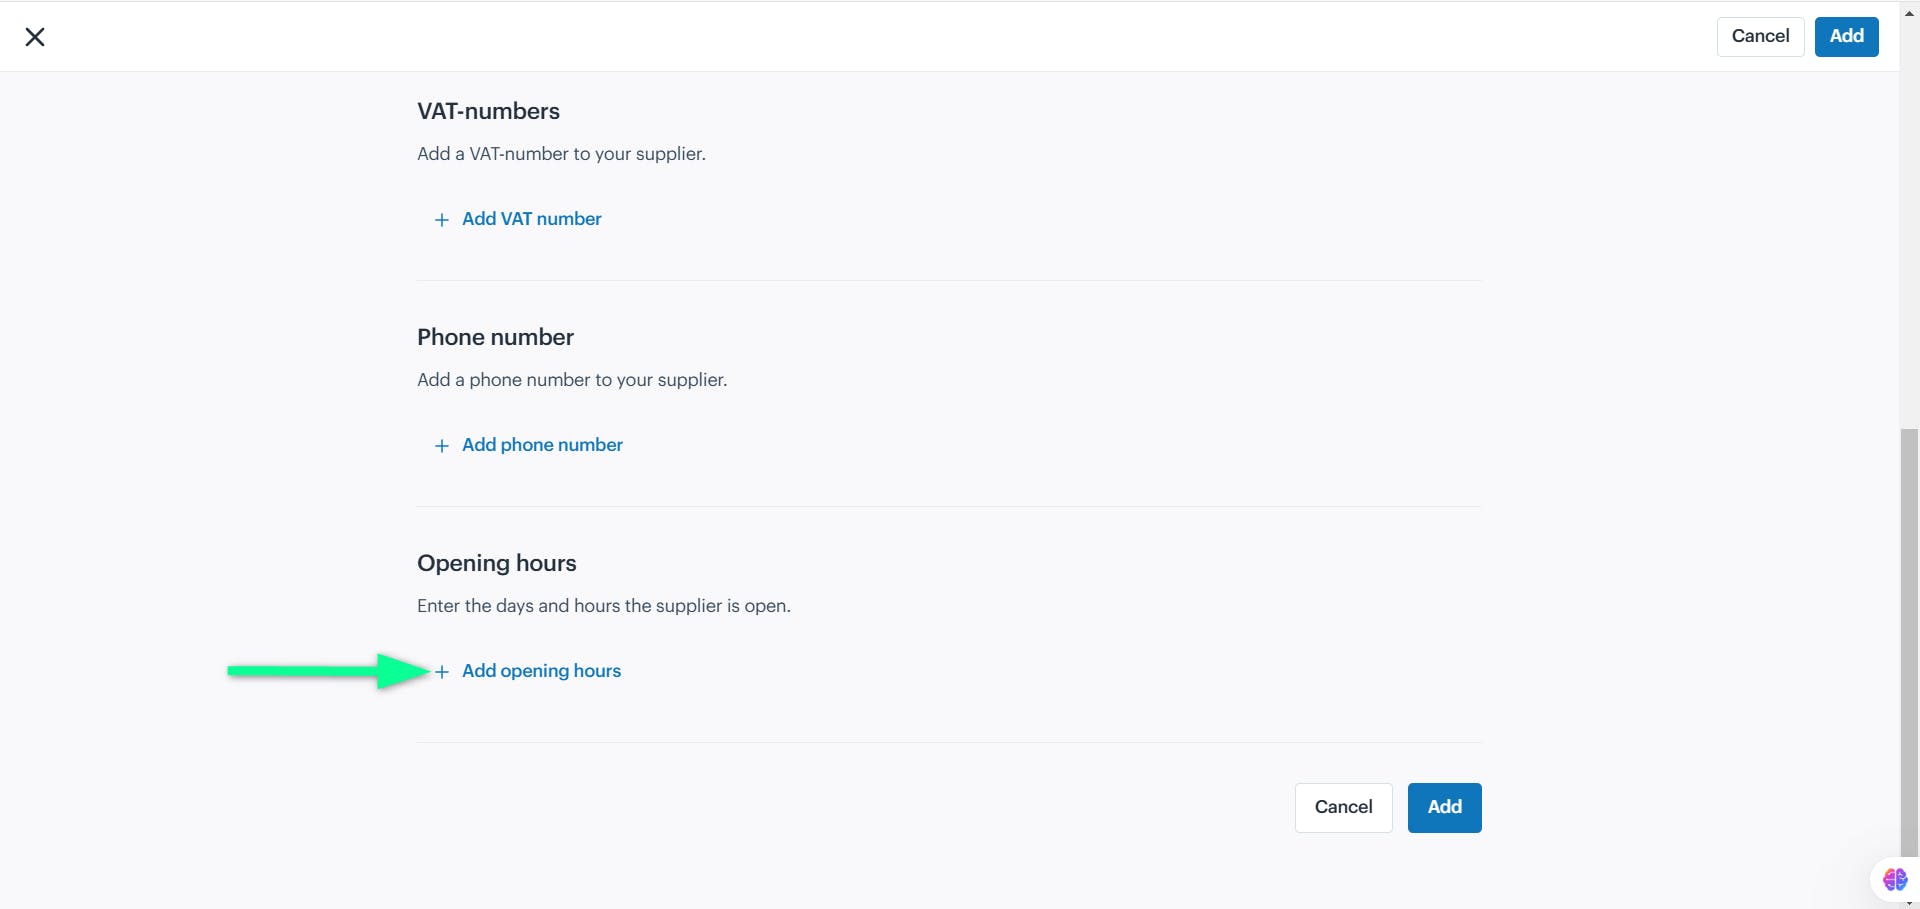
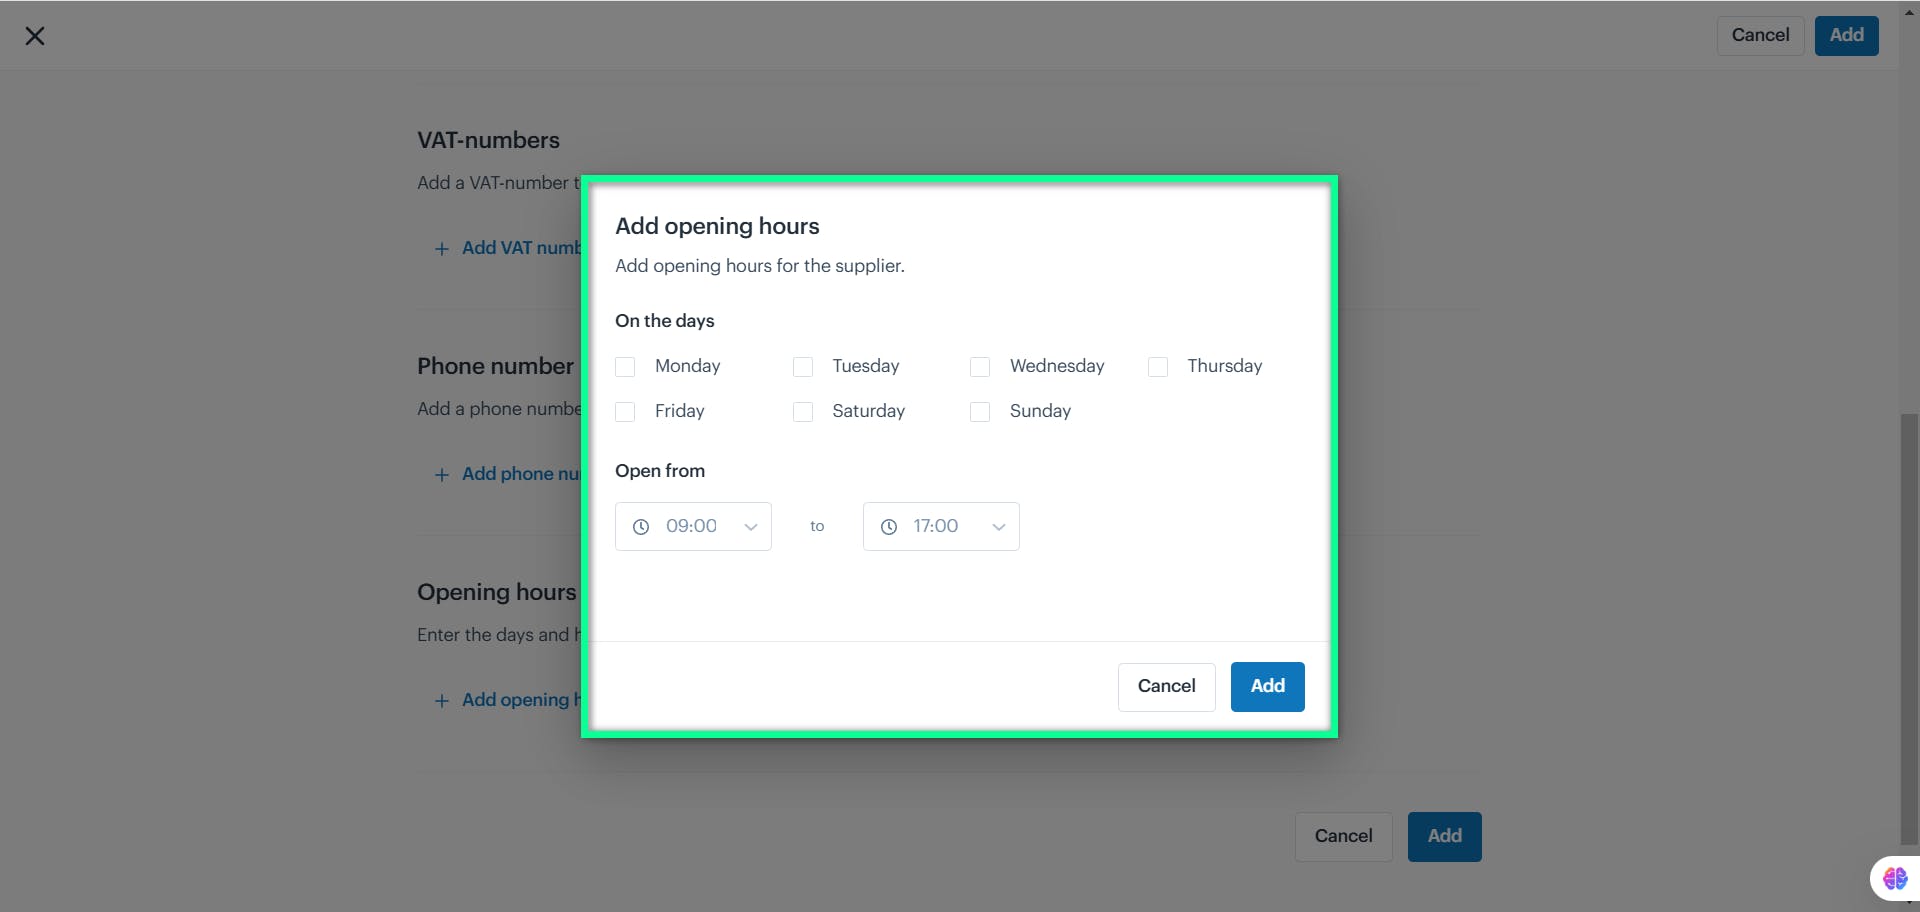
The "Add Opening Hours" window opens, letting you set the business's operating hours.
| Field | Description |
|---|---|
| On the Days | Select the operational days of the week by checking the corresponding boxes, e.g., Monday, Tuesday. |
| Open From | Specify the opening time using the dropdown menu for hours and minutes. |
| To | Specify the closing time using the dropdown menu for hours and minutes. |
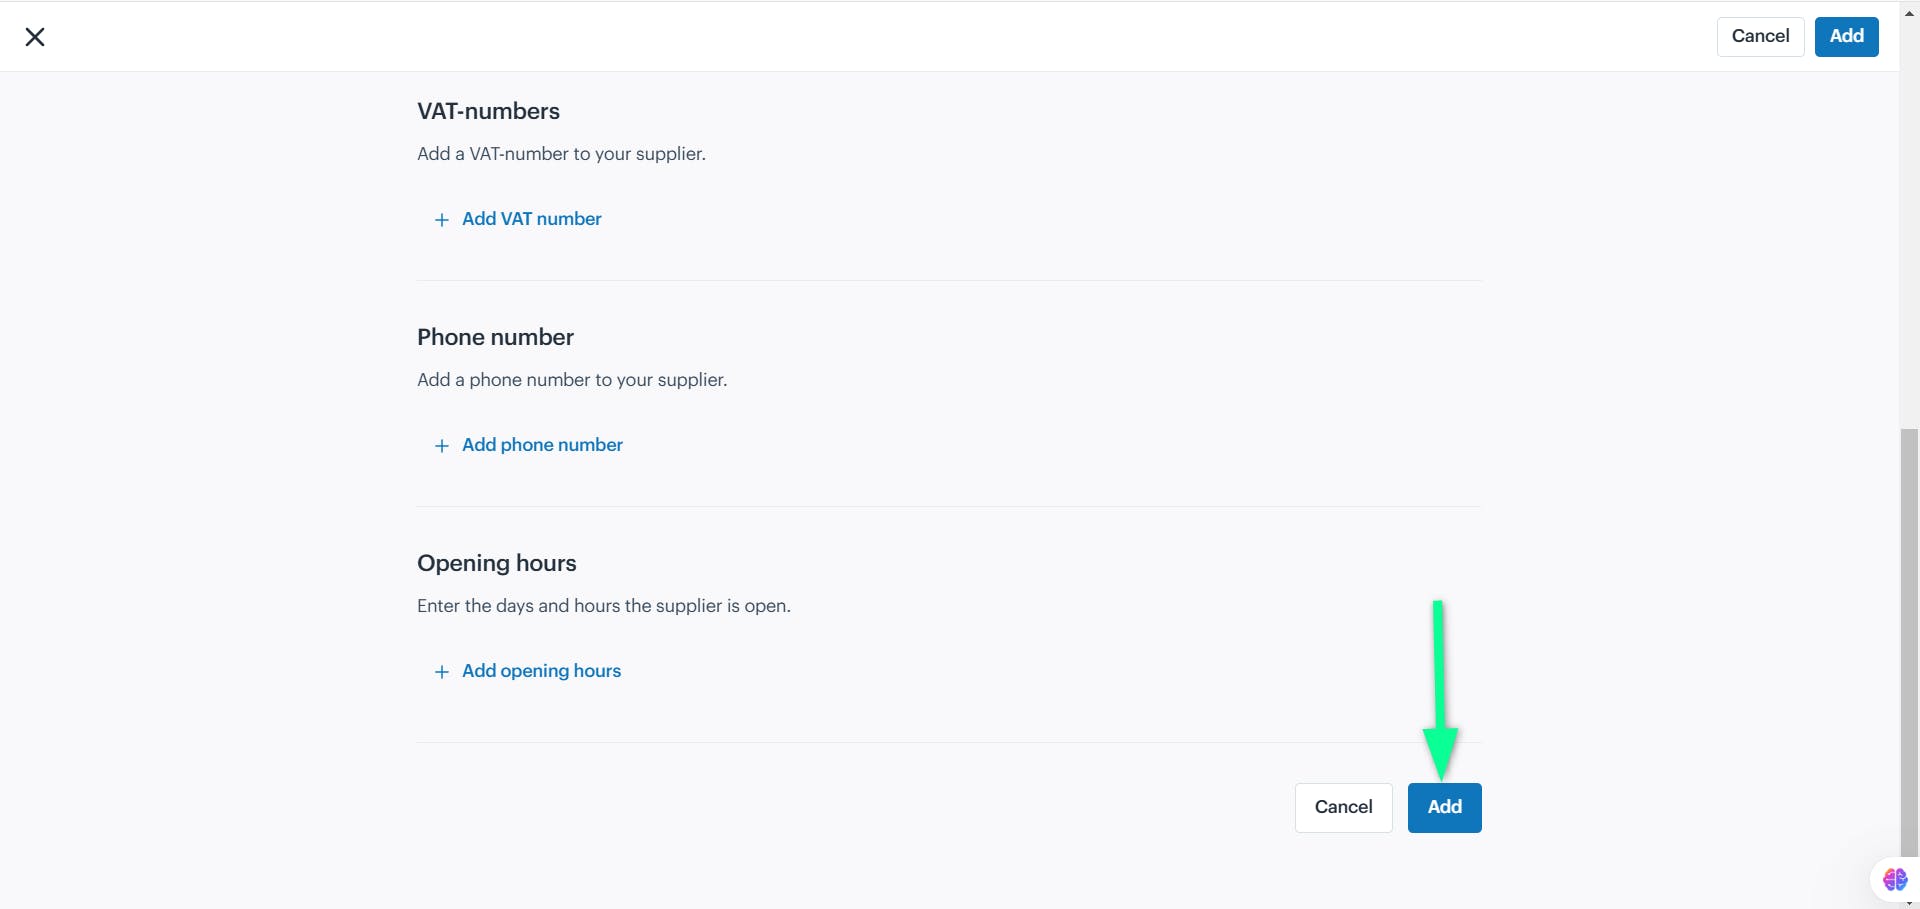
Click the "Add" button to save the Supplier details.
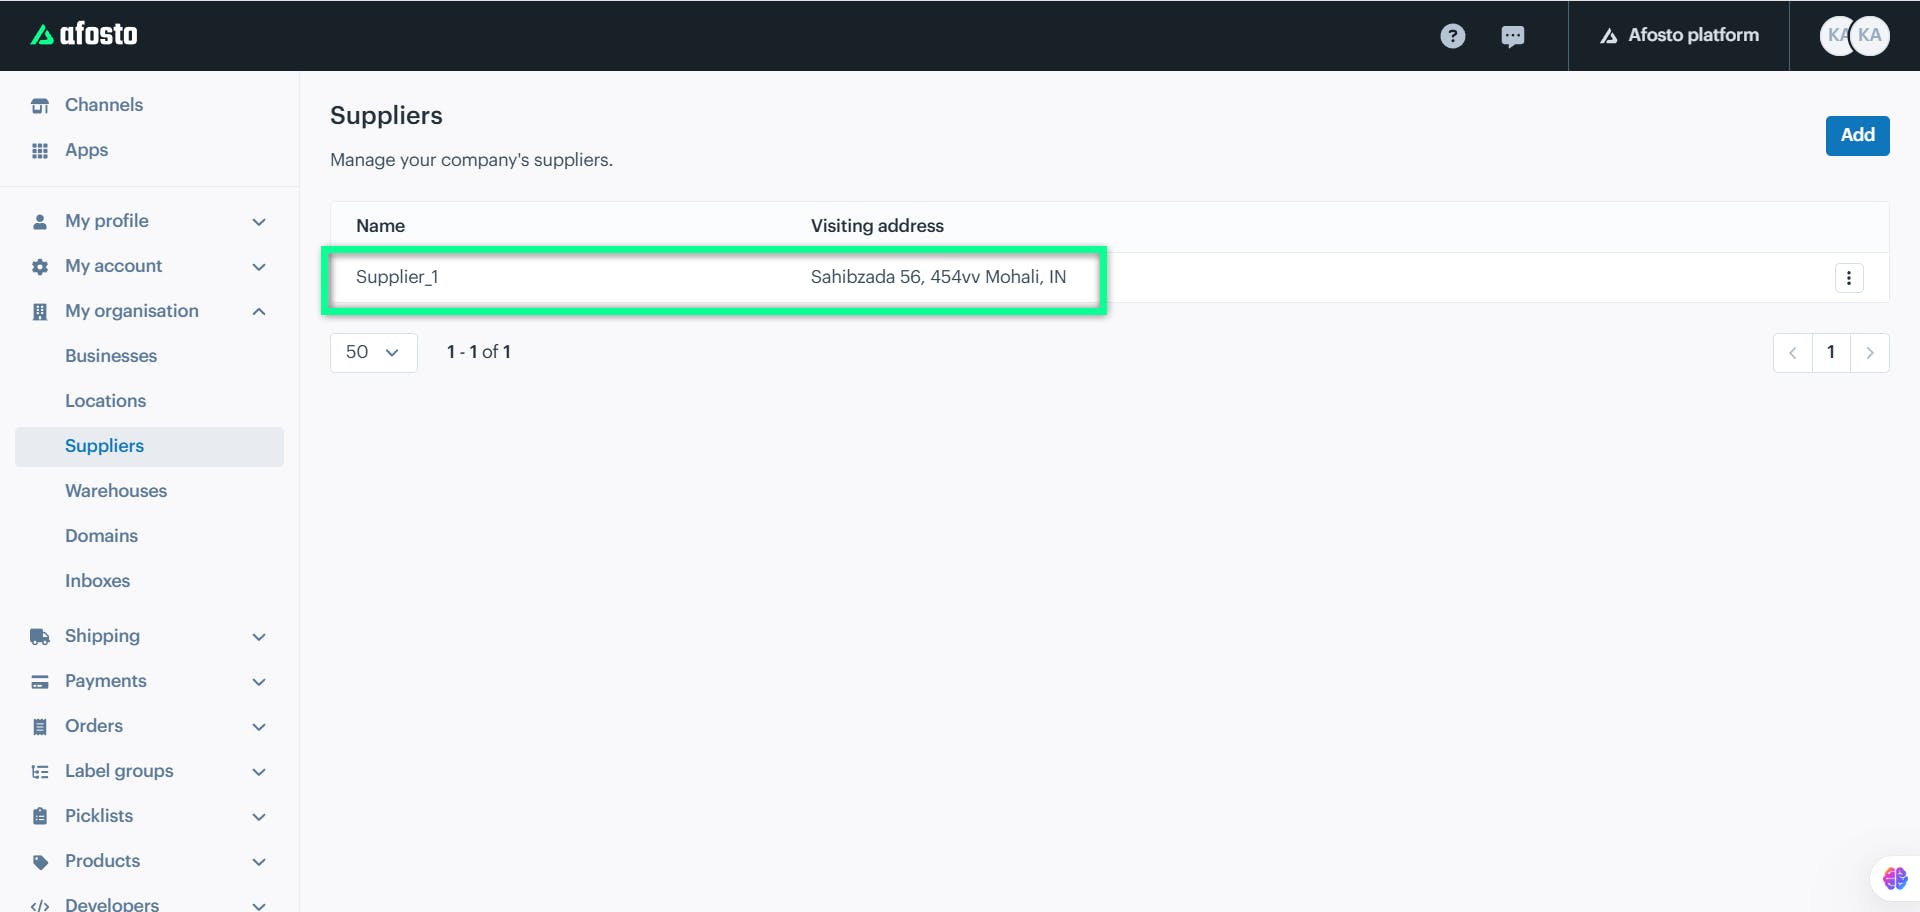
Supplier details will be added as a new entry on the Suppliers page
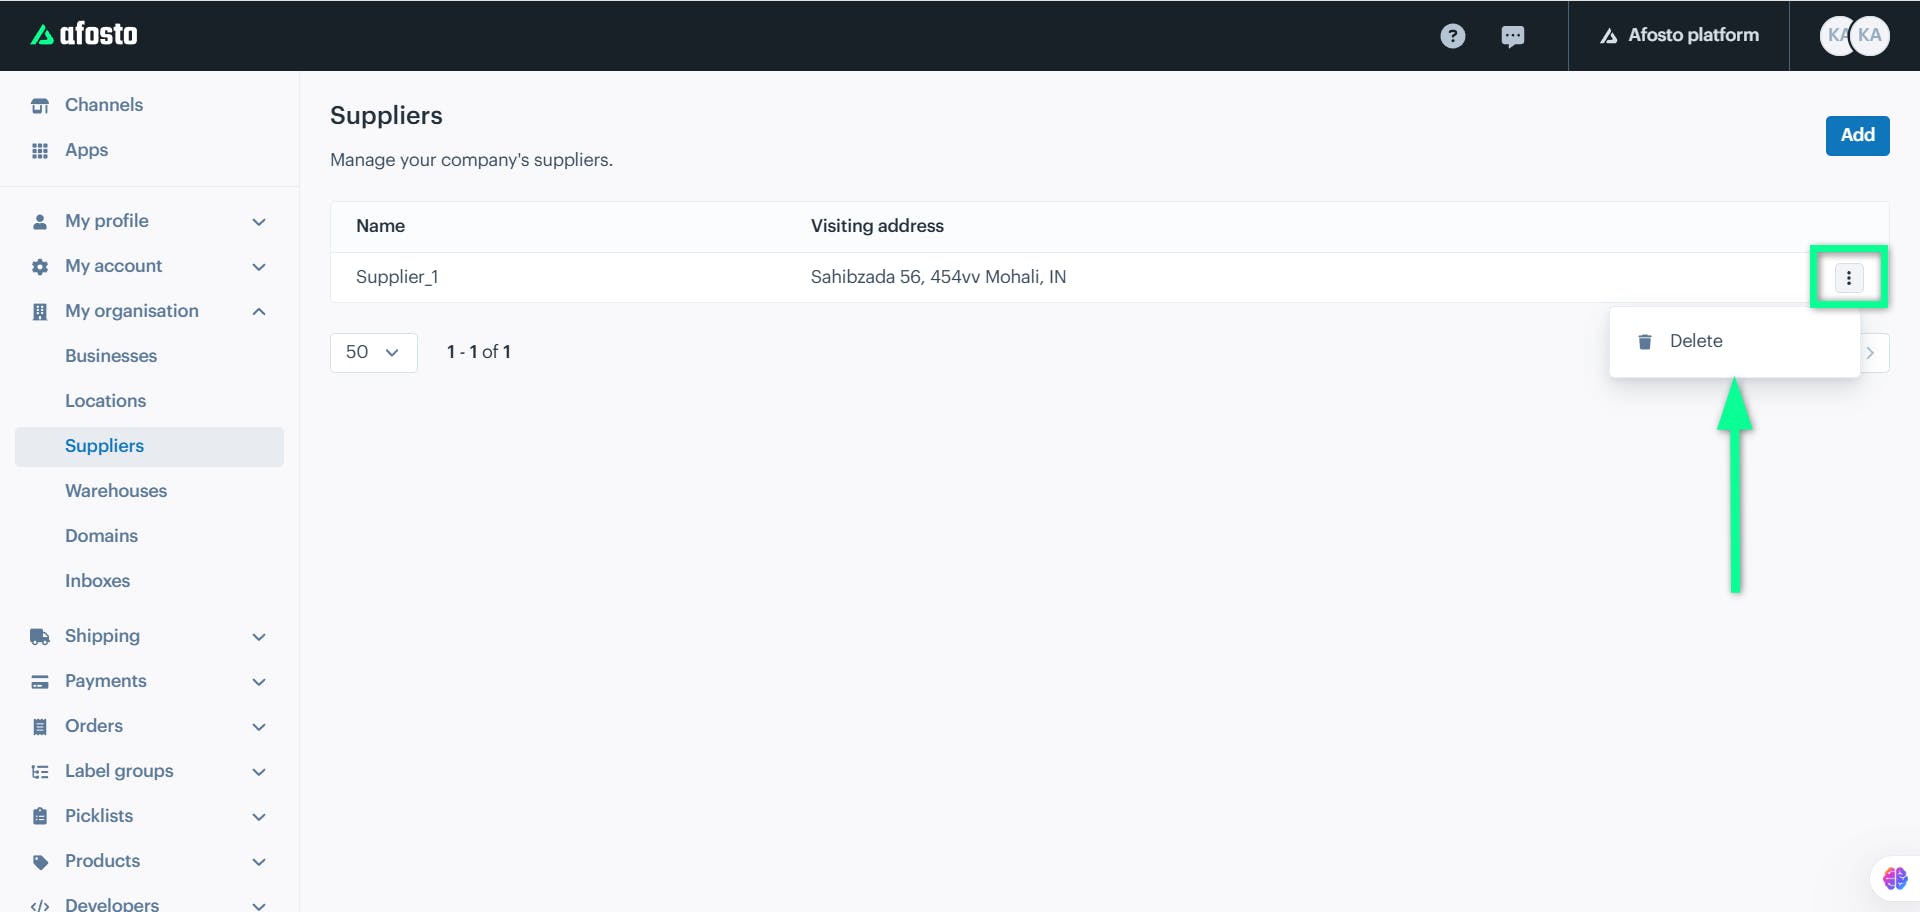
To delete a desired entry, click the ellipses icon (three dots) next to it and select the "Delete" option.
Warehouses
The Warehouses section manages inventory storage. A warehouse is linked to a location and is the place where your stock is stored. Warehouses can either be managed within Afosto or through an external system.
Why do I need this? Warehouses help you keep track of your stock. To add a warehouse, you need to first create a business and a location.
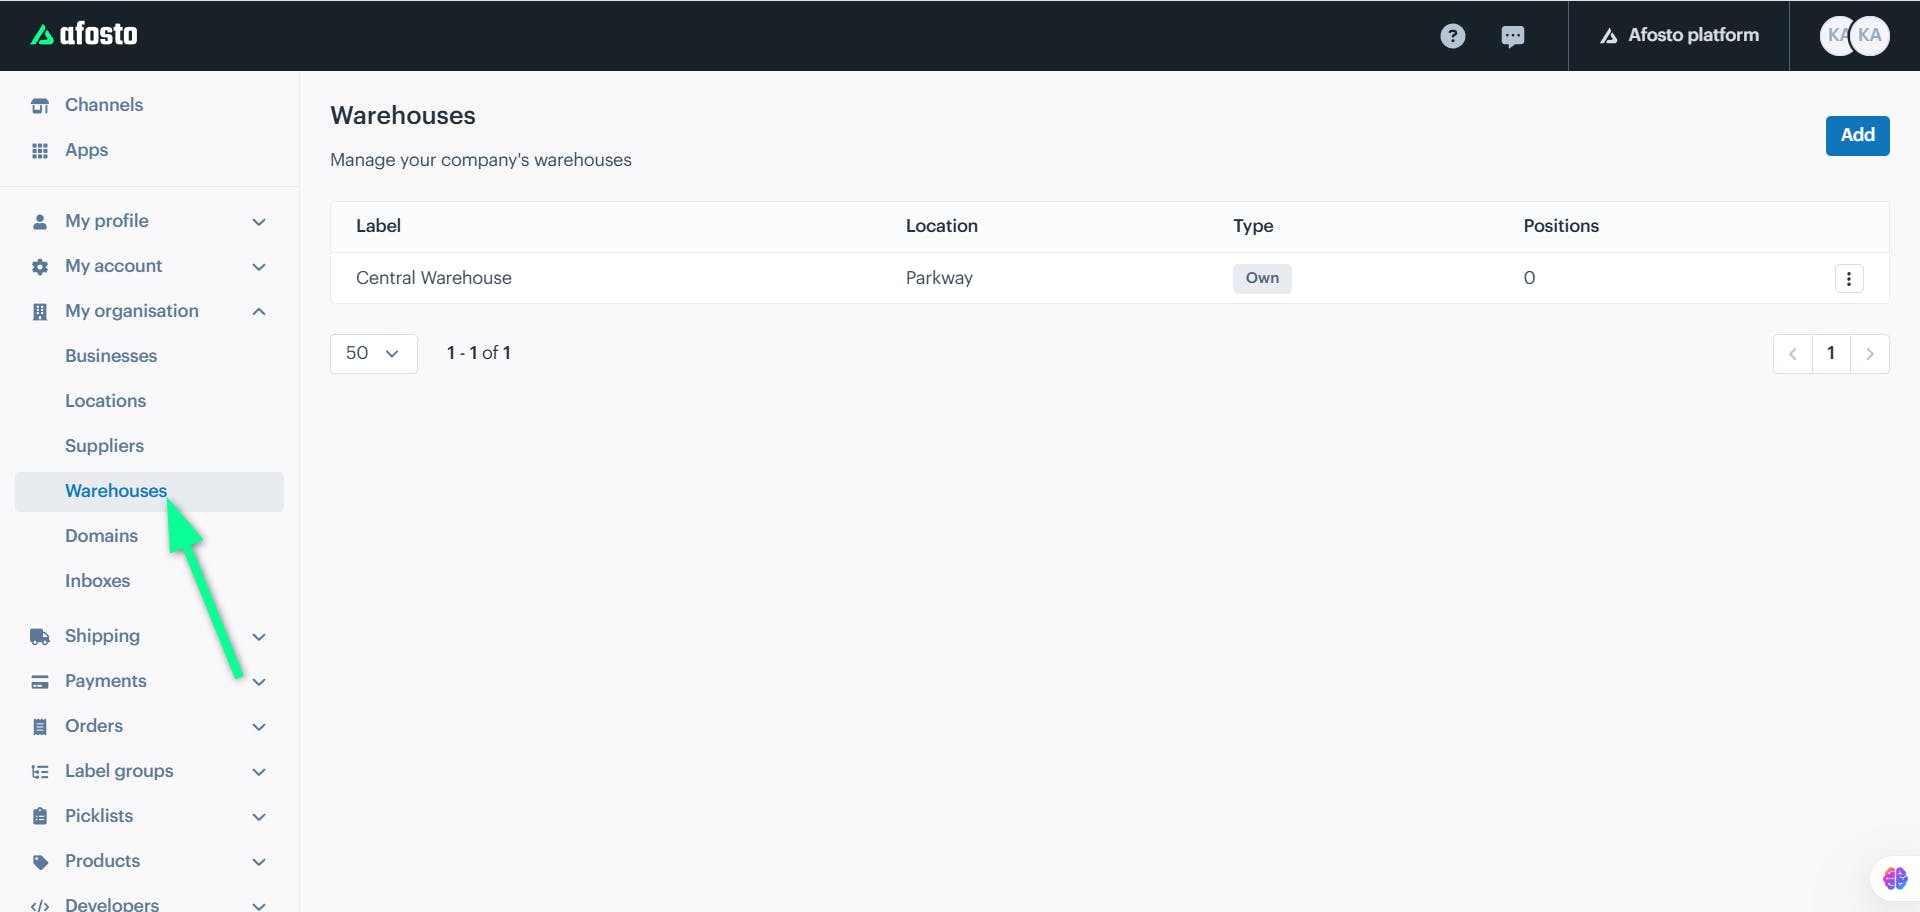
Click the “Warehouses” module from the left sidebar of the Afosto screen.
Click the "Add" button on the top-right corner of the screen.
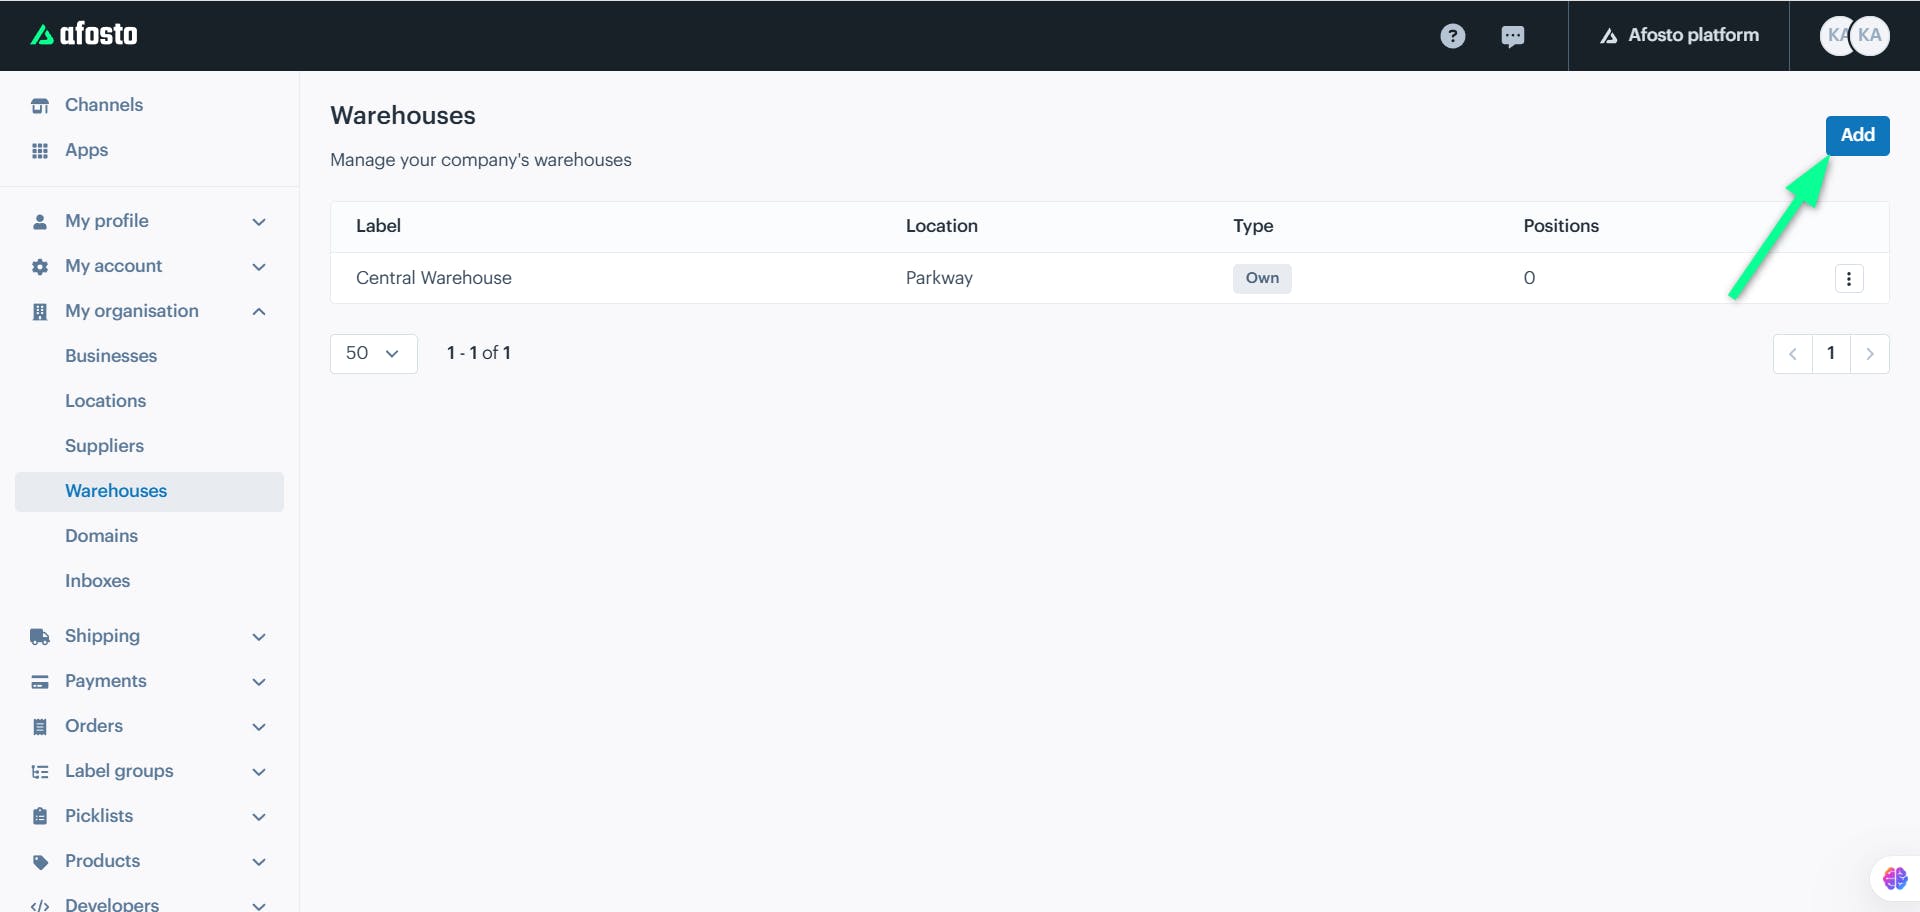
A new screen opens for creating a warehouse, allowing you the following input details:
-
Warehouse Name
-
Location
-
Manage Warehouse
-
Default Settings
-
Businesses
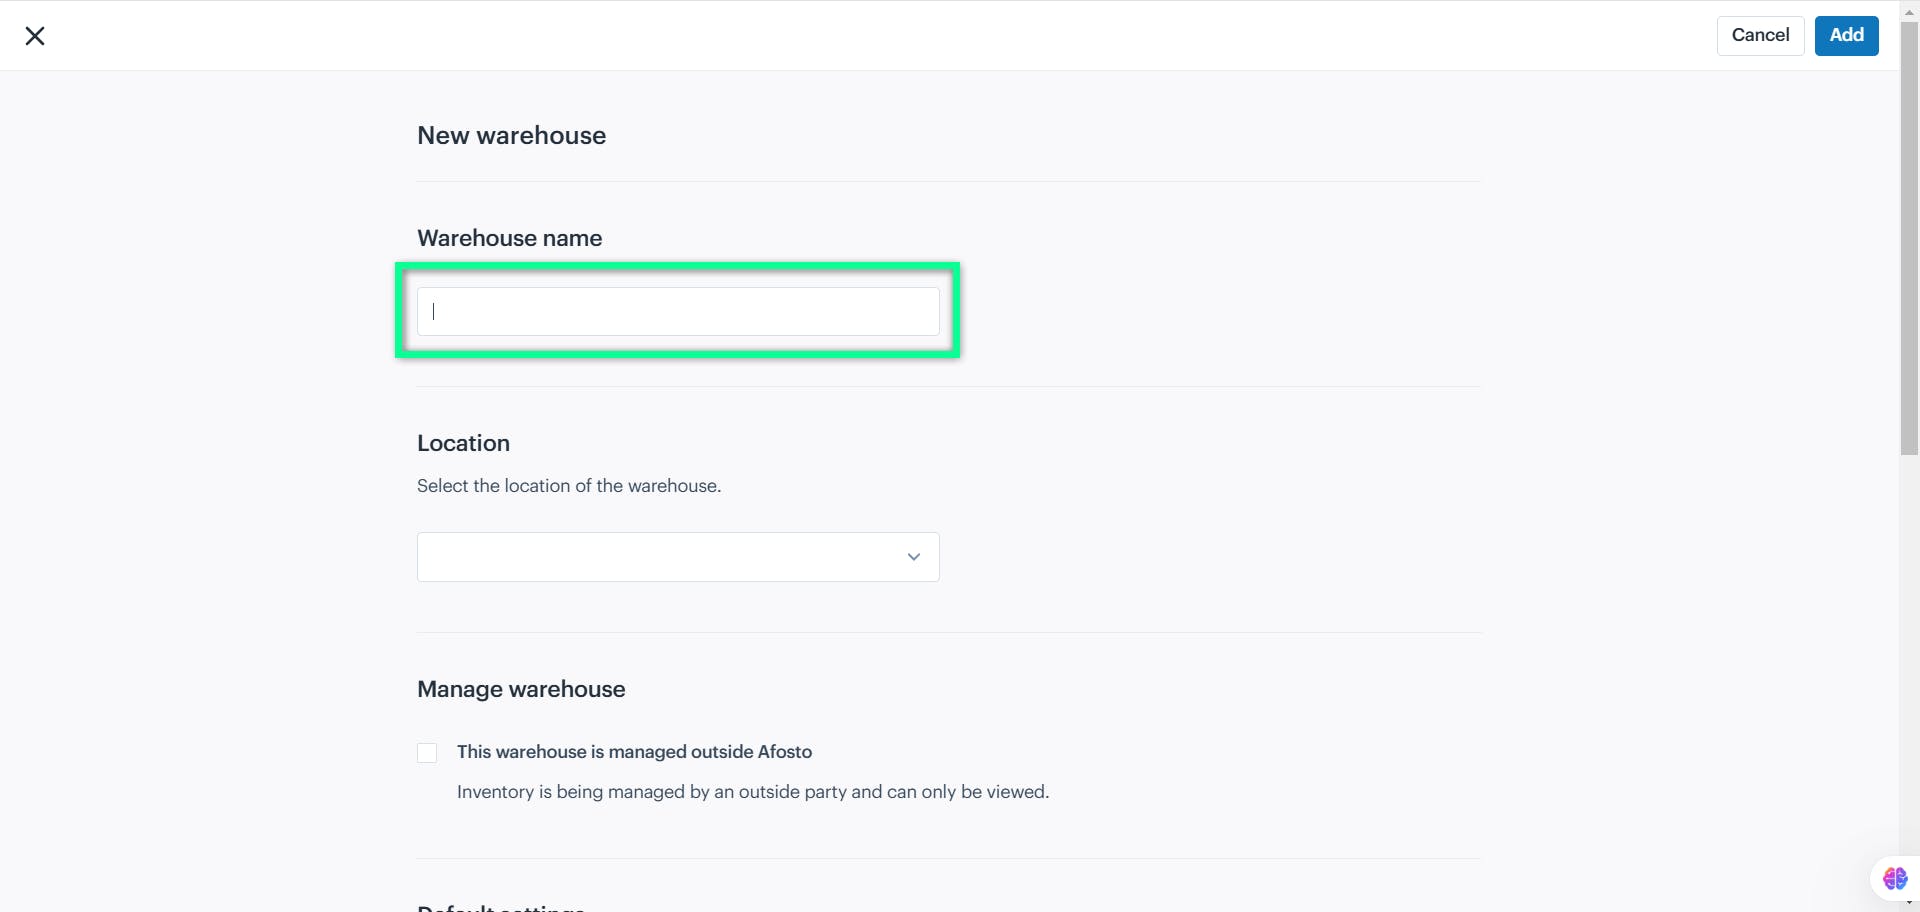
Warehouse Name
Enter the name of the warehouse.
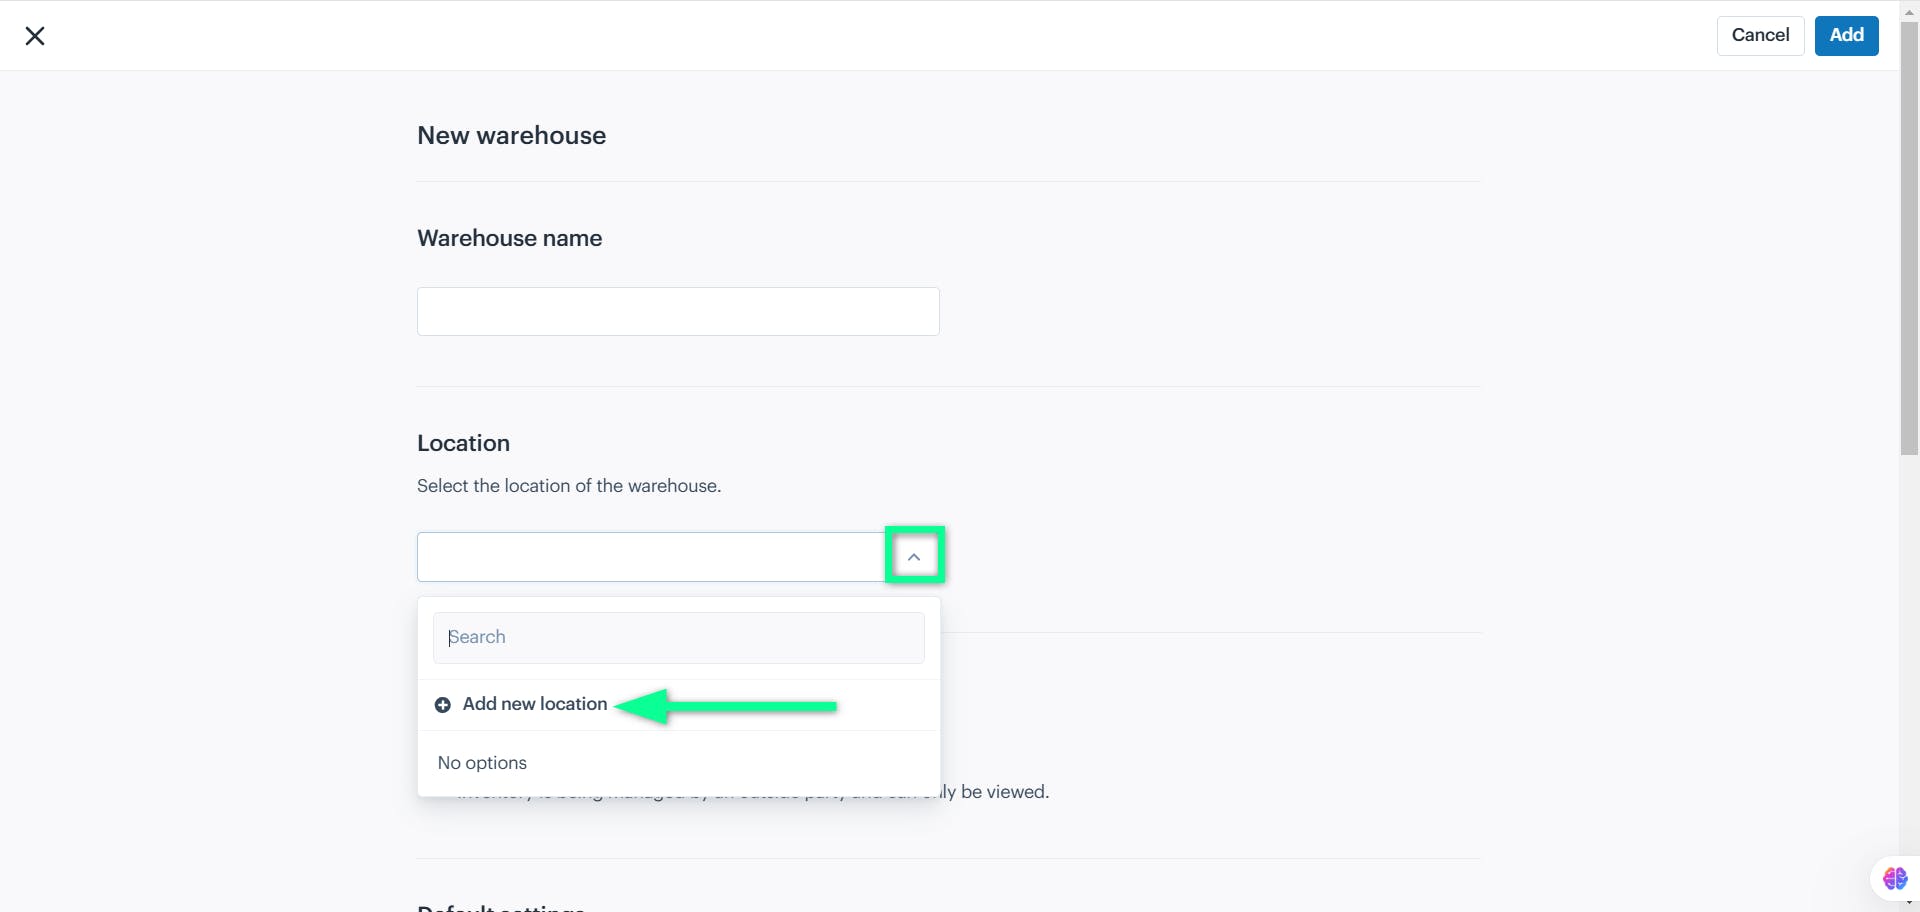
Location
Select the warehouse's location from the dropdown and click the “+ Add new location” action button to input a new address.
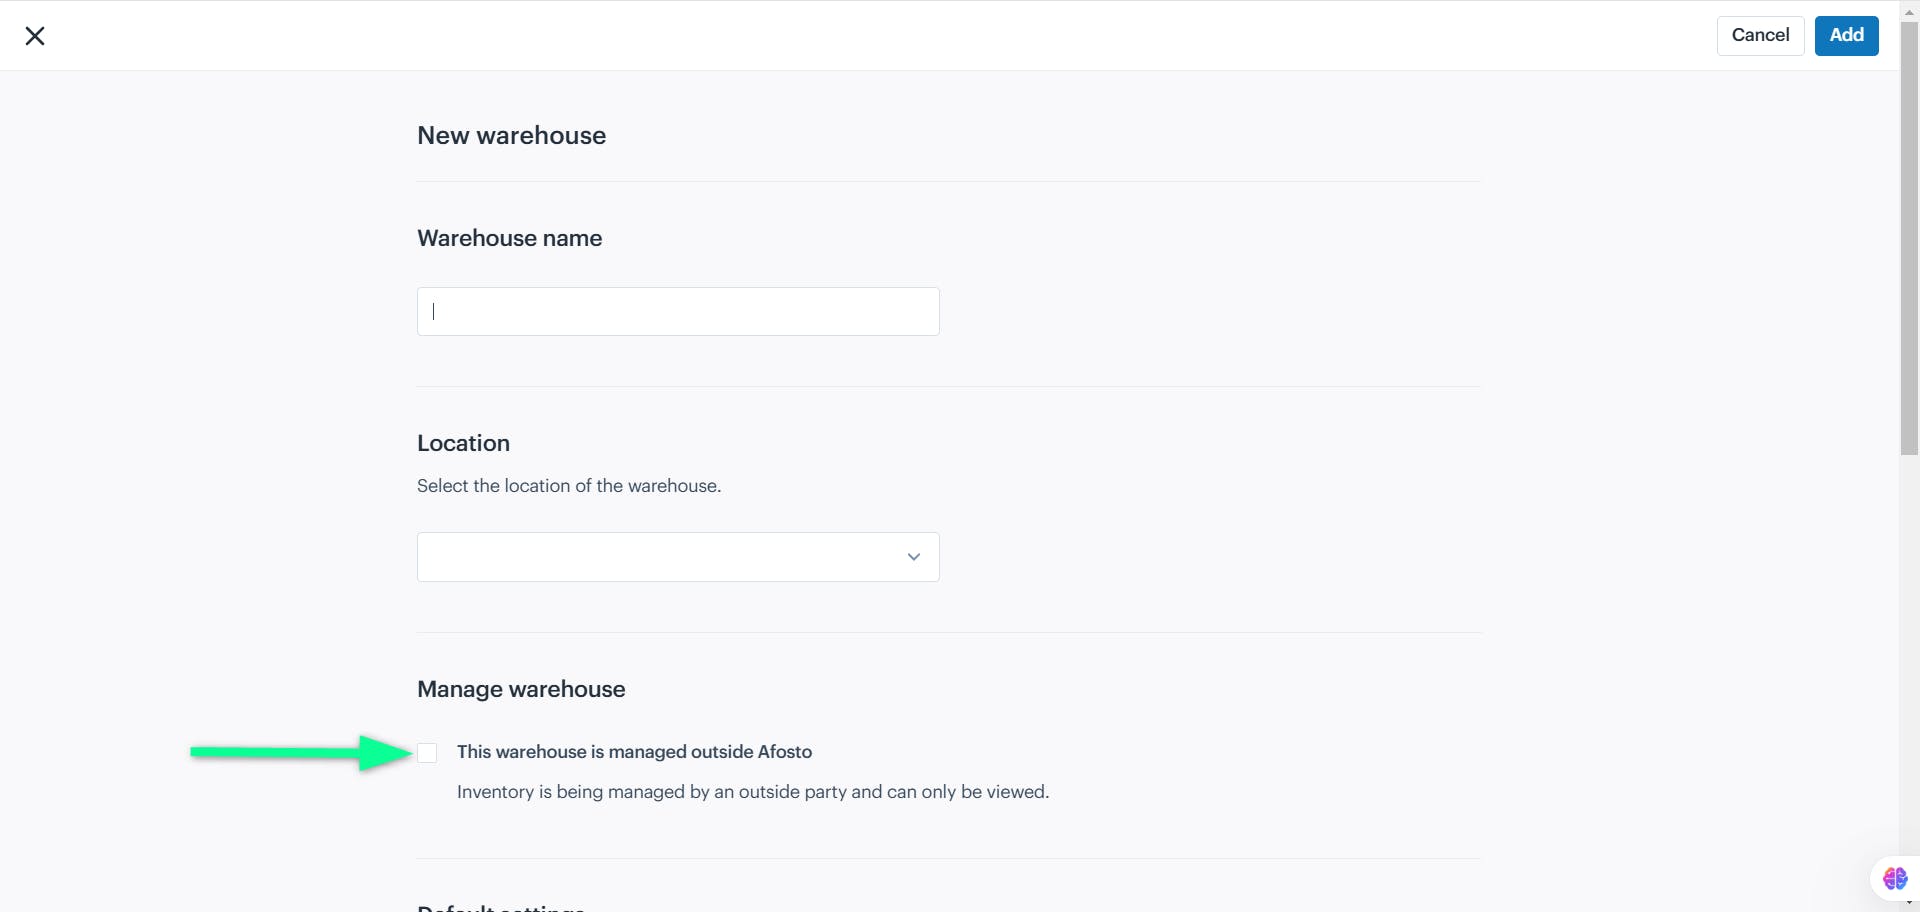
Manage Warehouse
Check the box “If the warehouse is managed outside Afosto” whichmeans inventory can only be viewed but not managed.
Default Settings
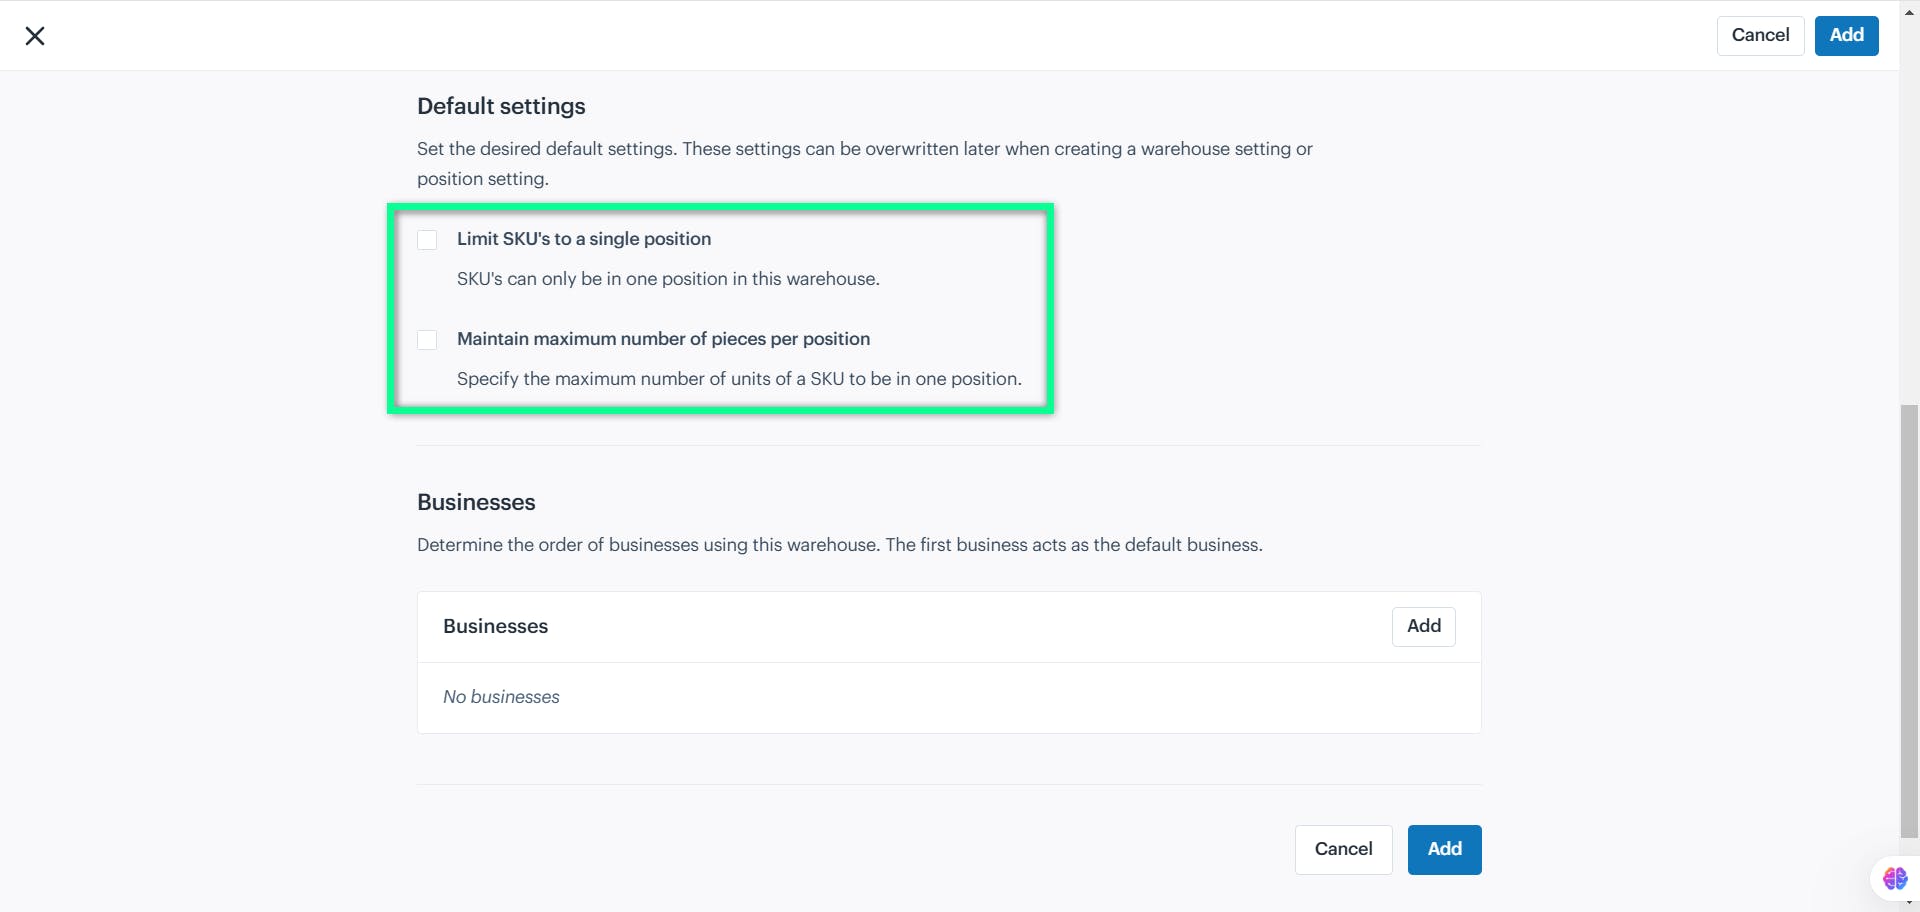
The Default Settings in the warehouse screen provide options to manage inventory efficiently:
Limit SKUs to a Single Position: Ensures each SKU (stock-keeping unit) is stored in only one designated position within the warehouse to avoid duplication.
Maintain Maximum Number of Pieces per Position: Allows you to specify a limit on the number of units of an SKU that can be stored in a single position, ensuring better space utilization and organization.
Businesses
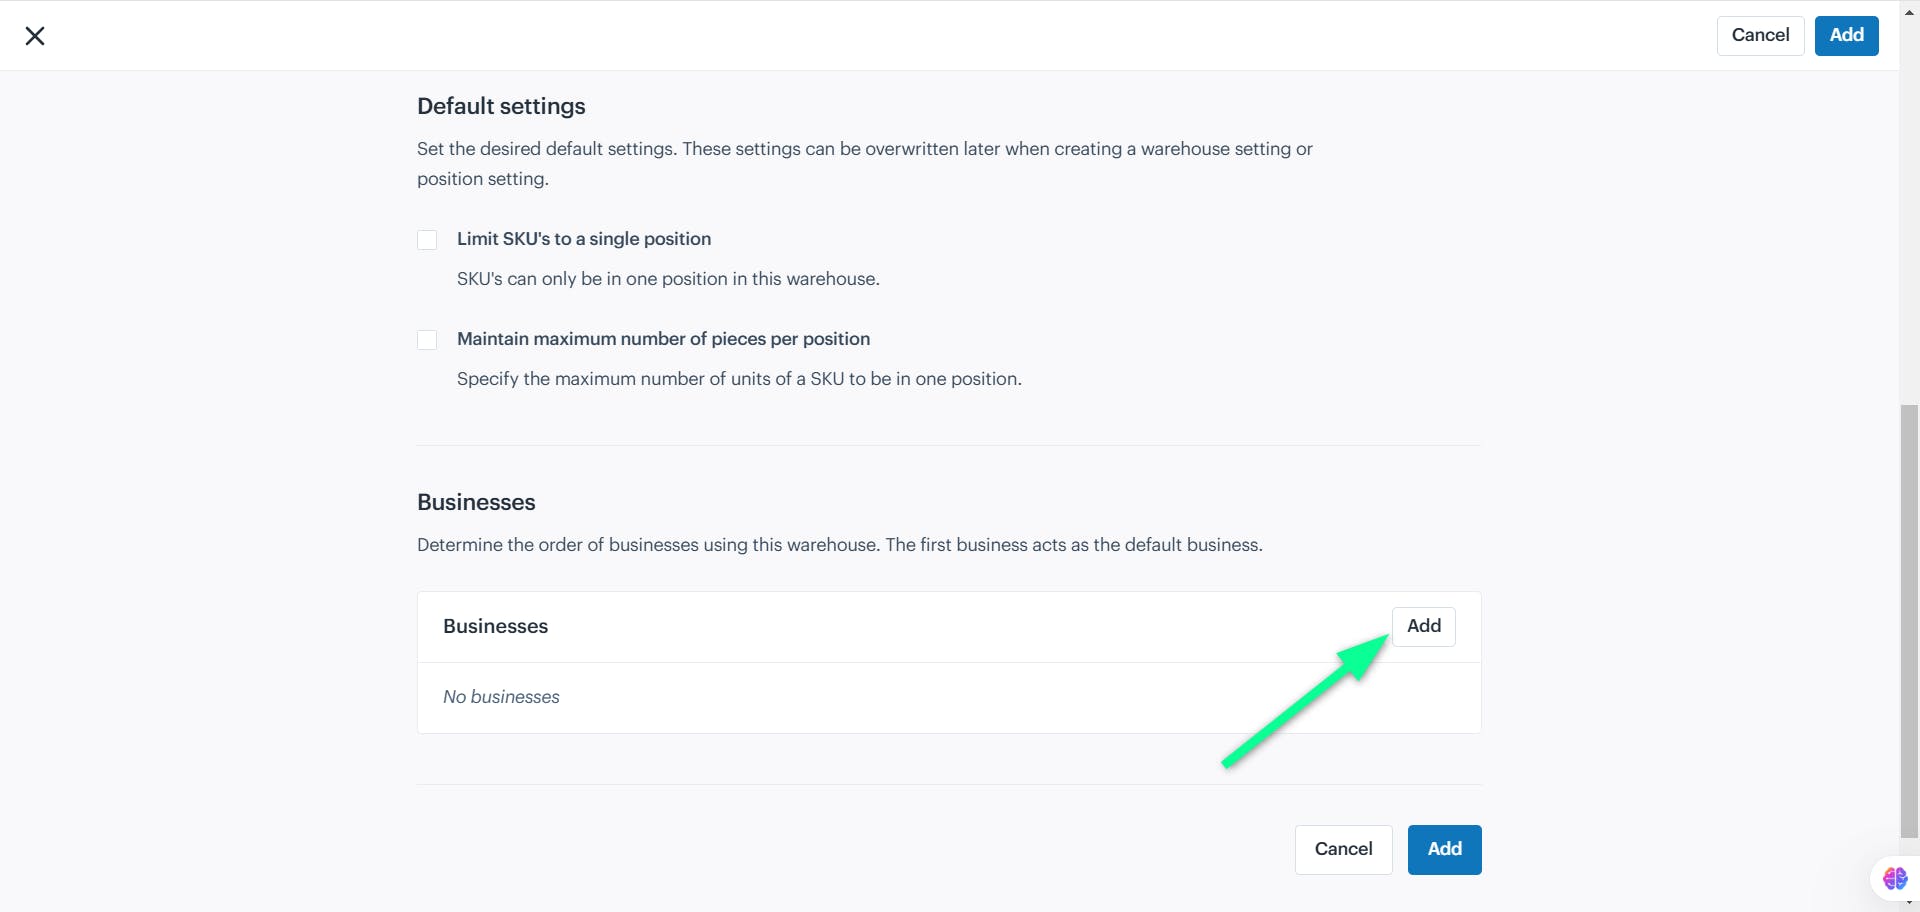
Click the “Add” button on the right side.
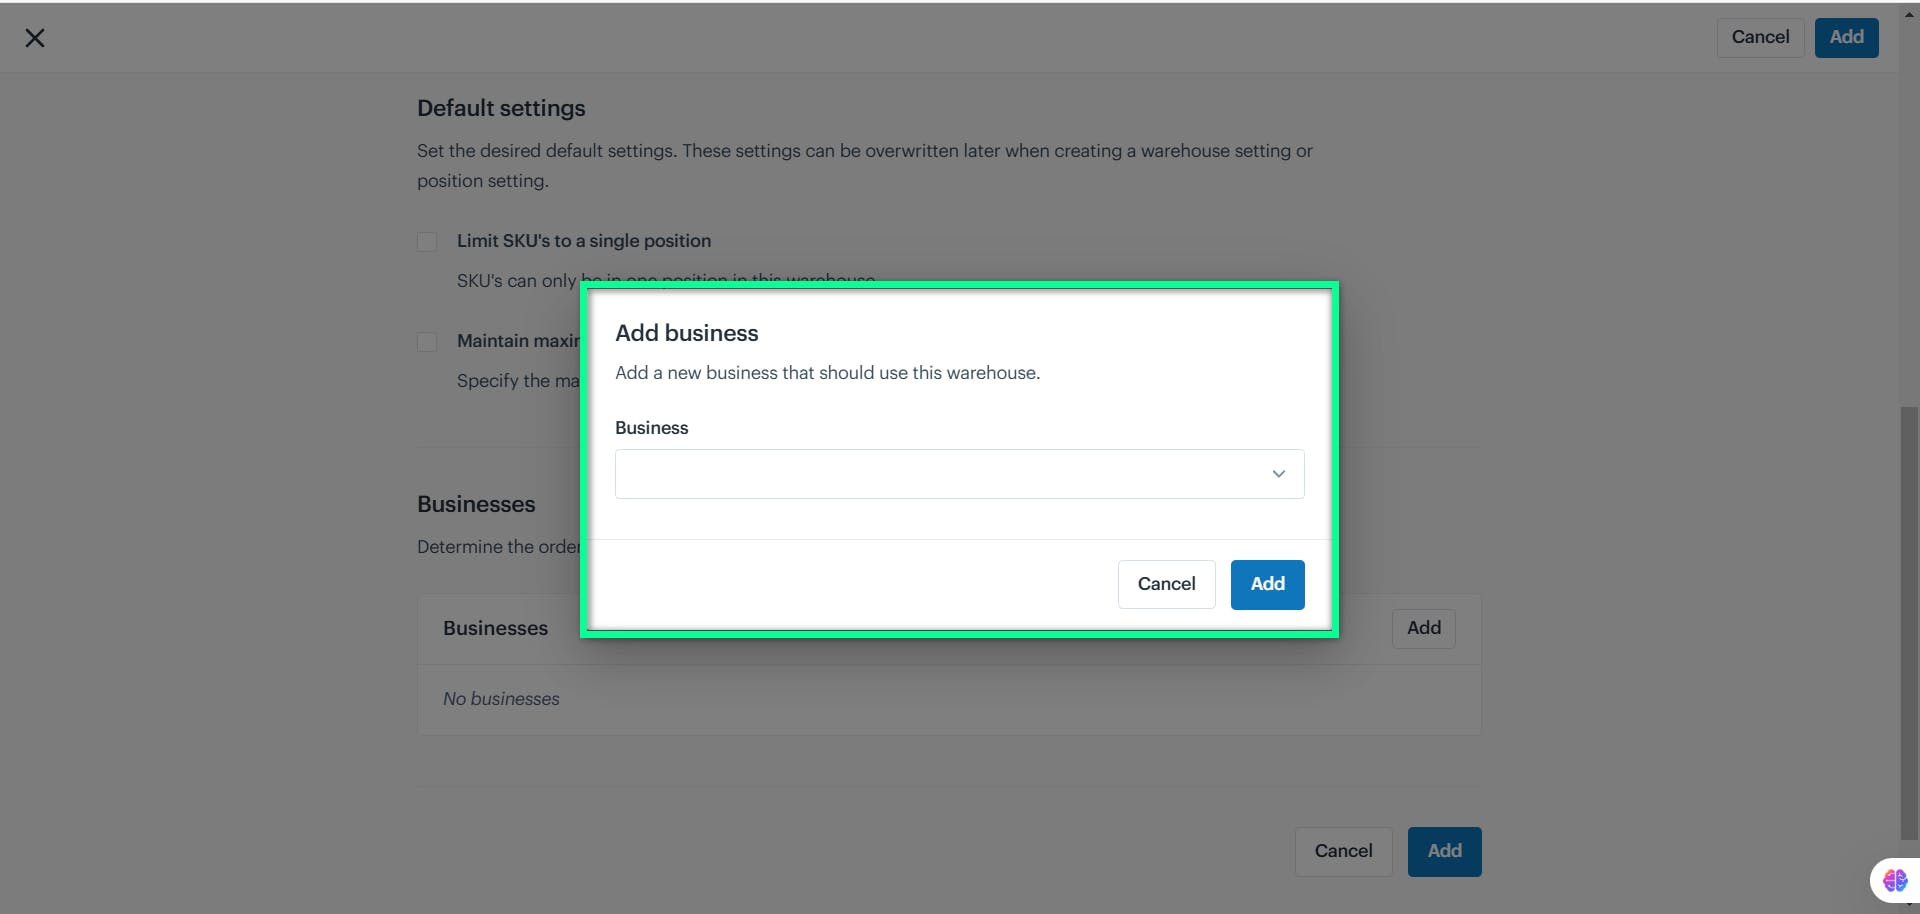
A new business window will appear. Select a business from the dropdown list and click "Add" to link the business to the warehouse.
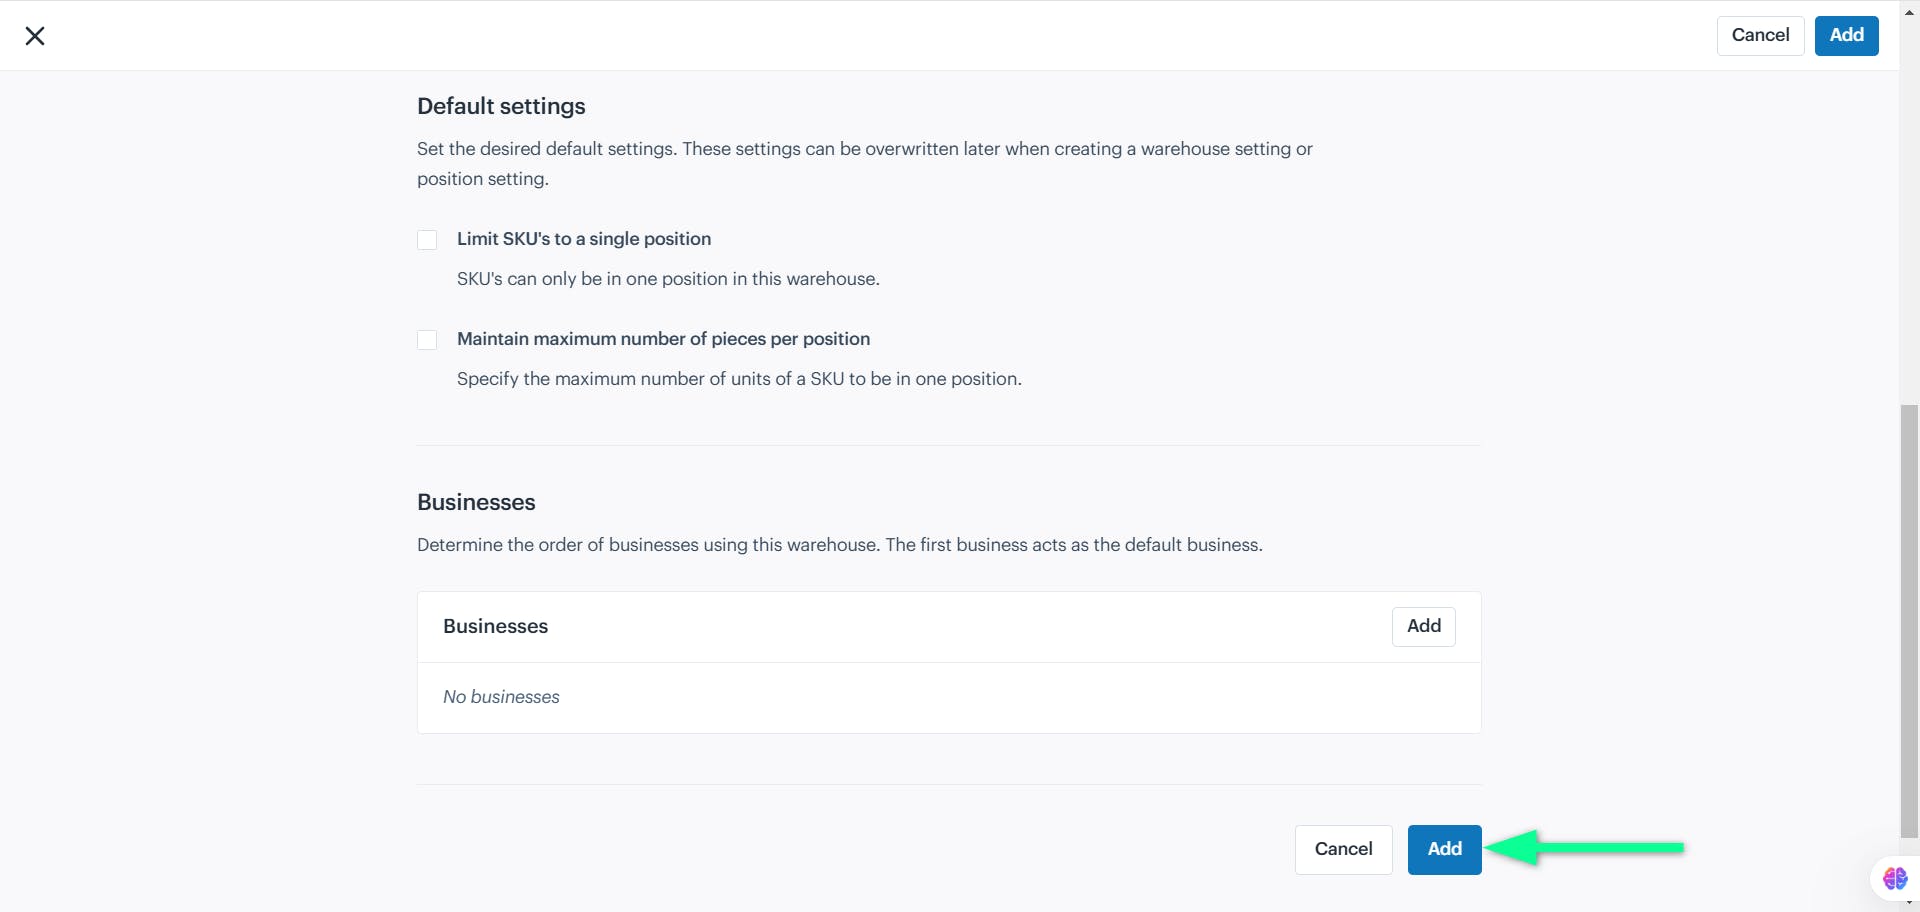
Click the "Add" button to save the warehouse details.
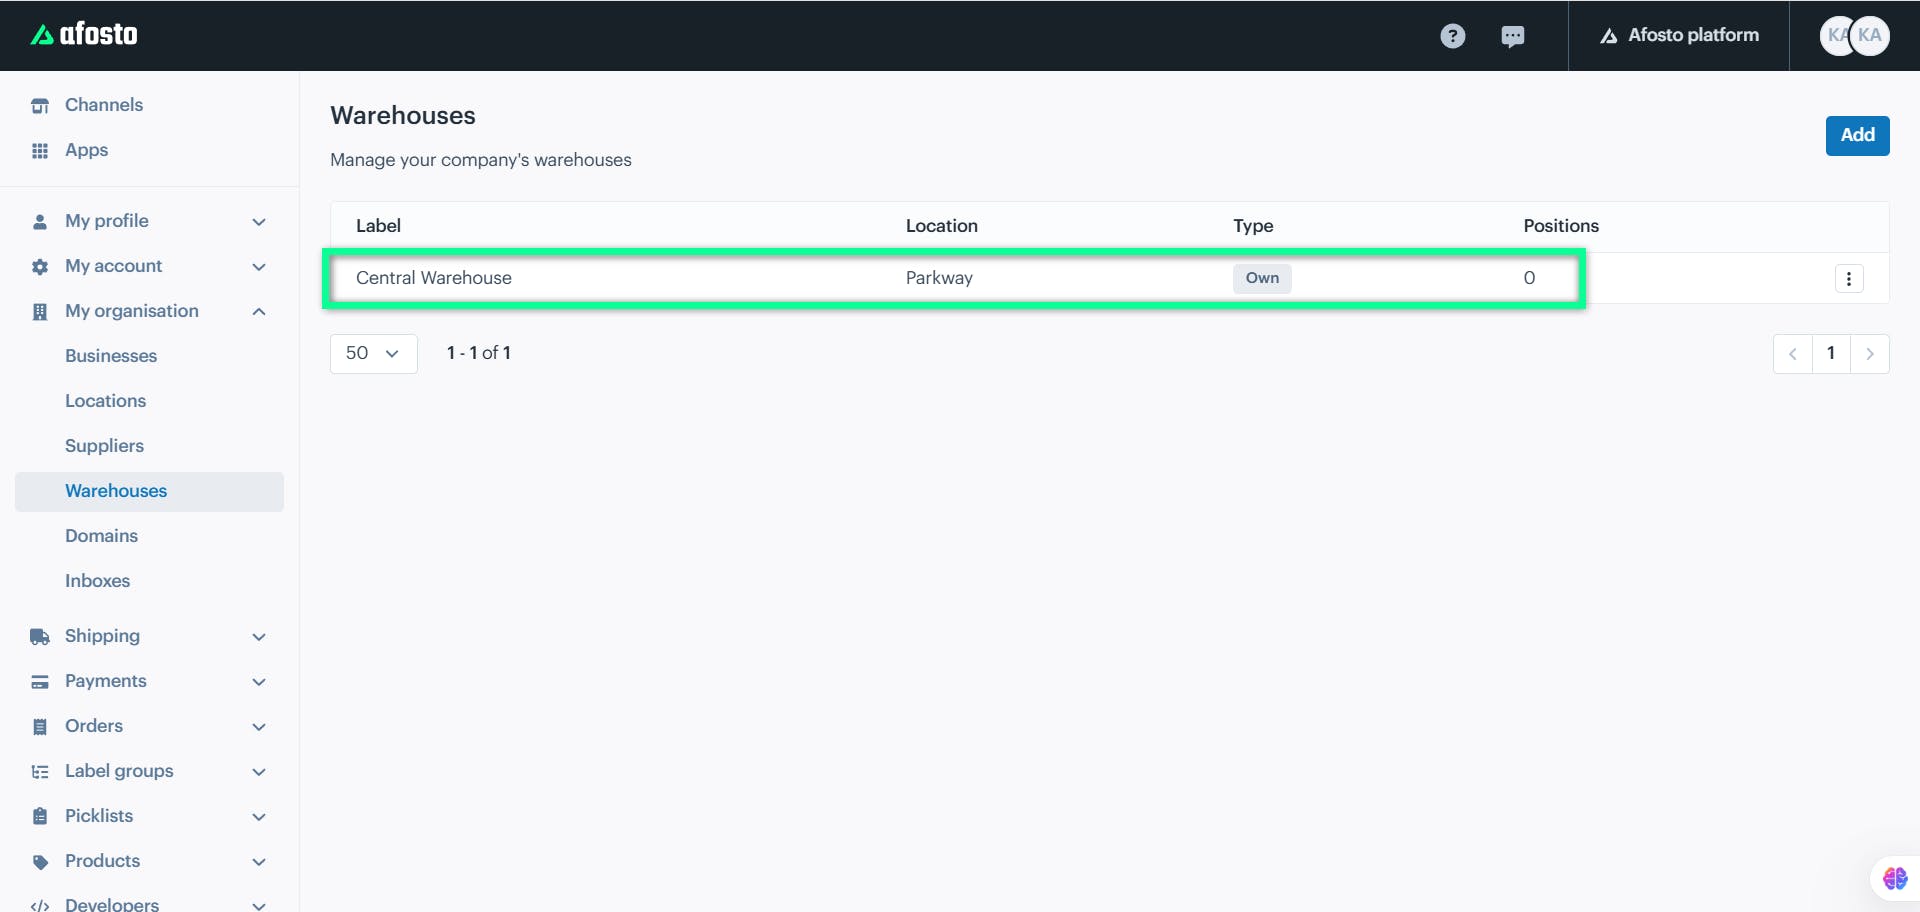
Warehouse details will be added as a new entry on the Warehouses page
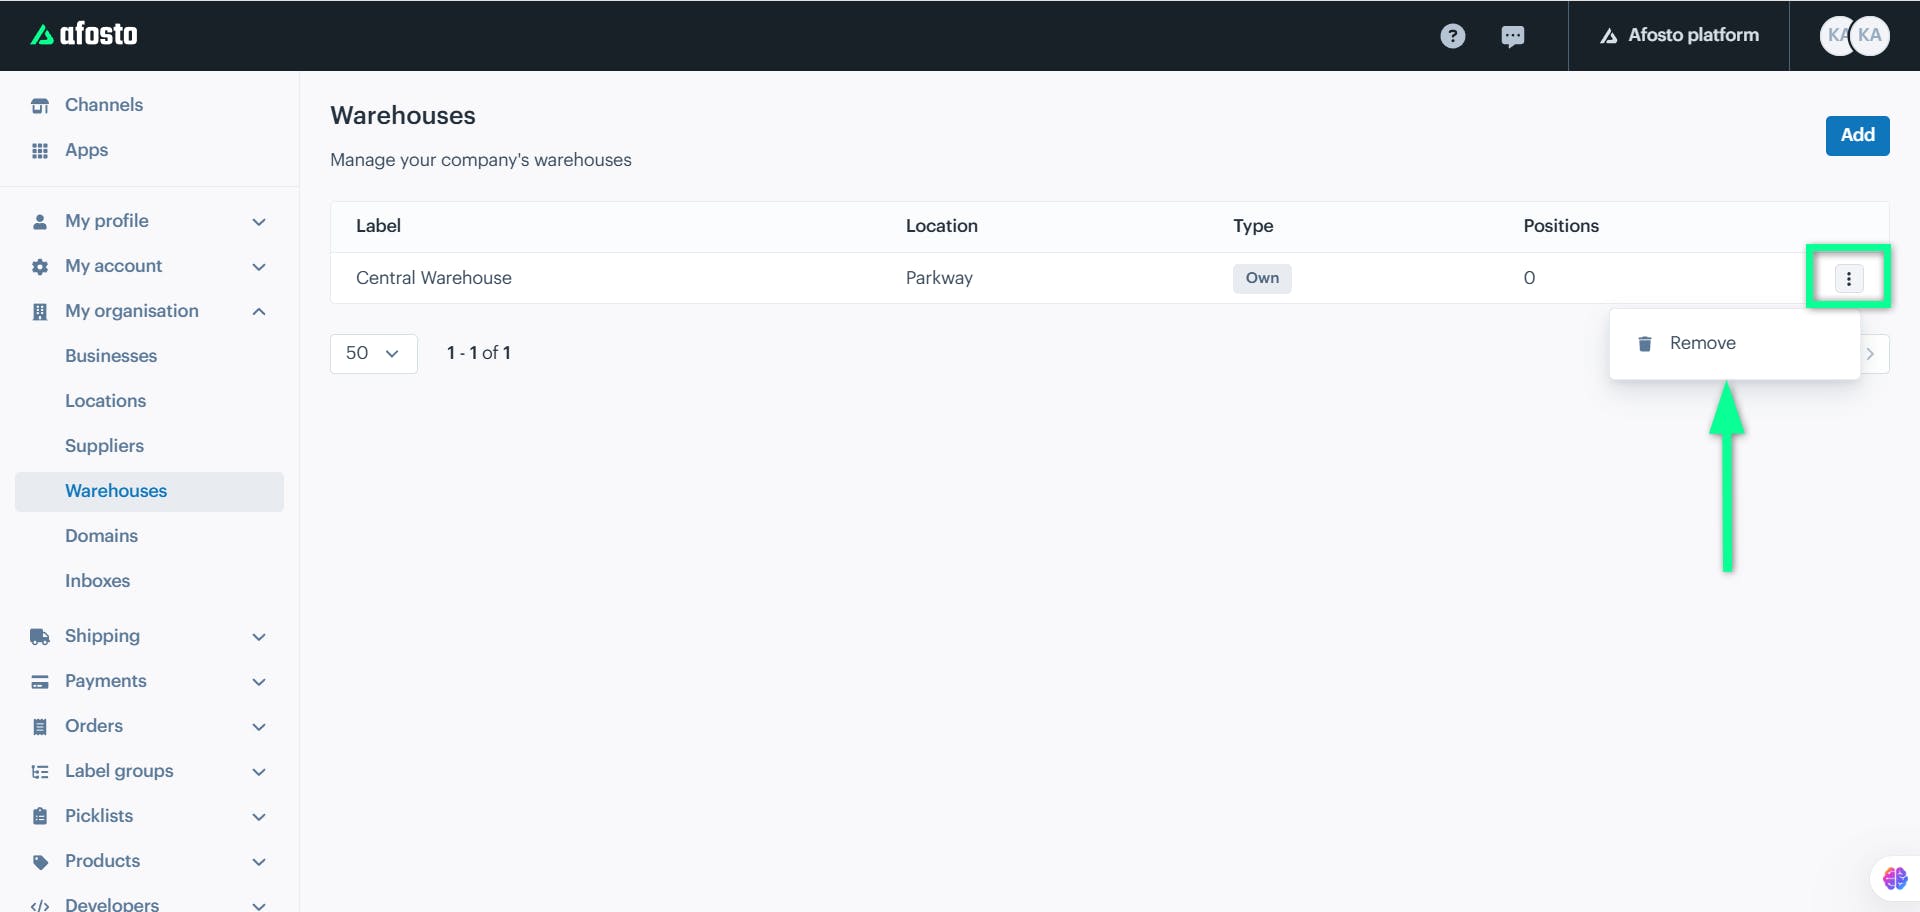
To delete a desired entry, click the ellipses icon (three dots) next to it and select the "Delete" option.
Domains
The Domains section lets you verify domain names. This is necessary if you want to send emails (like order confirmations) through Afosto or use Afosto’s checkout system.
Why do I need this? Domain verification ensures your emails and checkout processes are secure and trustworthy for your customers.
Click the “Domains” module from the left sidebar of the Afosto screen
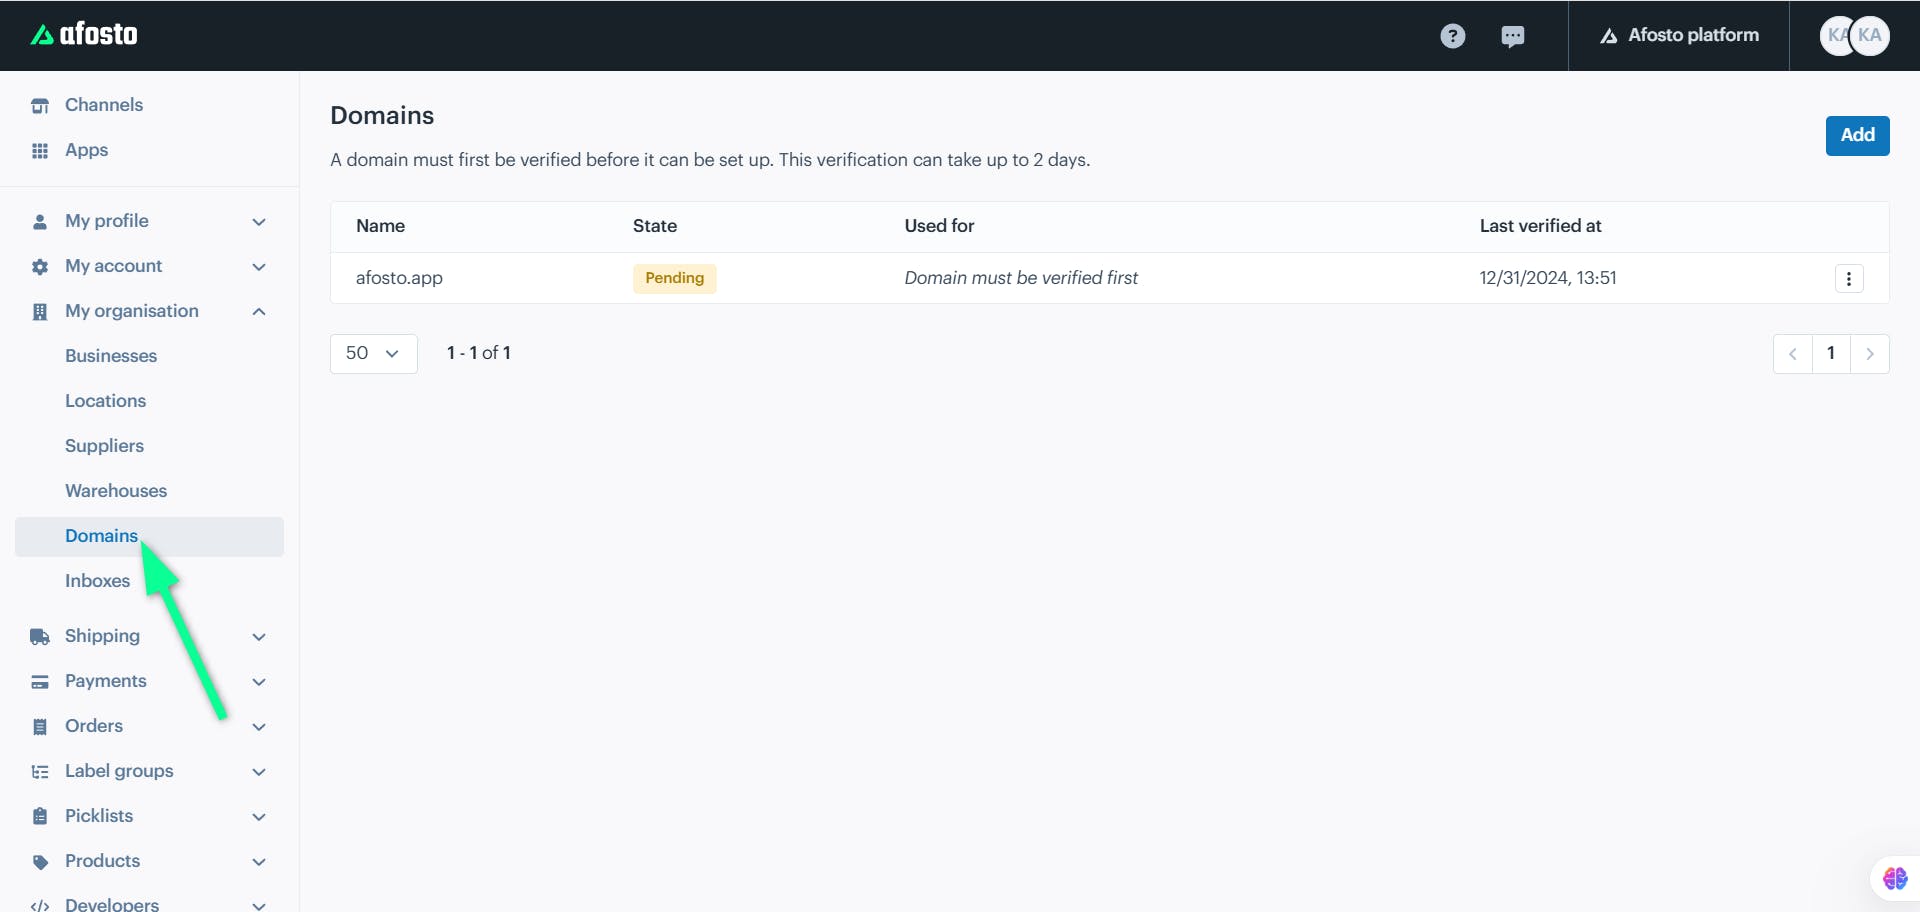
This section includes:
-
Add Domain Name
-
Verify Domain Ownership
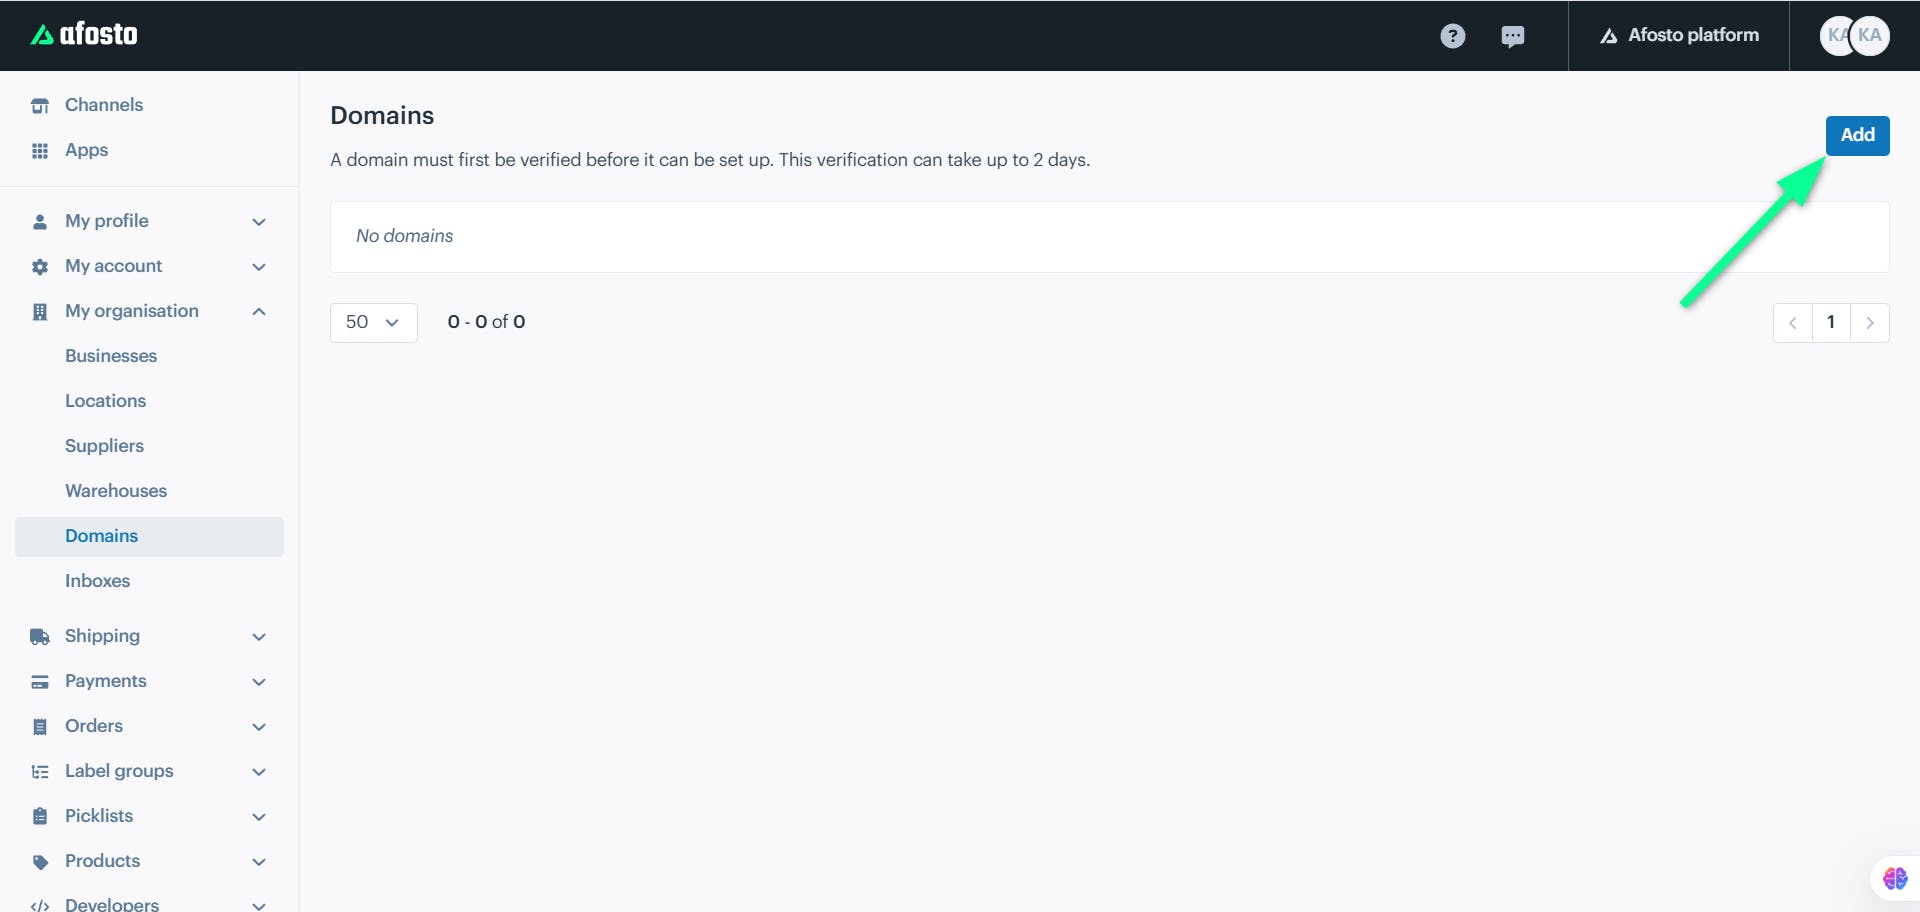
Click the “Add” button placed at the top-right corner of the screen.
Add Domain Name
An Add Domain window will appear. In the ‘Domain Name’ field, specify the domain name you wish to use.
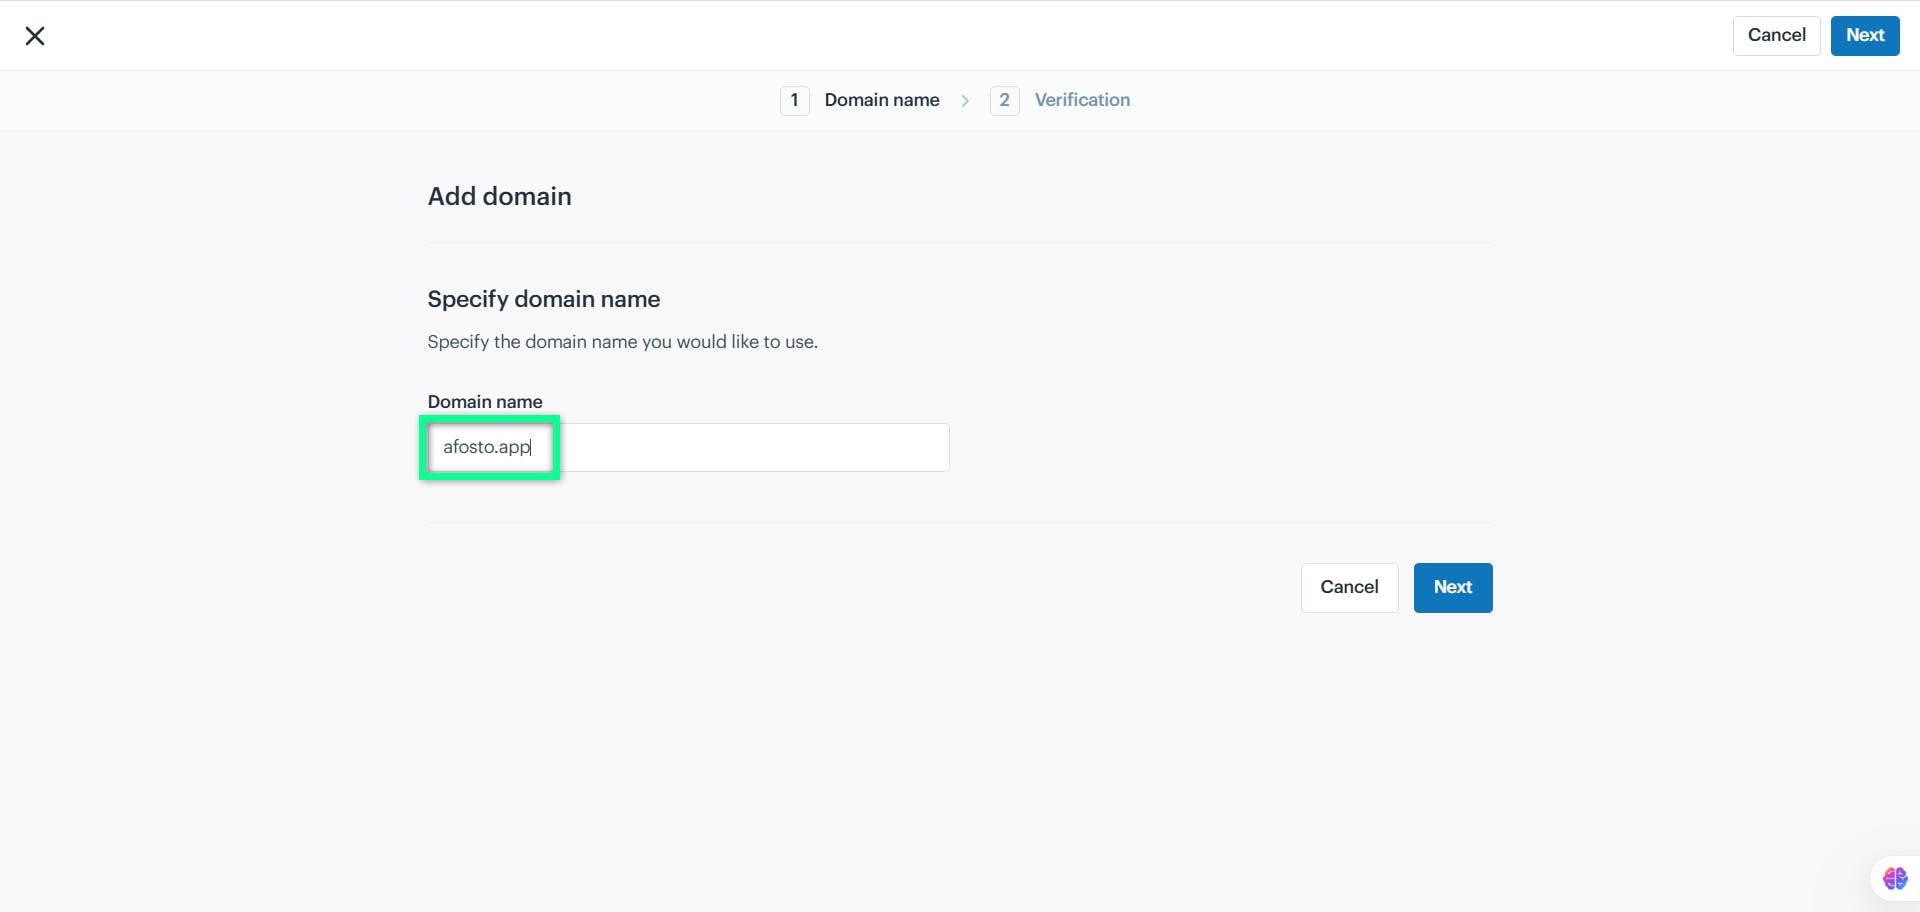
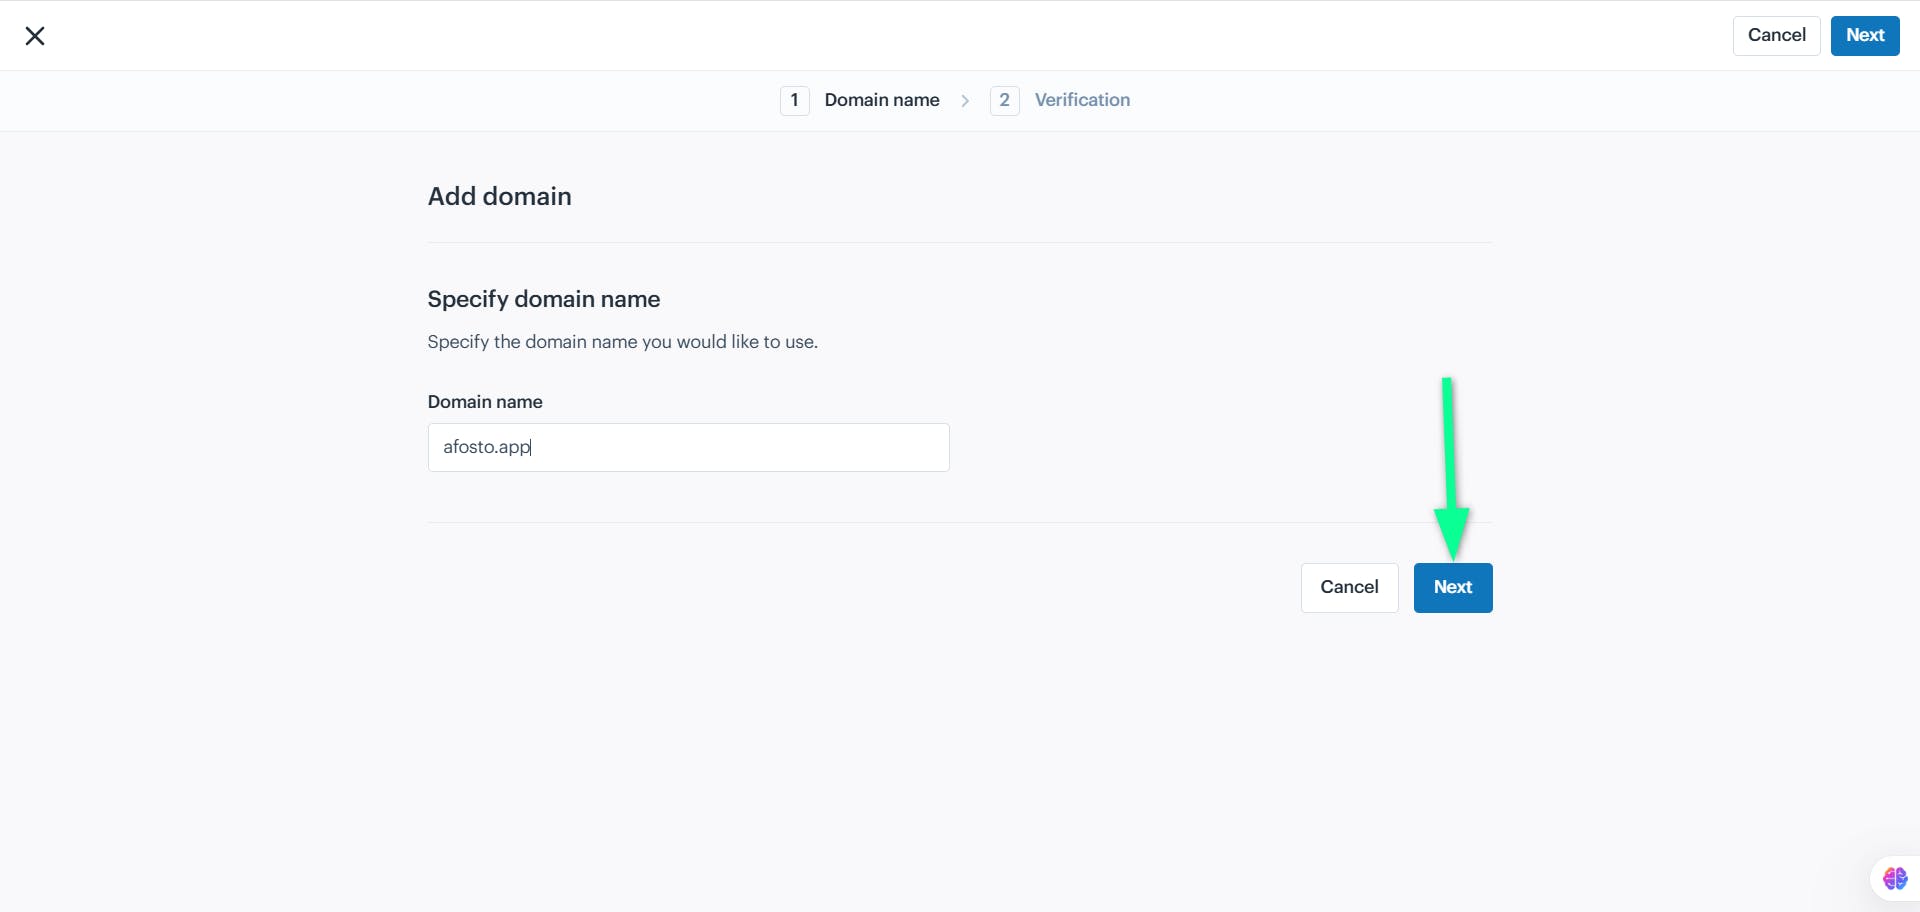
Click the “Next” button to proceed.
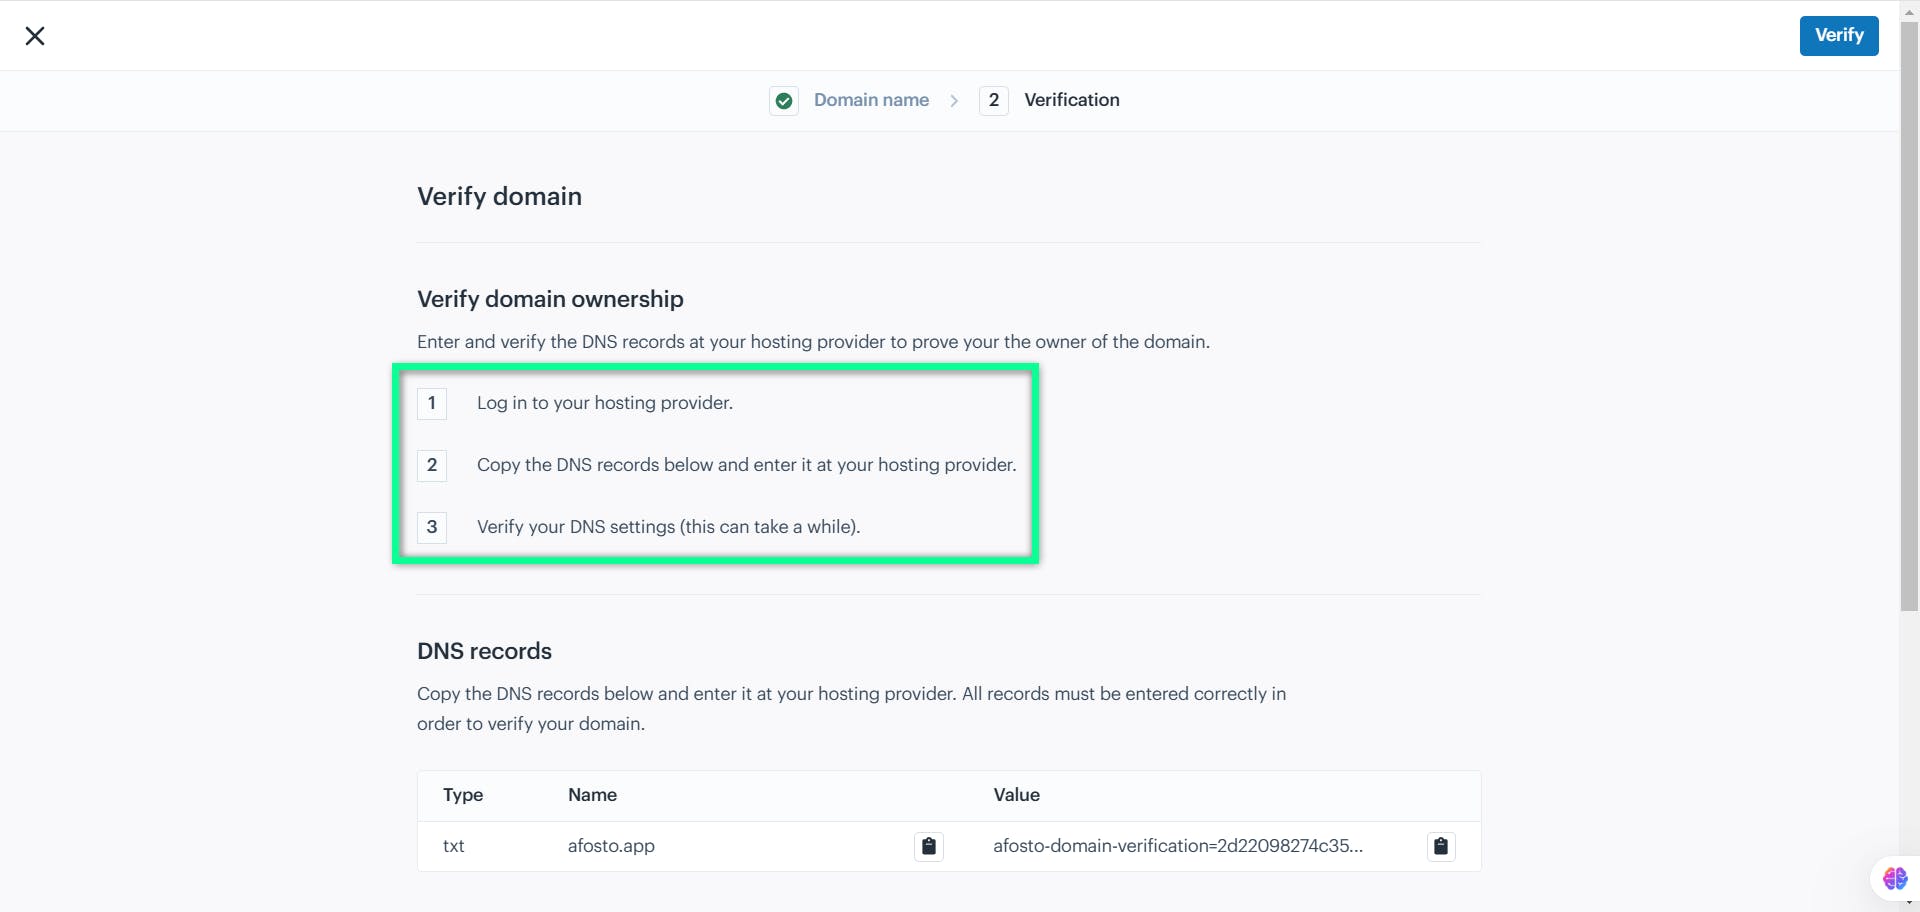
Verify Domain Ownership
To verify ownership: Log in to your hosting provider, copy the DNS records, and add them to your DNS settings.
Verification Process: Once the DNS records are added correctly, click “Verify”.
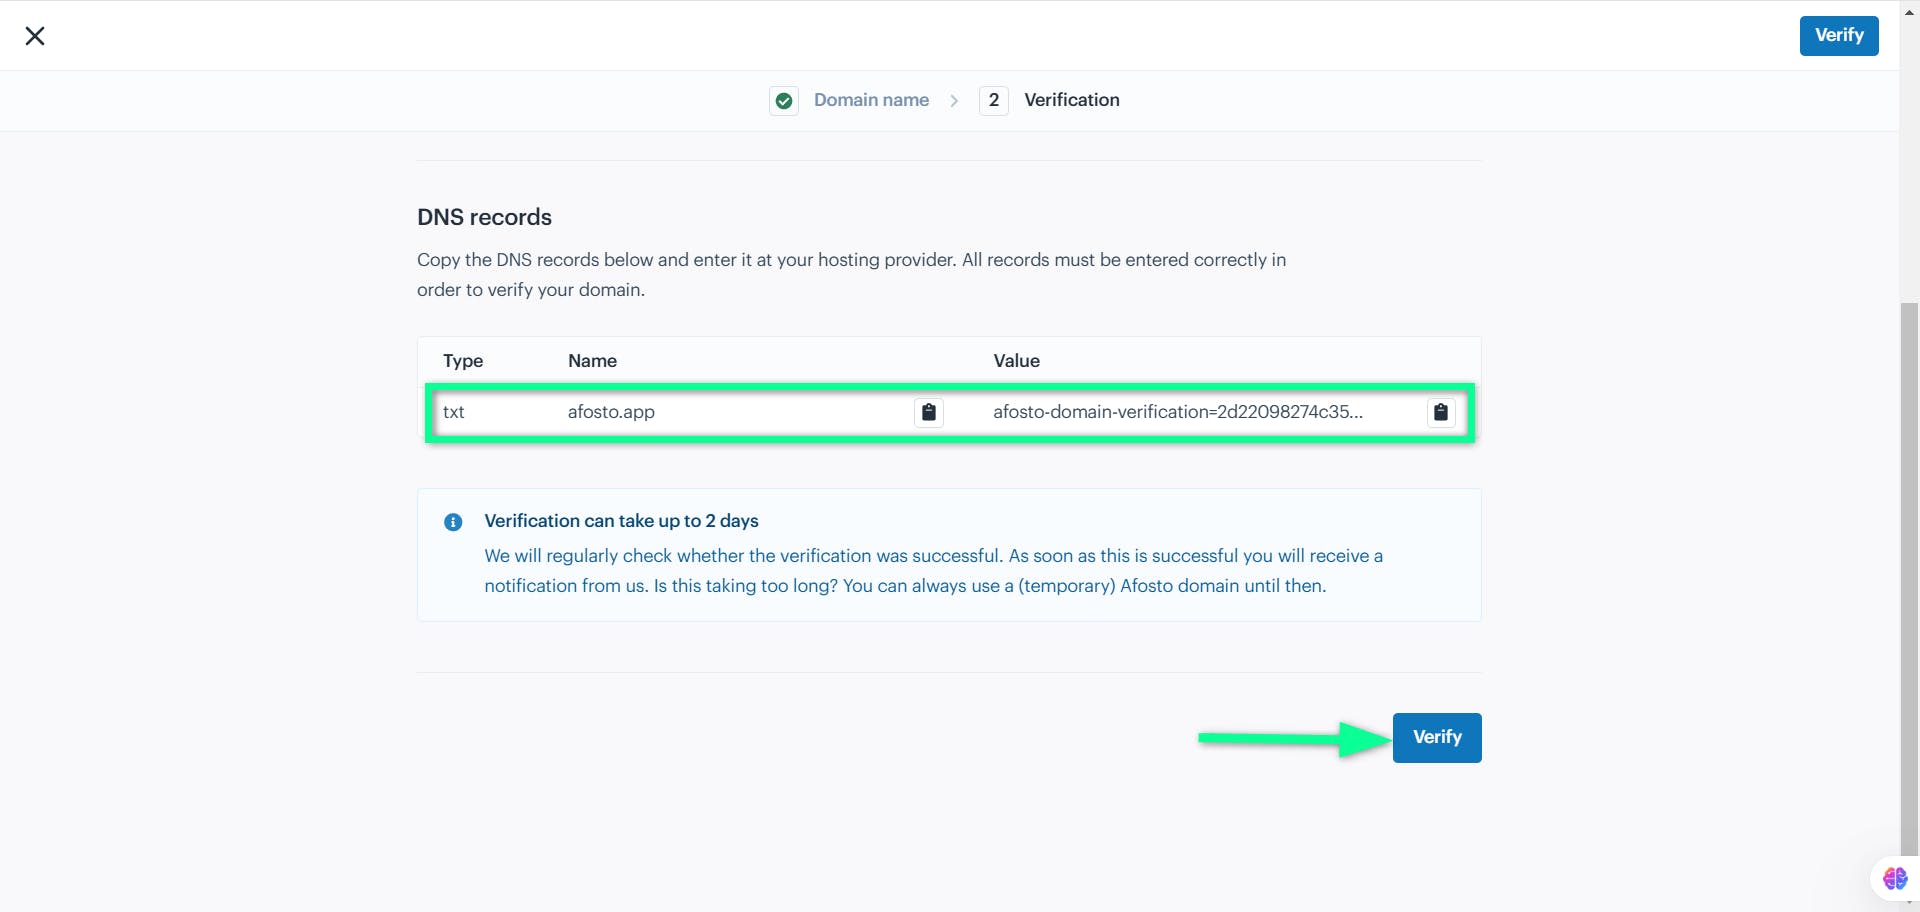
Note: The verification process may take up to 2 days. A notification will be sent once the domain is successfully verified.
Inboxes
The Inboxes section helps you set up email communication channels for managing customer interactions and other business correspondence.
Why do I need this? Inboxes ensure smooth communication with your customers, allowing you to manage messages like queries or order updates easily. Click the “Inboxes” module from the left sidebar of the Afosto screen.
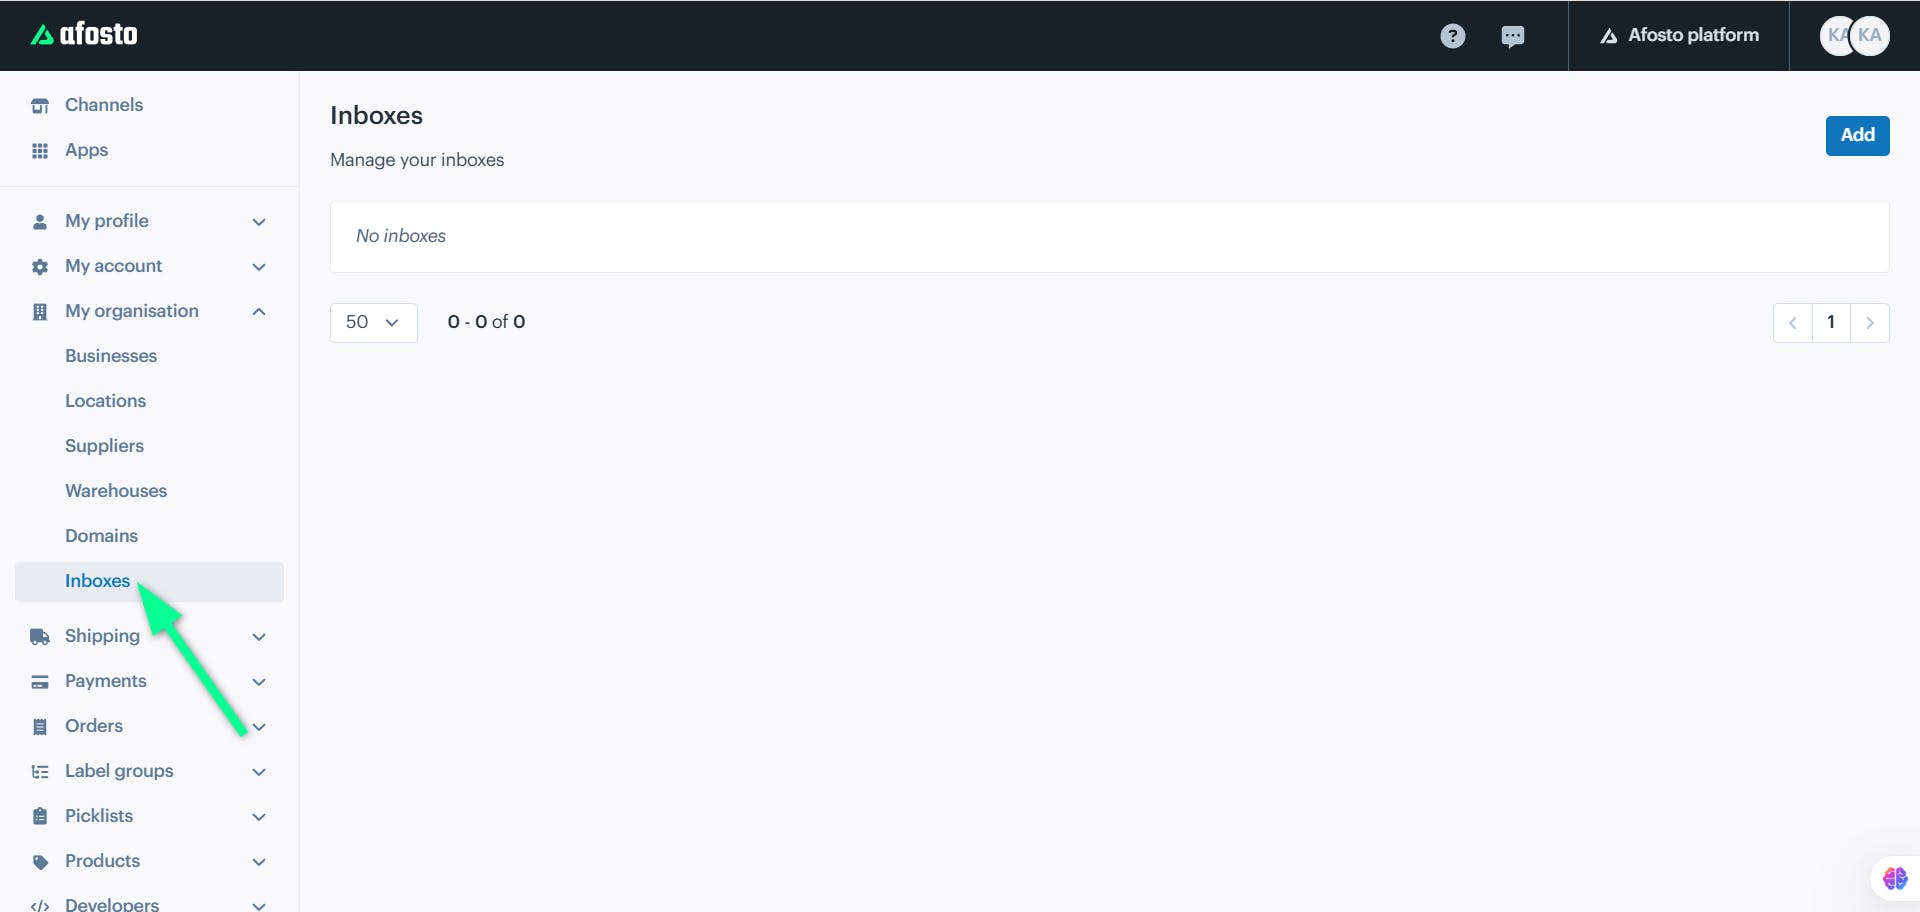
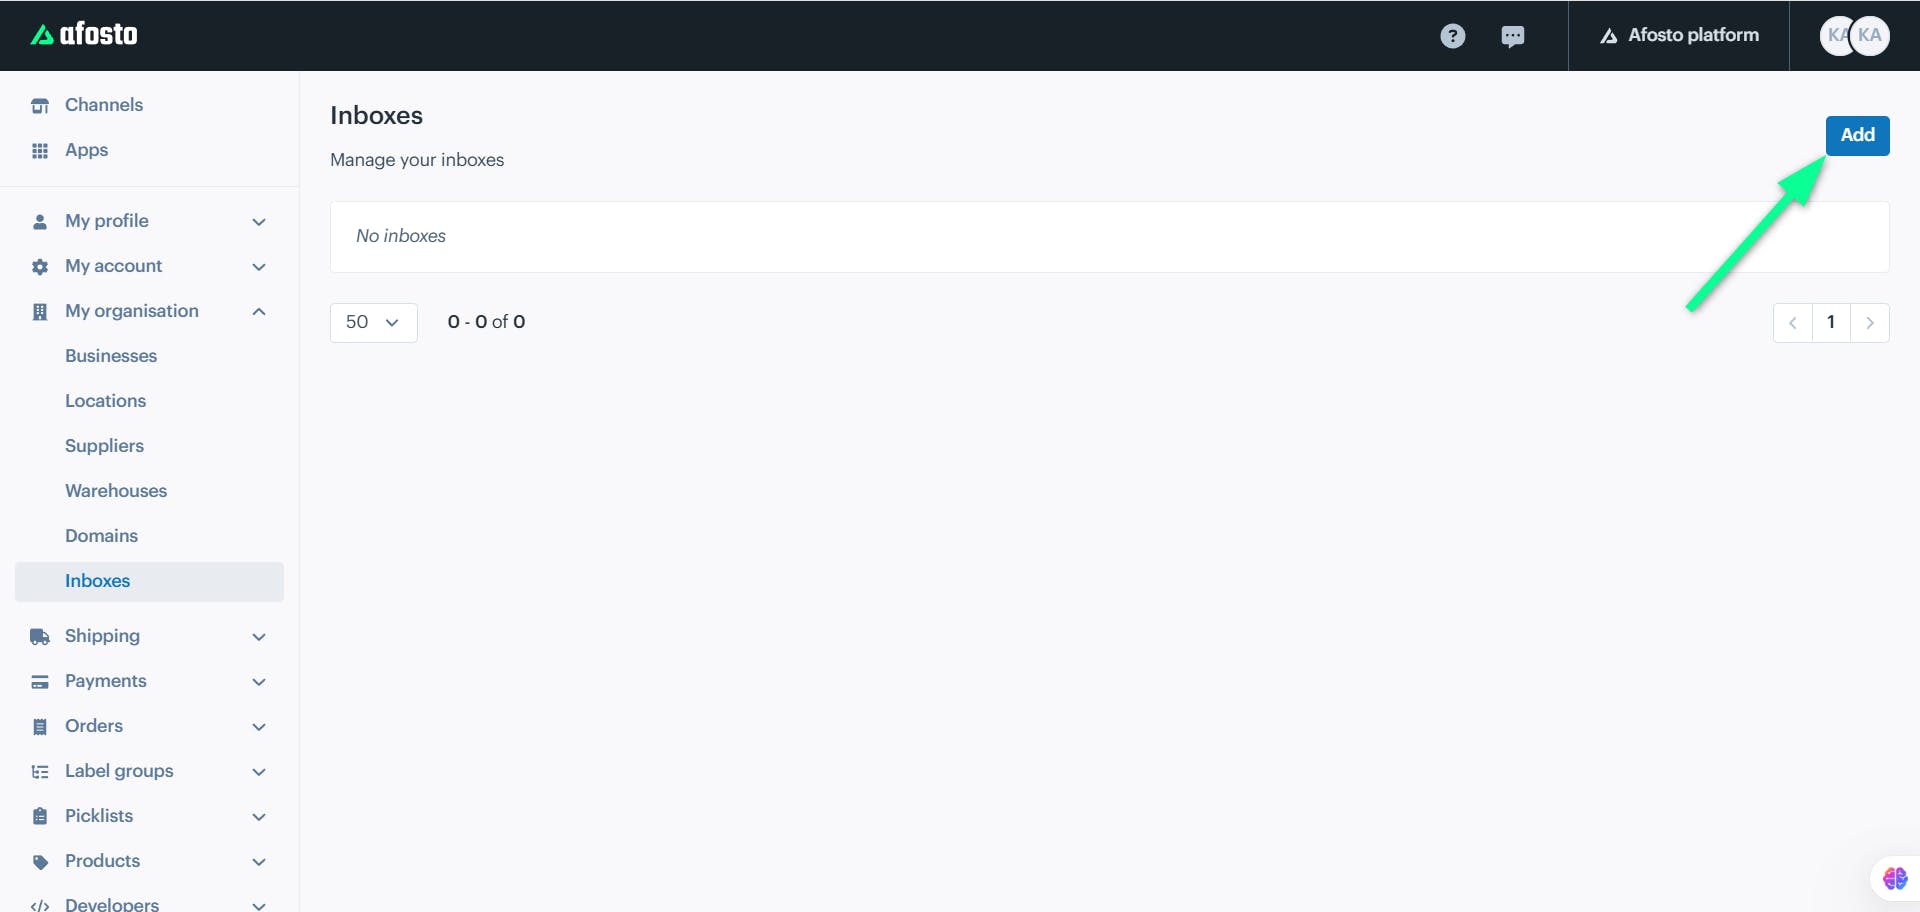
Click the “Add” button placed in the top right corner of the screen.
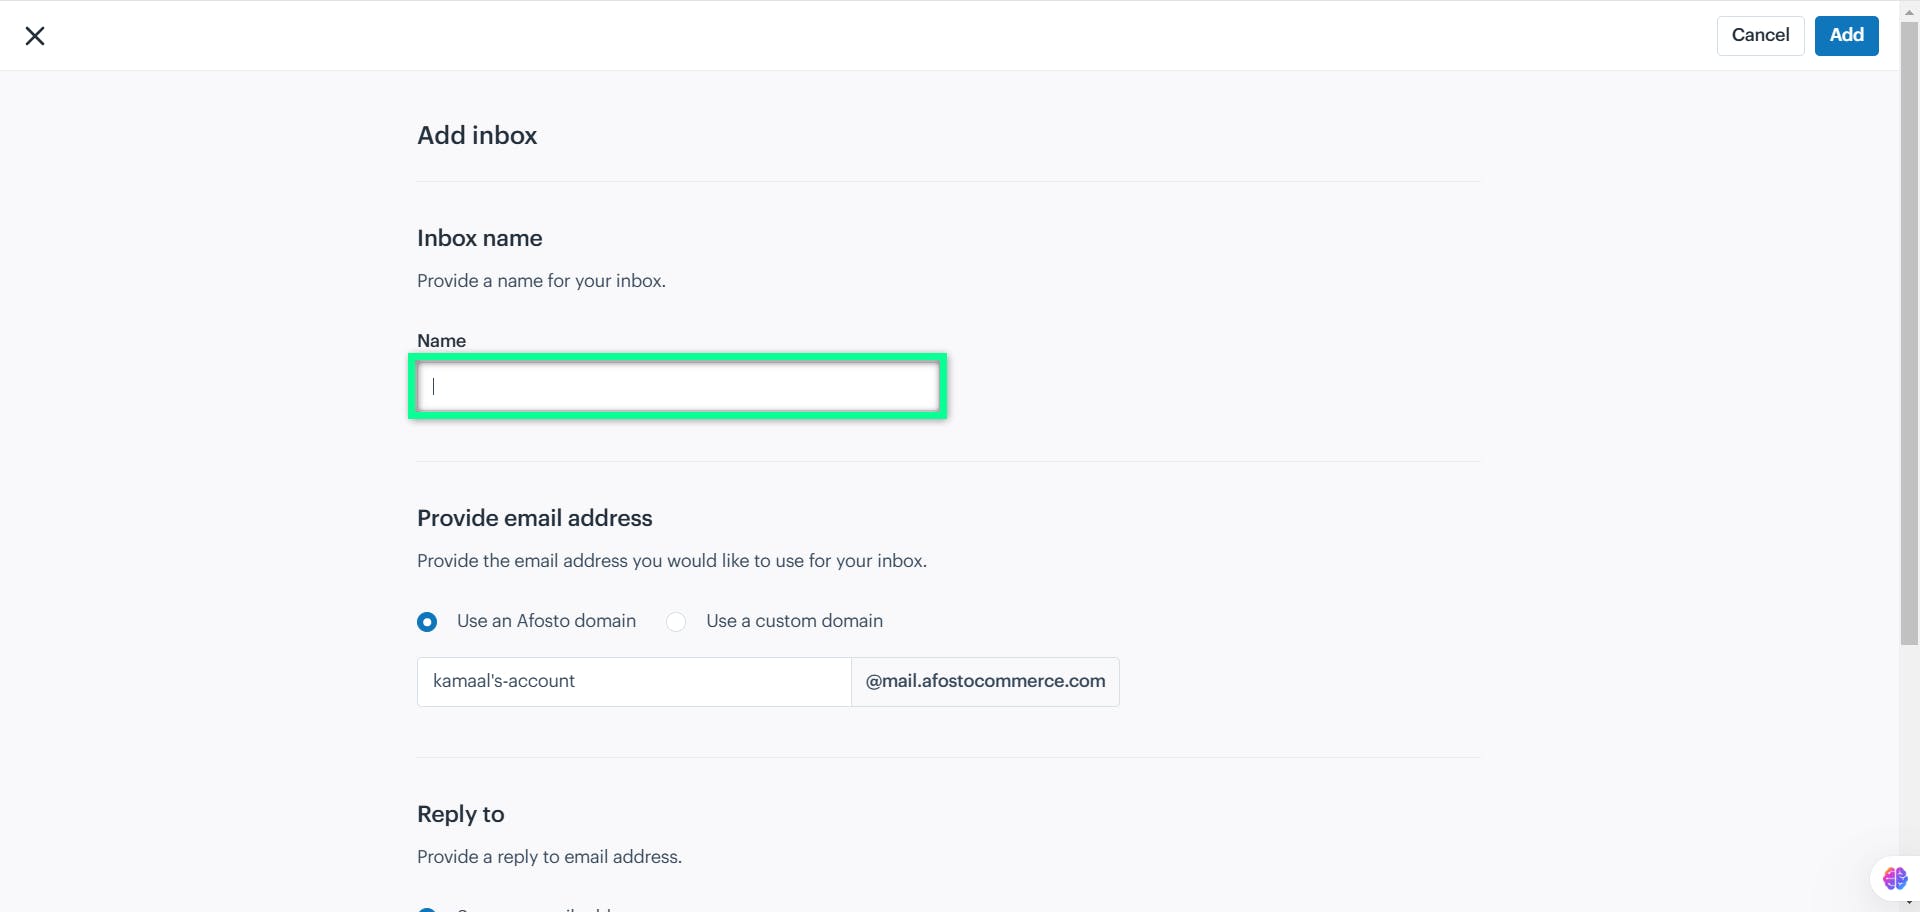
An Add Inbox screen will appear, allowing you to the following input details:
-
Inbox name
-
Provide email address
-
Reply to
Inbox name
In the Inbox name field, enter a name for your inbox.
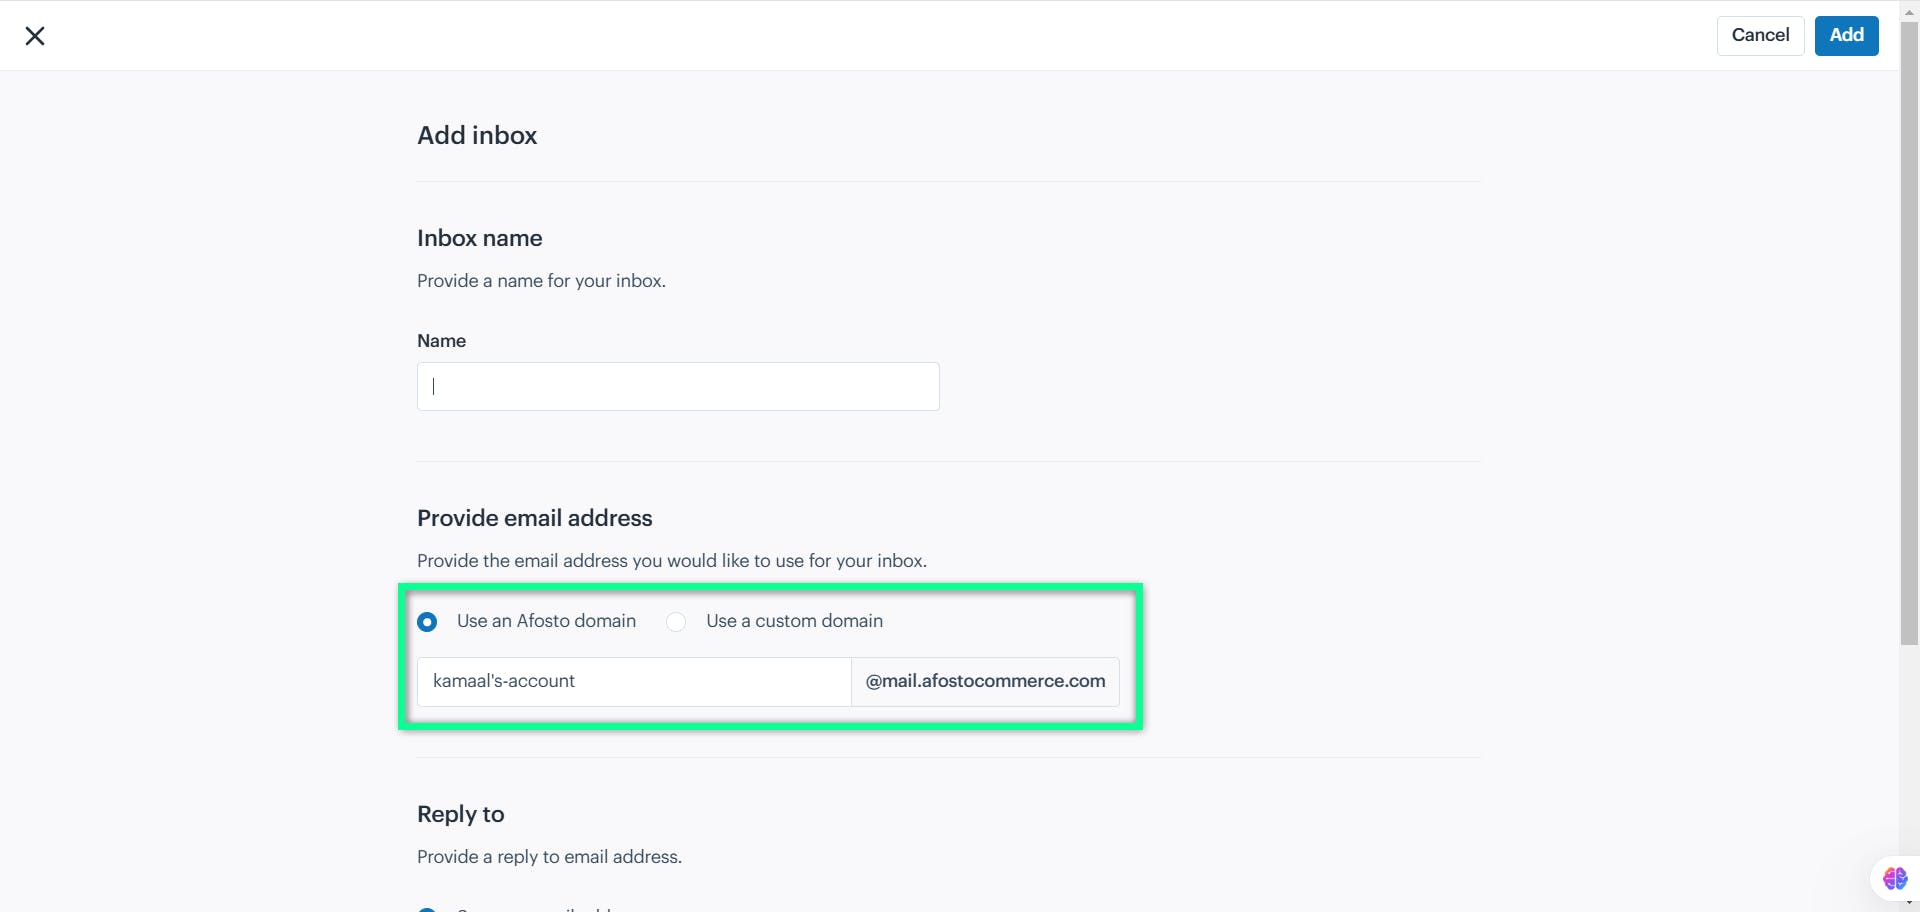
Provide email address
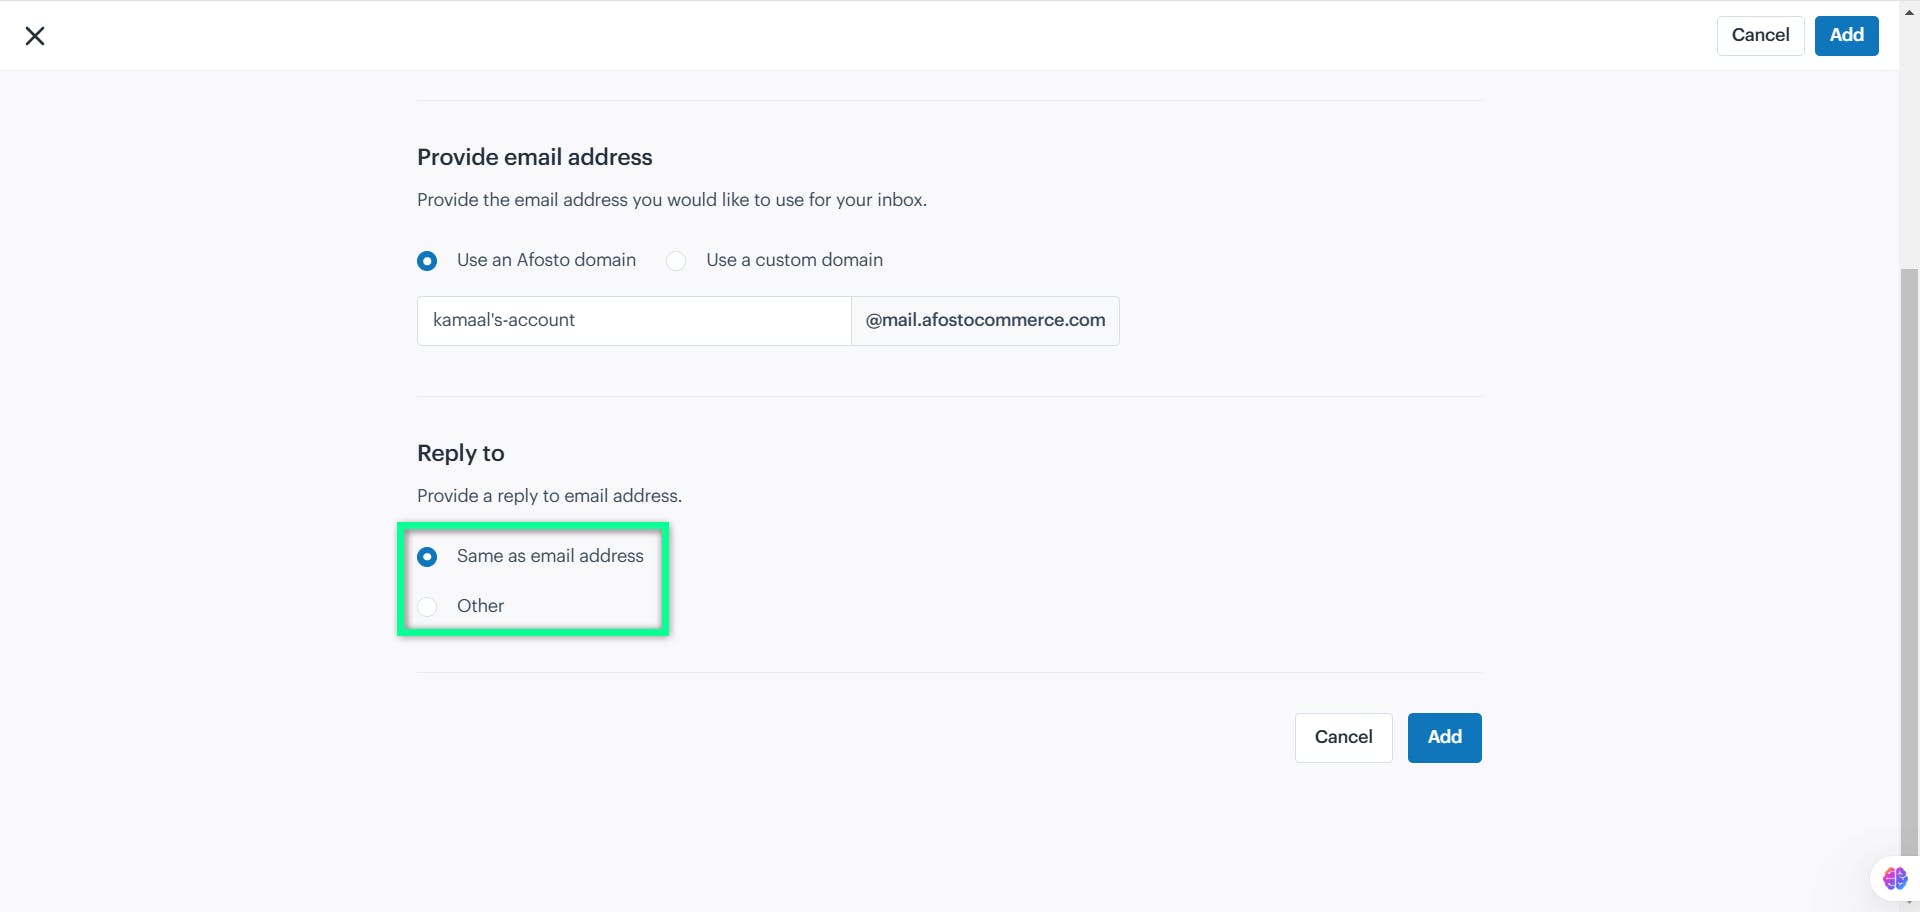
Choose an Afosto domain or a custom domain and fill in the email address.
Note: By default, an email address is set to ‘Use an Afosto domain’.
Reply to
In the Reply to section, choose if the reply-to address is the same as the email address or provide a different one.
Note: By default, Reply to is set to the ‘same as email address’.
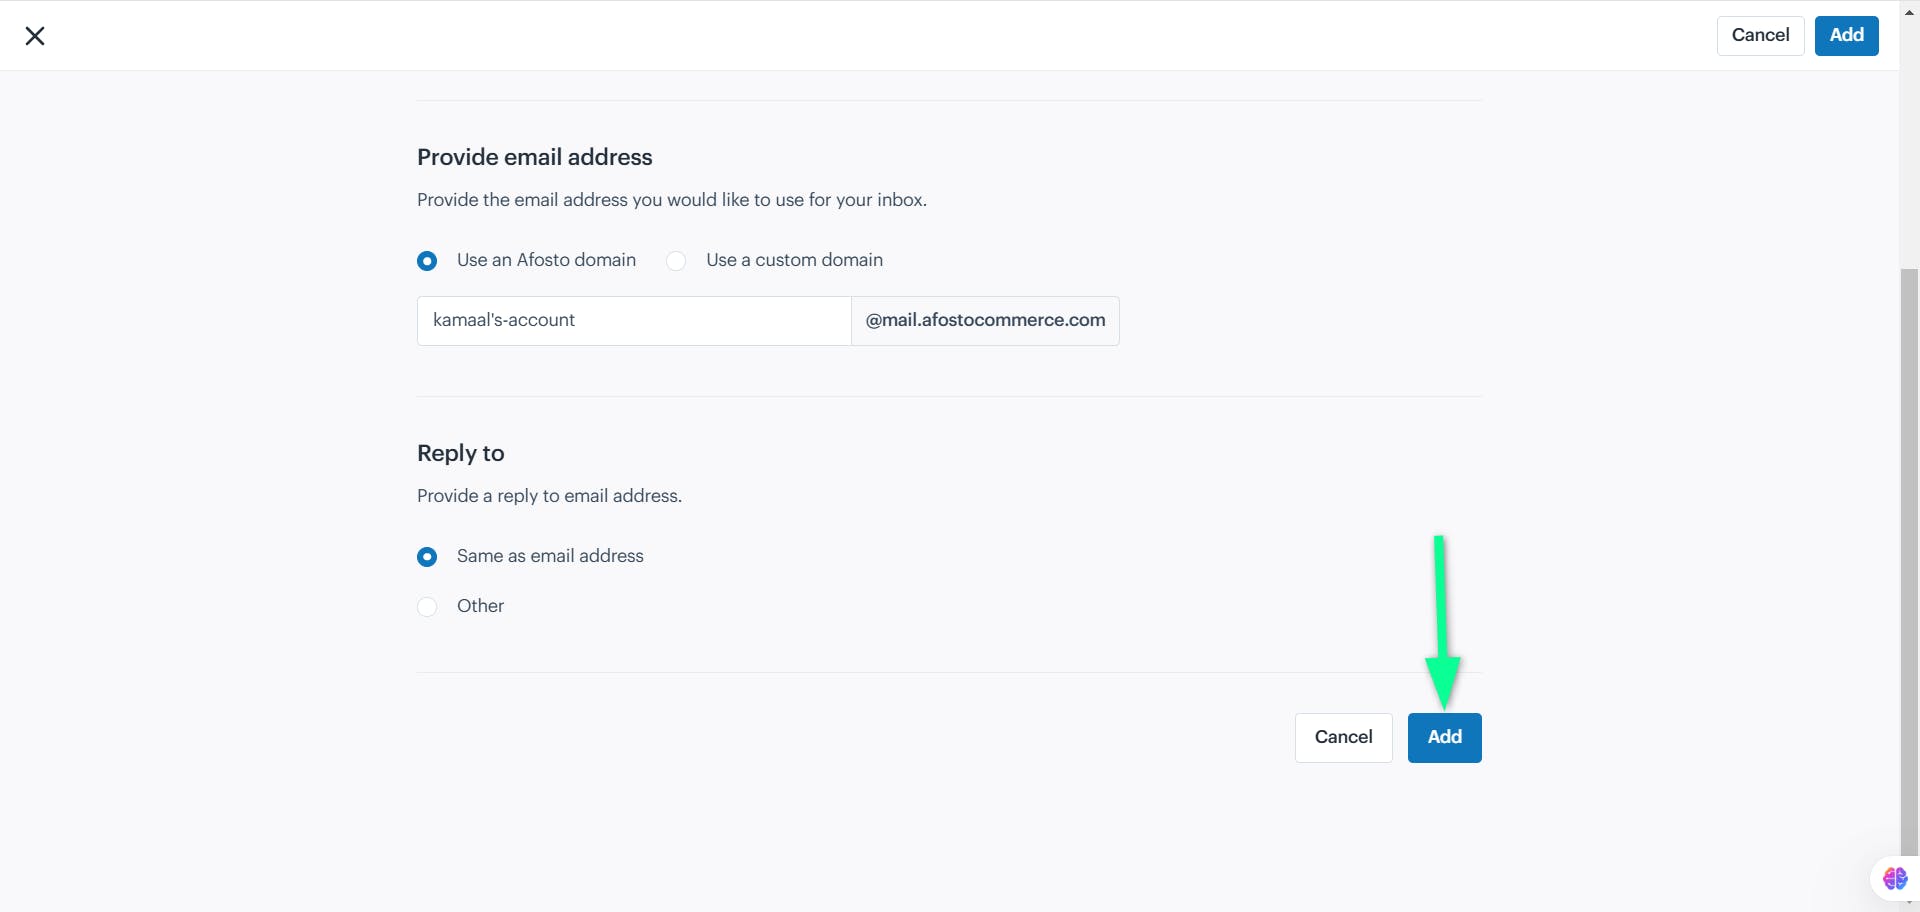
Click the “Add” button to save the new inbox configuration.
About Afosto
Till, webshop, bol and Kaufland on one stock.
Related documentation
Generating and Printing Invoices in Bulk
Leer stap voor stap hoe je in Afosto eenvoudig facturen tegelijk genereert en print via het orderoverzicht en de Spooler-app. Efficiënt en foutloos factureren.
Replenishment Lists
Replenishment lists show which products to restock, based on safety stock, reorder points and optimal and maximum stock per warehouse.
Packing Slips – Downloading and Printing
Ontdek hoe je pakbonnen handmatig of automatisch kunt downloaden en printen in Afosto. Inclusief stappenplan, printerkoppeling en veelgestelde vragen.
Add or Adjust Warehouse Stock per Product in Afosto
Leer stap voor stap hoe je handmatig magazijnvoorraad toevoegt of aanpast in Afosto. Inclusief tips voor bulkacties bij voorraadbeheer via spreadsheet of CSV.