Receiving and replenishment lists
A receiving list is a documented record of products expected to arrive at a specific location, such as a transfer from a store to a warehouse or a shipment from a supplier to the warehouse. Upon arrival at the warehouse, the products are processed and verified against the receiving list.
Received items are checked off the list. Any additional products received that were not on the initial list are recorded on an 'unexpected' list. This approach ensures accurate inventory management and efficient warehouse operations.
Within Afosto, you can use the Purchasing module to maintain your stock levels, allowing you to actively track how many and which products you need to reorder from your suppliers. In this article, we will explain how to achieve this.
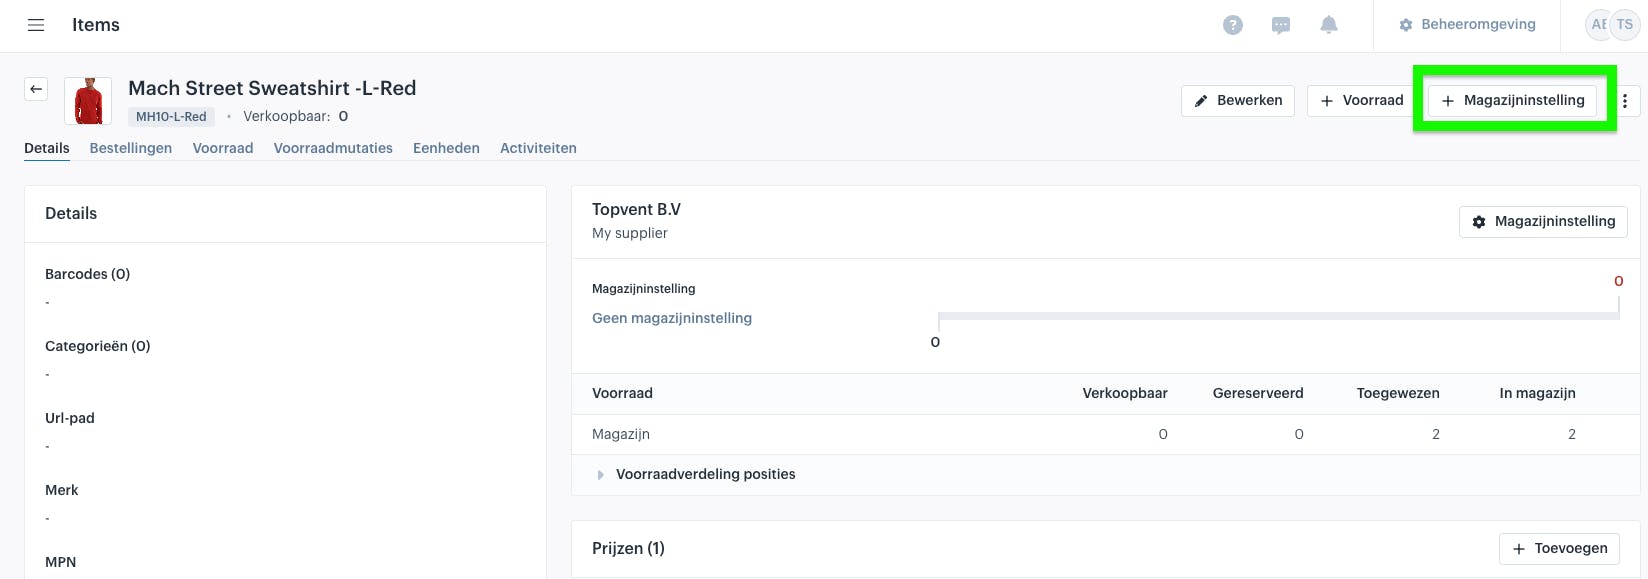
First, navigate to a product and click the "+ Warehouse setting" button in the top right corner.
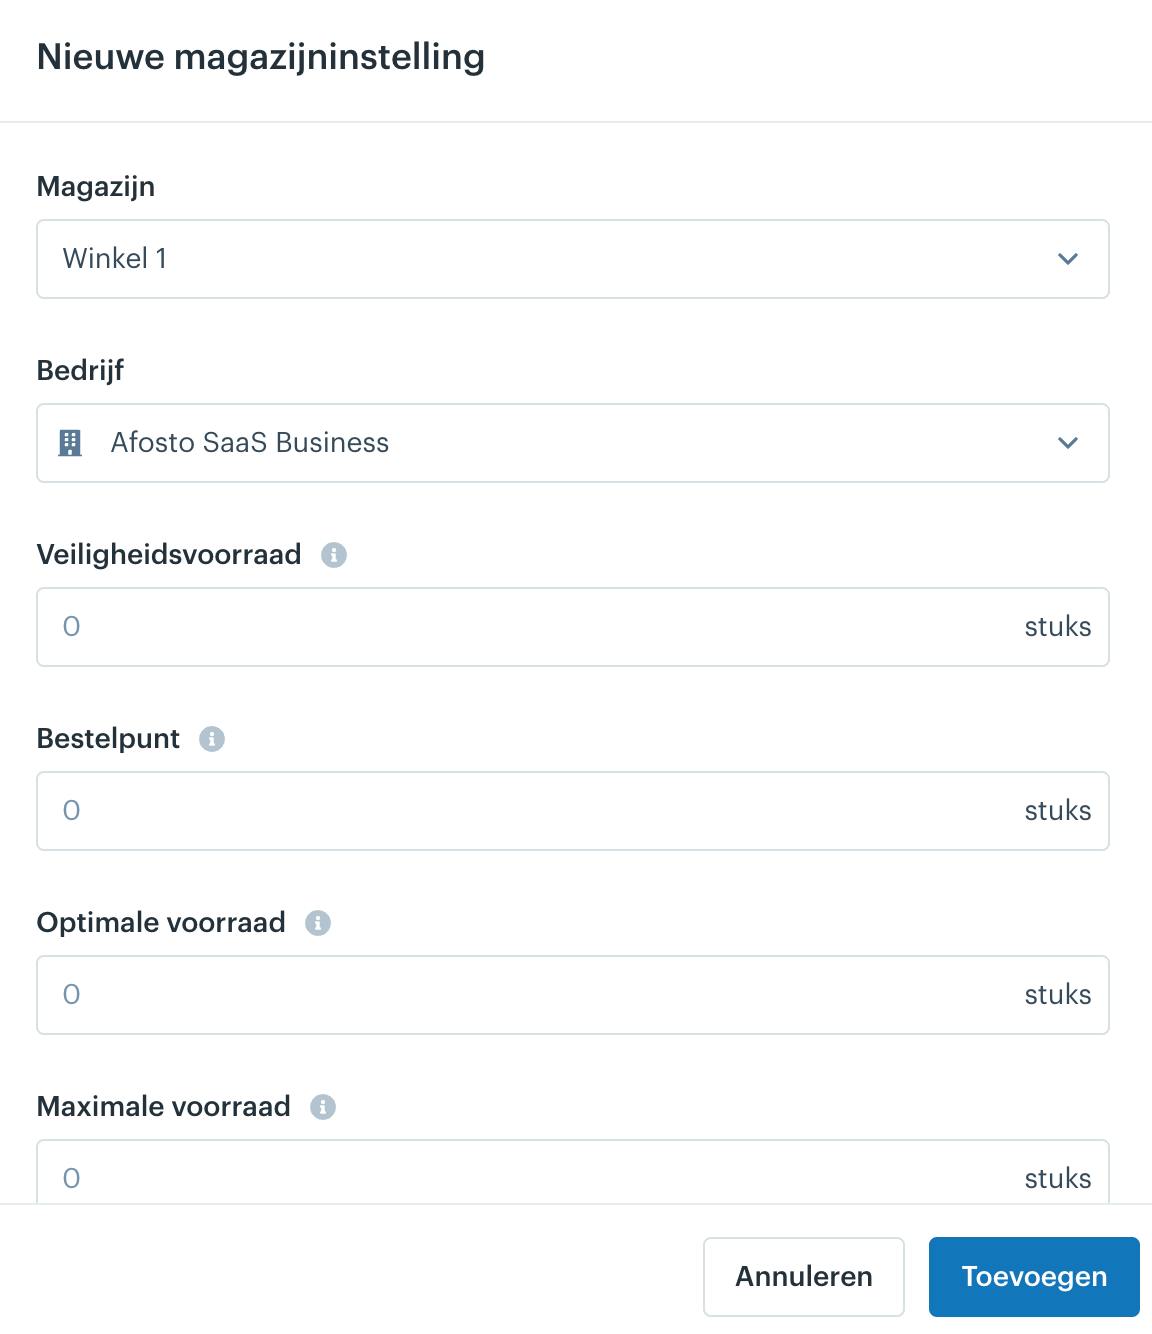
A menu will then open, displaying several terms. We explain these in more detail below:
Safety Stock The amount of extra stock held on hand to buffer against unexpected fluctuations in demand or supply.
Reorder Point The inventory level at which you want to place a new order.
Optimal Stock The ideal stock level you wish to maintain; this number will also be used as a suggestion when replenishing products in the replenishment list.
Maximum Stock The maximum quantity of this product you want to keep in stock within this warehouse.
Additionally, you can limit the SKU to a single position within the warehouse and choose to backorder the SKU when it is no longer available.
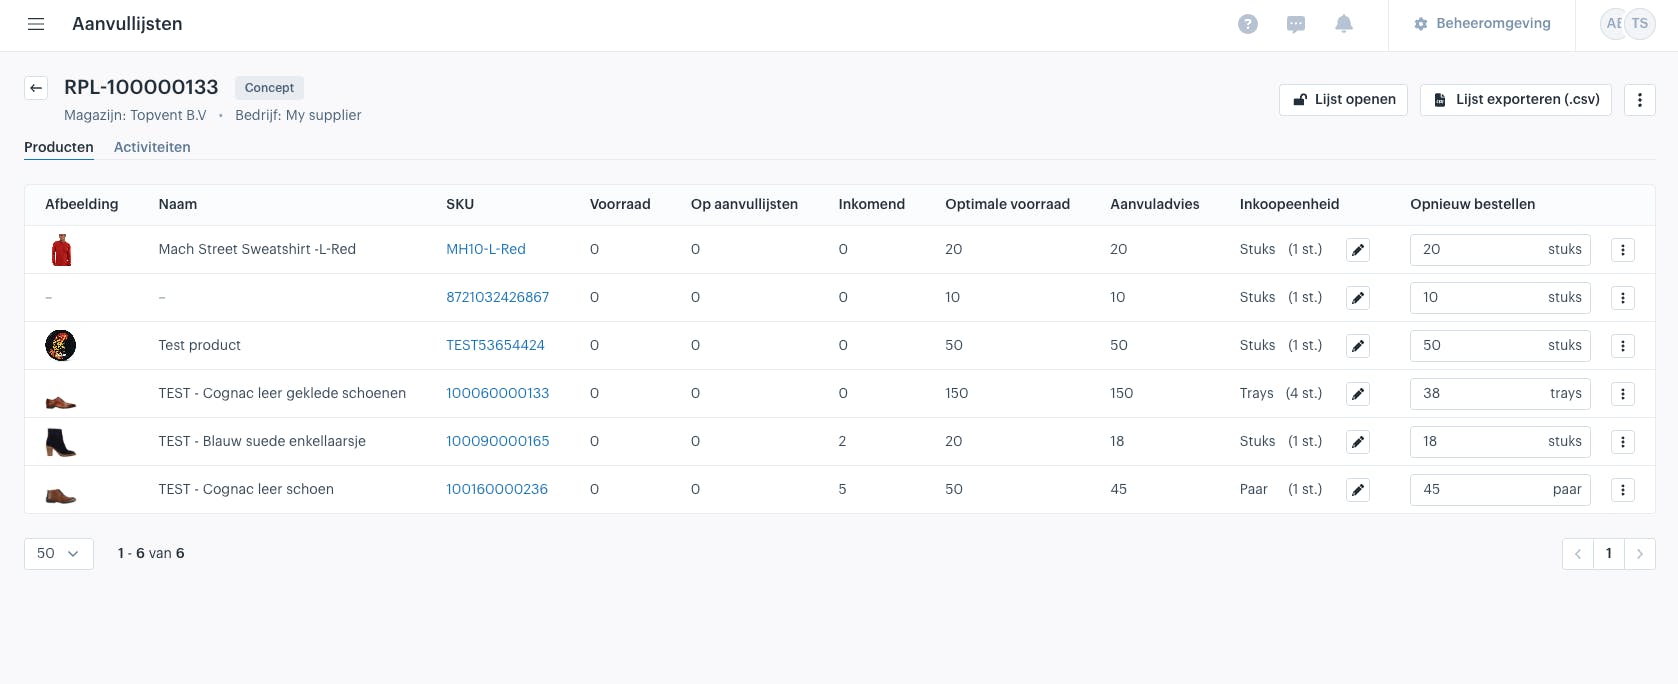
Now, you can navigate to the Replenishment lists tab. From there, click the "Generate" button in the top right corner to create a new replenishment list.
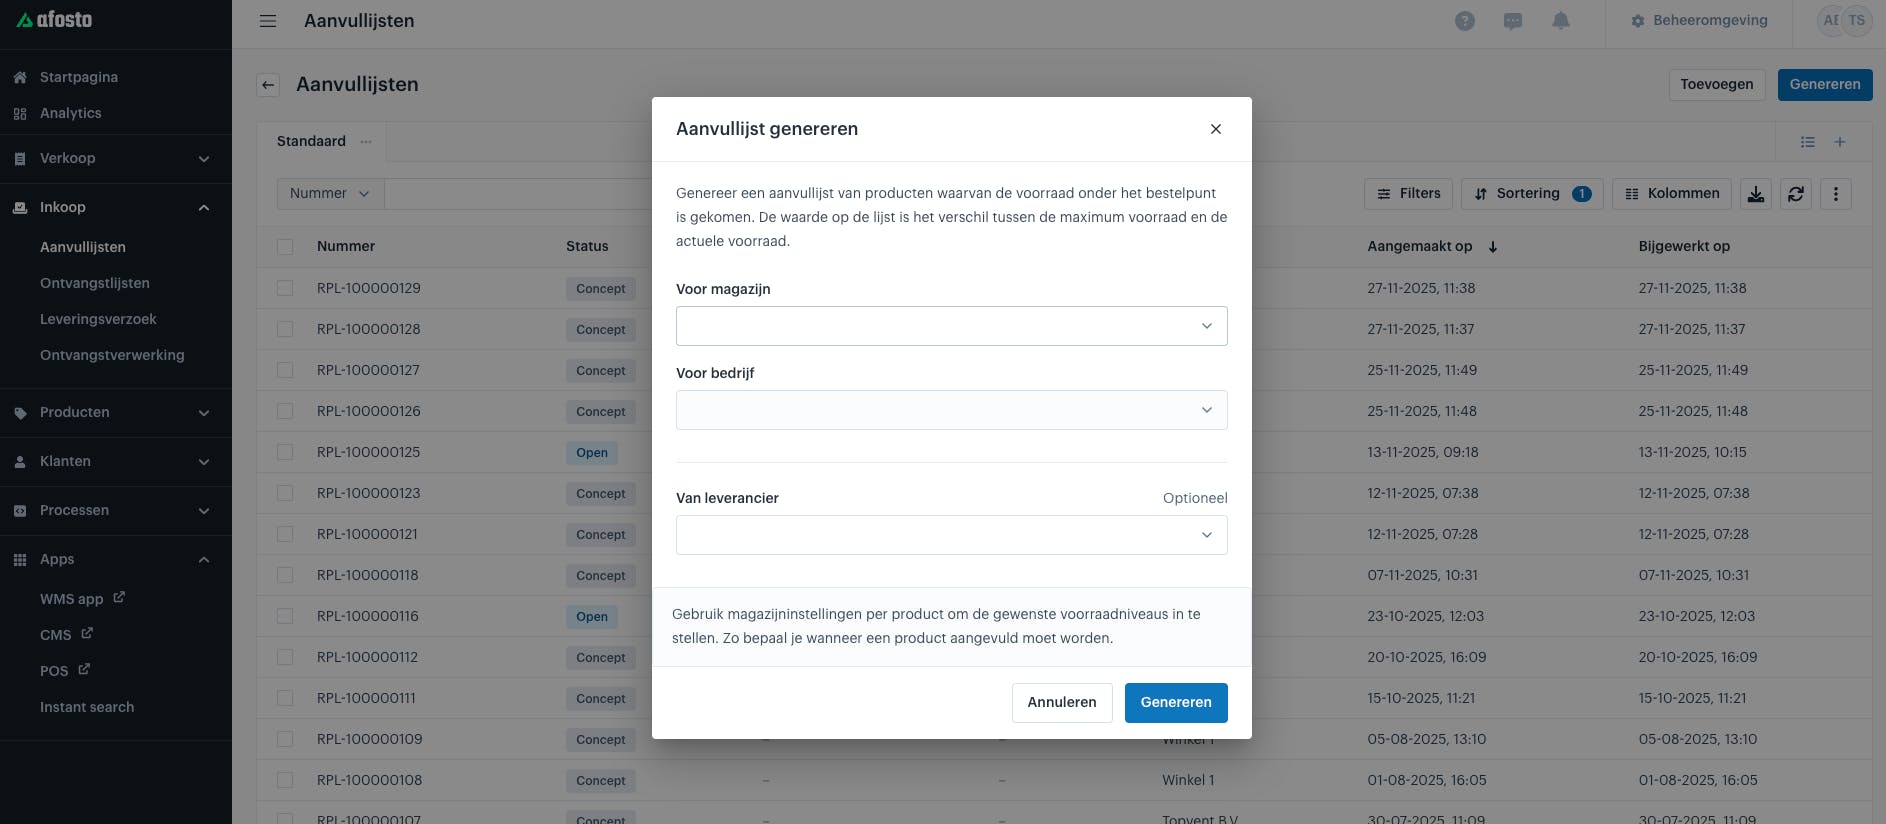
Here, you can enter the warehouse, company, and (optionally) the supplier. After doing so, the replenishment list will be displayed (see example below).
You will see the Optimal Stock reappearing here. The replenishment advice is shown next to it; this represents the difference between the Reorder Point and the Optimal Stock. You can now click the "Open list" button in the top right corner to move the list from draft to open status.
Nadat je aanvullijst hebt aangemaakt heb je twee mogelijke scenario's bij het binnenboeken van goederen:
-
Je weet wat er binnenkomt (bekende ontvangst) (Je maakt een ontvangstlijst aan)
-
Je weet niet wat er binnenkomt (onbekende ontvangst) (Je maakt geen ontvangstlijst aan)
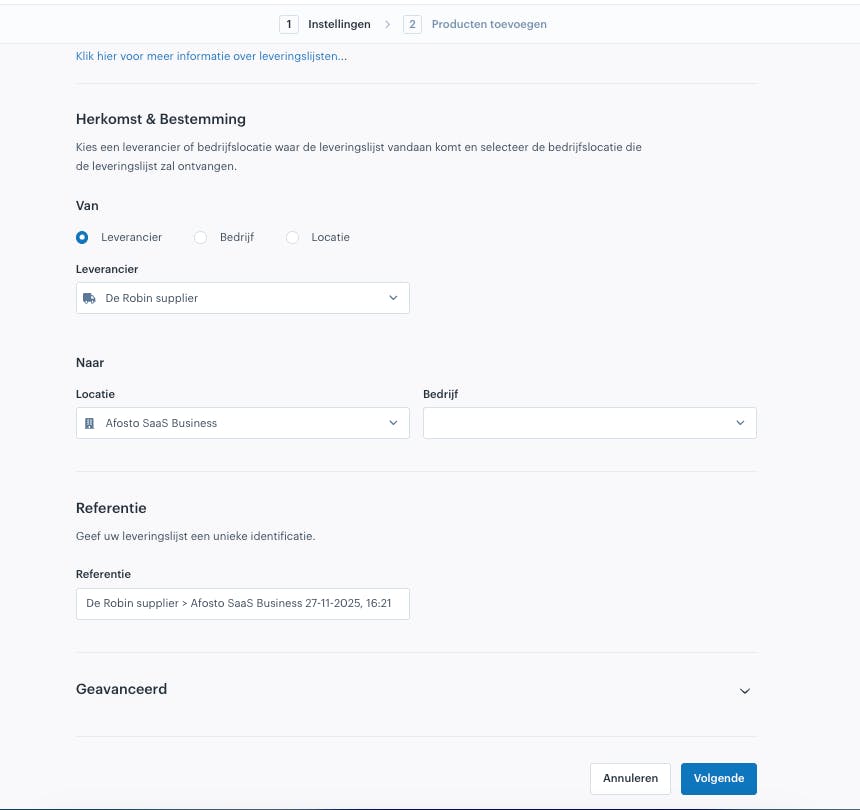
Bekende ontvangst Je kan bij Ontvangstlijsten rechtsbovenin op "Toevoegen" klikken waarna je de gegevens kan invullen op basis van waar dit product vandaan komt (Bedrijf, Leverancier, Locatie)
Once you have created the replenishment list, there are two possible scenarios for receiving goods:
-
Known Receipt: You know what is arriving. (You create a receiving list)
-
Unknown Receipt: You do not know what is arriving. (You do not create a receiving list)
Known Receipt
Navigate to Receiving lists and click the "Add" button in the top right corner. You can then fill in the details based on where the product is coming from (Company, Supplier, Location).
You can now complete the receiving process in two ways:
-
On the platform (https://afosto.app/supplies)
-
Using the WMS App (https://scan.afosto.app/)
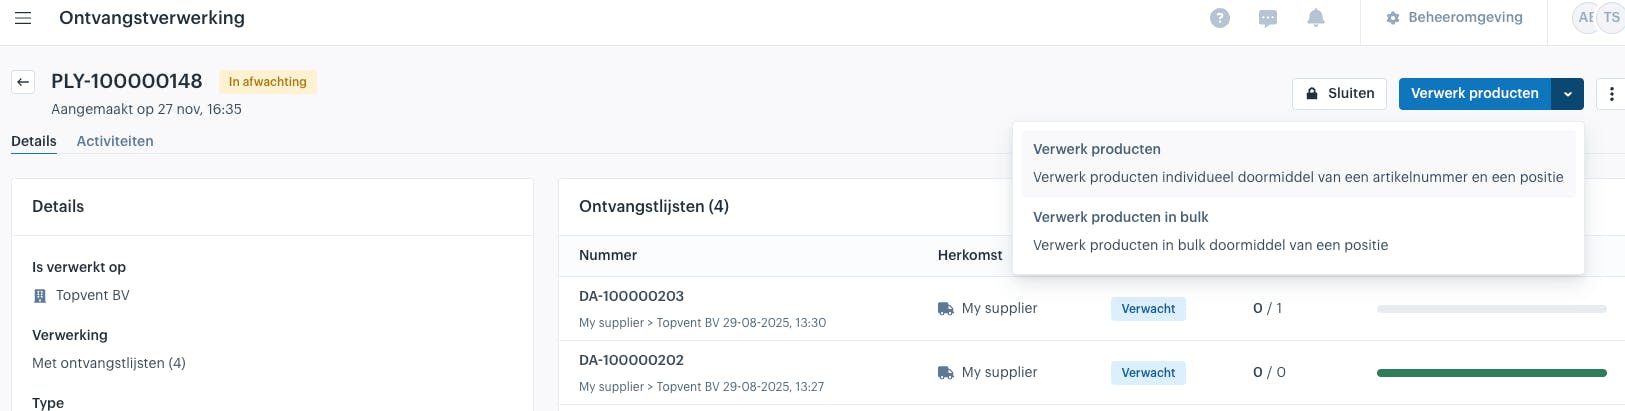
On the platform
In Receiving processing, click on the list you just created. You can then add these products via the platform per SKU or in bulk (see image). Afterward, you can also choose whether to specify the storage location. Once you close the receiving process, the list is finalized and the products are processed.
Using the WMS App
Open the scan app. First, you need to configure a few scanner settings (located under Settings in your profile menu at the top right):
-
Location: Ensure the correct warehouse location is selected.
-
Shipping: Here, you can apply the same filters you use in the "Orders" section of the Afosto WMS. You can also configure the Flow type:
-
Scan only: Every individual item must be scanned.
-
Scan and plus button: Use this if you don’t want to scan every single item to add stock; you can manually adjust the quantity.
-
Additionally, you can enable options to Automatically print shipping labels or Print packing slips upon shipping.
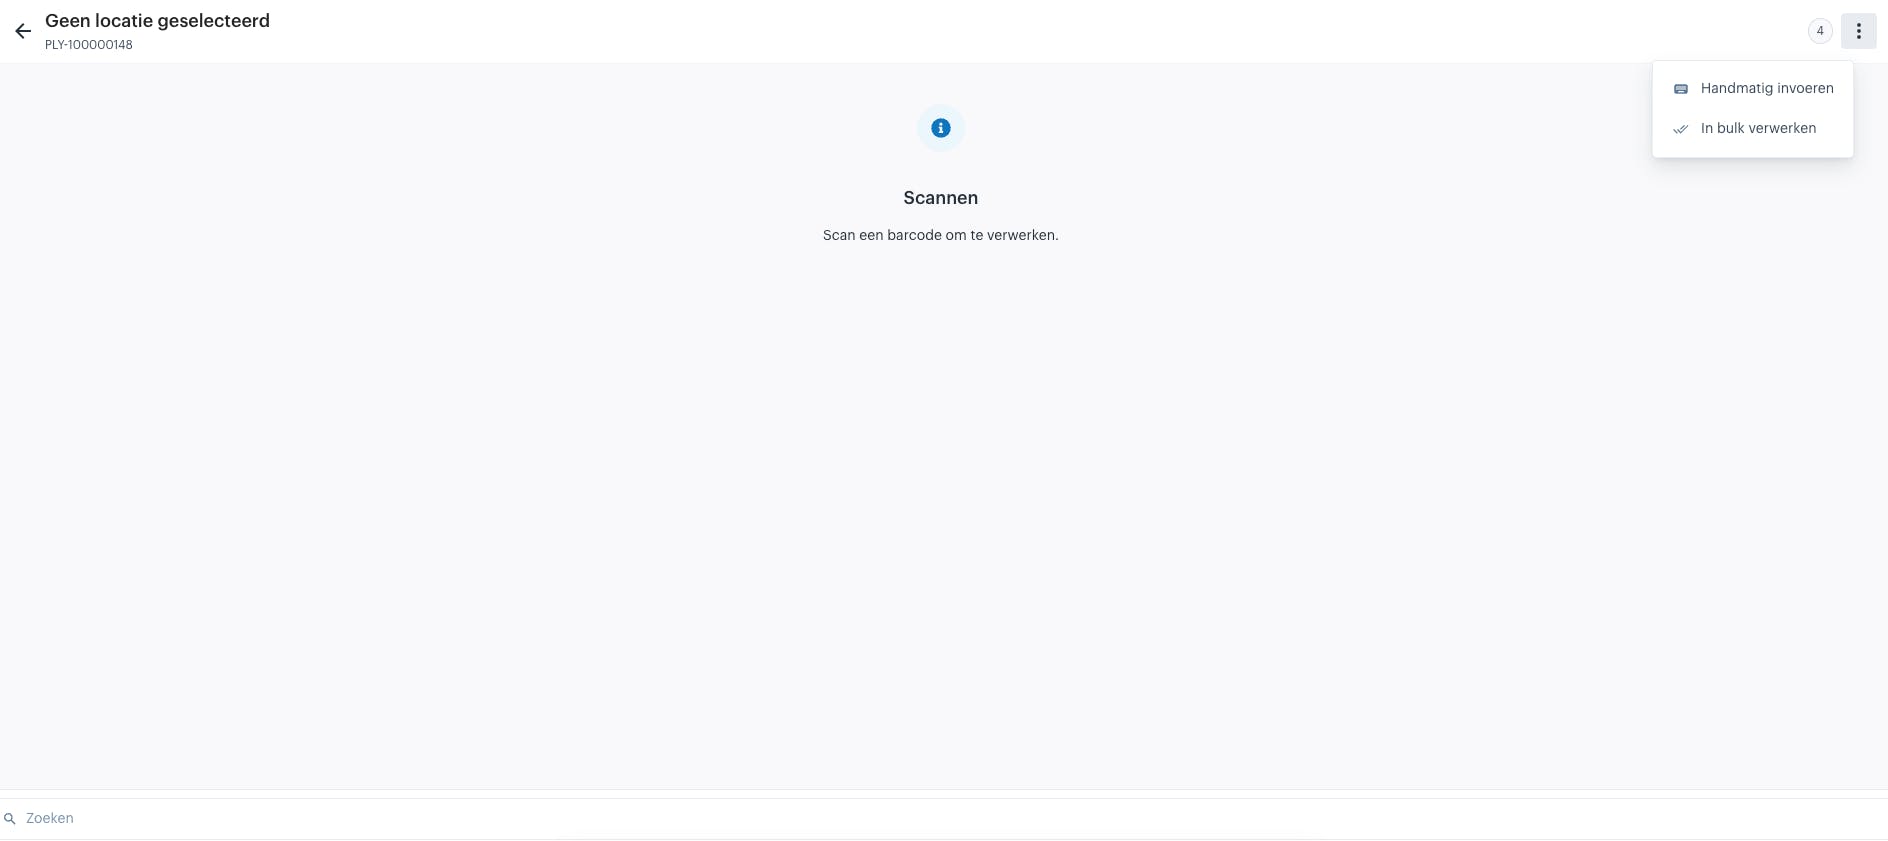
Now, tap on "Receiving processing" in the WMS App.
From here, you can choose to work with or without a Receiving list. You can enter products manually or scan them. It is also possible to process everything in bulk (see image).