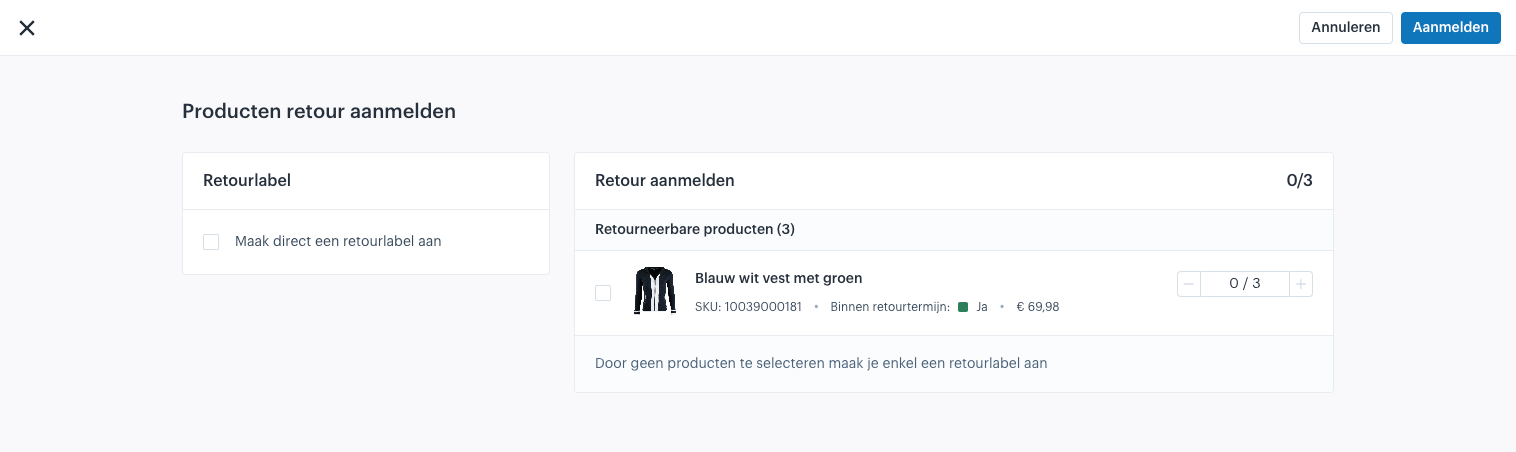
Register products for return
To register products for return, you will see the following screen.

Create return label immediately
You can indicate whether you want to create a return label immediately when registering. If you do not want to create a return label, you can skip the step below and proceed to the next step "Determine which products you want to register".
If you do want to create a return label, do so by checking the option below.

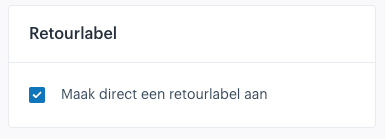
If you check this option, you can do two things:
- Do you only want to create a return label and not register products? Then skip the next step and go directly to "Register return".
- Do you want to register products? Read on.
Determine which products you want to register
You can indicate which products you want to register for return and the number of that product. To indicate which products you want to register for return, follow these steps:
1. Check the box (checkbox) in front of the product.
2. Specify the number of the product you want to register for return. You can change this using the + and - buttons.

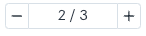
Once you have completed the above steps, you will see something like the following:

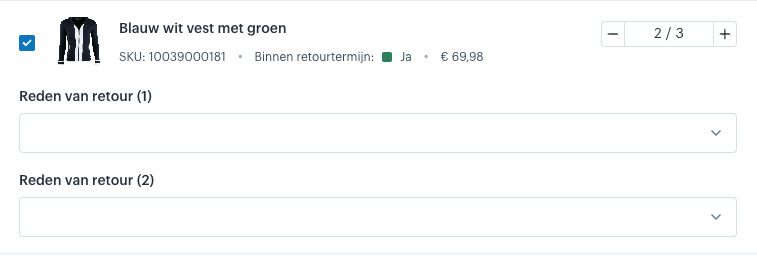
The above screen indicates that you now want to register 2 of the 3 blue and white vests for return.
After completing steps 1 and 2, a next step will become visible: specifying a reason for return<strong>.
3. You can specify per product why you want to register the product for return. The reasons under a product are, however, automatically pre-selected based on the first reason you select. If the reason for the other products is different, you can still change this for the relevant products.
The following reasons are available:
- Requested by customer
- Damaged
- Defective
- Delivery issues
- Unsuitable
- Wrong product delivered
Register return
Once you have completed the above steps, click the "Register" button at the top right of your screen.

Once you have clicked on this, the products are registered for return. If you had checked "Create return label immediately", proceed to the next step "Set up return label". If you did not want to create a return label, you are now finished registering the products for return.
Set up return label
To set up your return label, you will see the following screen.

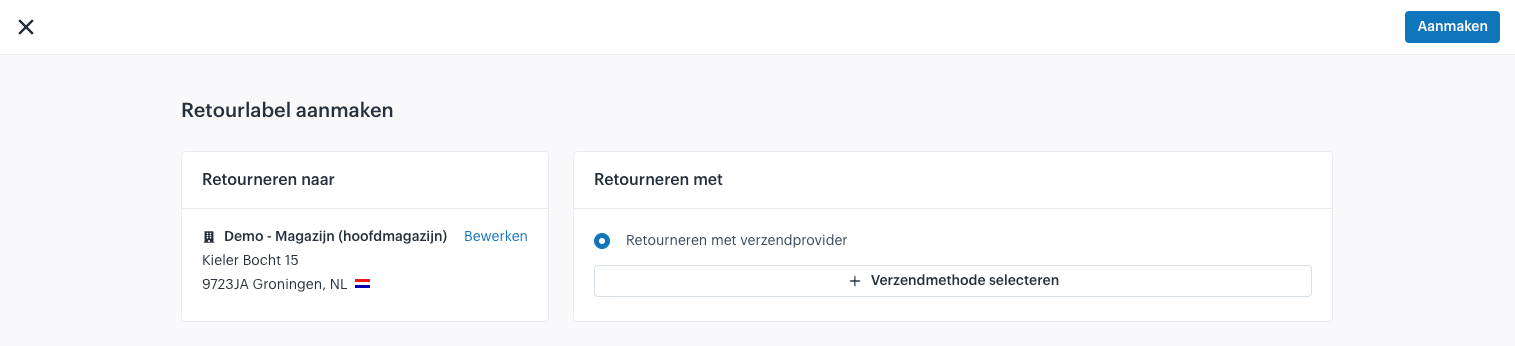
Return to
To create a return label, you must select a recipient. This is one of your own locations for which an address is set and is linked as a stock location to the order's sales channel.

This location is automatically preselected as the return location set for your sales channel. (This setting can be found under "Orders" at your sales channel).
Do you want to select a different location? Then click "Edit" and choose one of your other locations from the list.
FAQ: Is the location not in the list?
Is the location you want to select not in the list? Then check the following:
- Is an address set for the location?
- Is the location linked as a stock location in the "Products" settings of your sales channel?
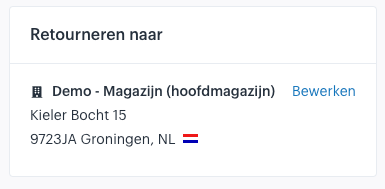
Return with
To create a return label, you must also select a shipping provider and a shipping method. Do this by following these steps:
- Click the "Select shipping method" button.
- Select the shipping method you want to return with from the list of shipping methods.
Once you have completed the above steps, you will see something like the following:

You have now completed selecting a shipping method. You can proceed to the "Create" step.
Create return label
If you have completed the above steps, you can now create the return label by clicking "Create".


You have now completely finished registering a return.