Add Contacts via Bulk Action
To import multiple contacts at once, Afosto provides the Contacts Bulk Action. This allows you to easily upload multiple contacts from a spreadsheet into the Afosto platform.
- Go to Processes and then click on Bulk Actions (located in the left-hand main menu).
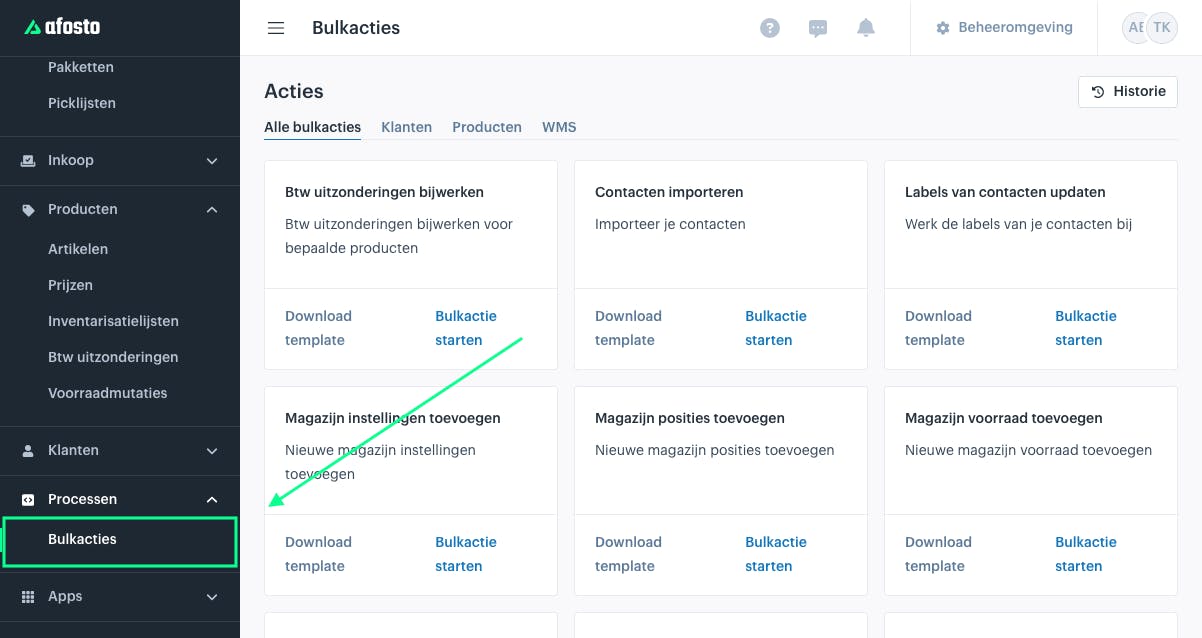
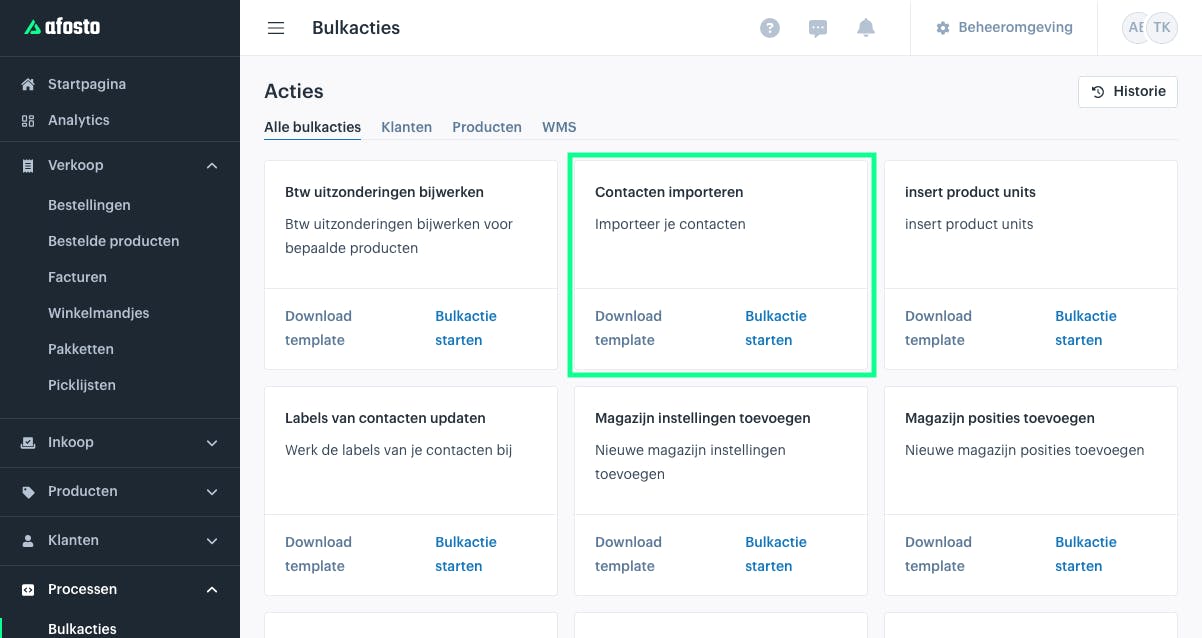
Next, the following screen will appear. Here, search for the bulk action called “Import Contacts.”
For efficient use of bulk actions, knowledge of spreadsheets (Google Sheets or Excel) is a plus.
-
You can download the template for the contacts bulk action via the “Download Template” button in the platform or via this link: [Google Docs link].
-
The template explains how the spreadsheet should be formatted so you can paste your data or upload a CSV file correctly. Make sure the spreadsheet is properly prepared before proceeding with this guide.
Reference
-
When starting the bulk action, give it a reference so you can easily recognize it later.
-
This reference has no other function; you can leave the pre-filled reference as it is.
Next, you need to select the group, which can be done via the dropdown menu highlighted below.

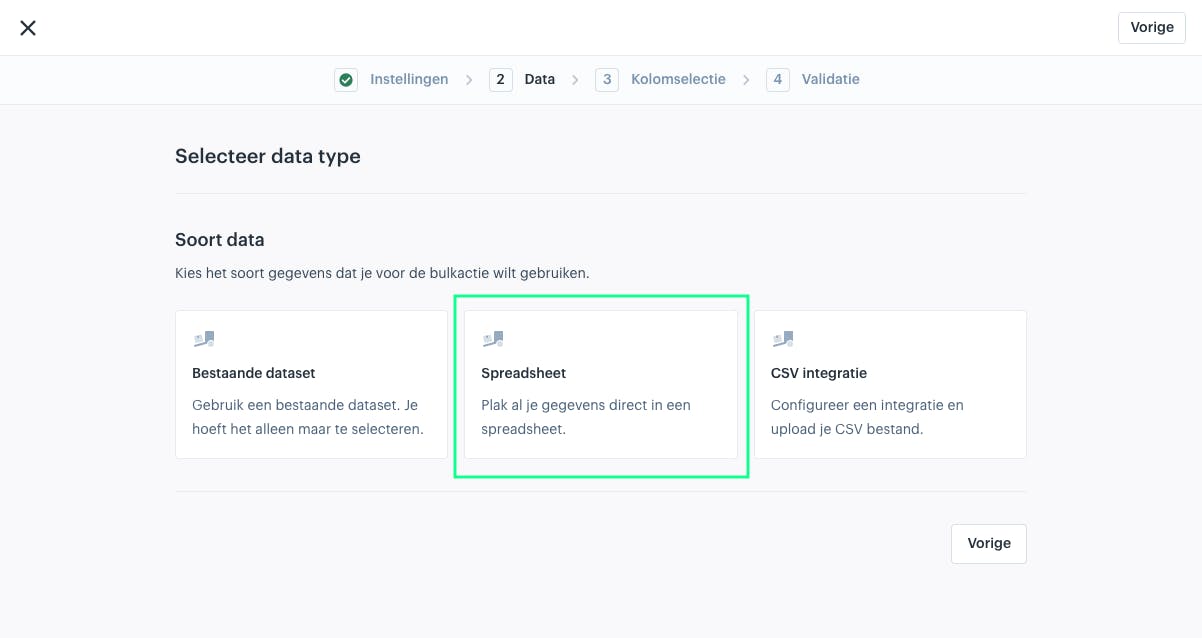
Select Data Type
In the second step, you are presented with three options:
-
Existing dataset: Use this if you have previously uploaded a CSV file and want to reuse it.
-
Spreadsheet: Use this to quickly paste your data from the template or another spreadsheet.
-
CSV integration: Use this to upload a new CSV file.
Since the Spreadsheet option is the fastest, we will proceed with option 2 for this guide.
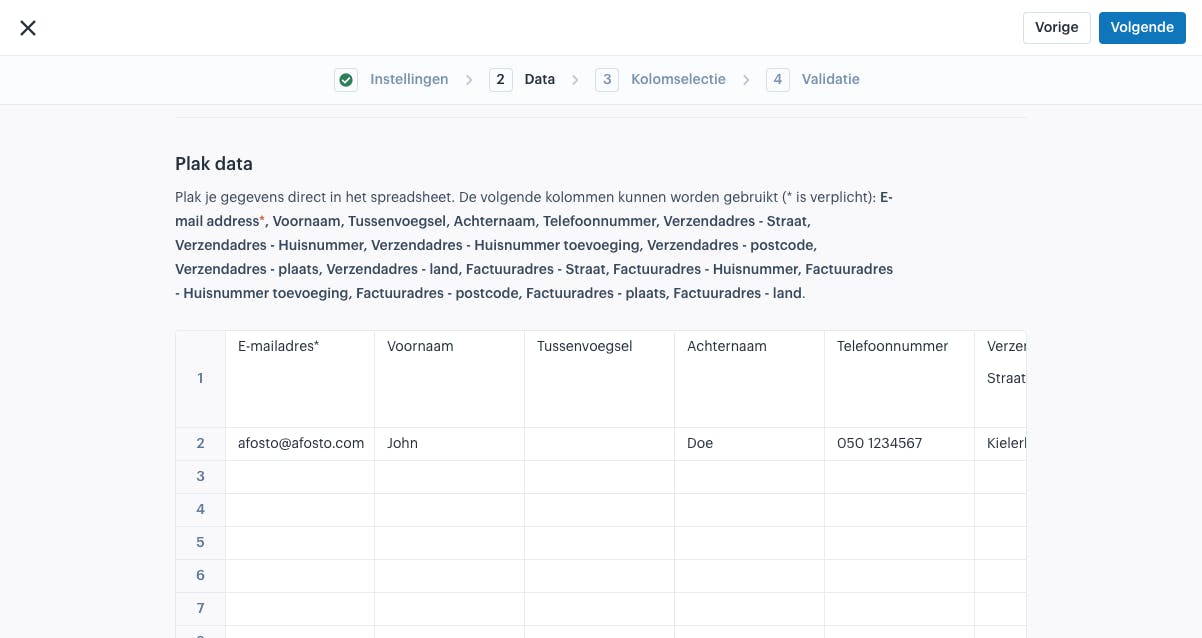
Paste Data
In the next step, you will see a table. Here, you can paste the values from your spreadsheet as shown.
-
Make sure the first row always contains the column names for the data you want to upload.
-
Once the fields are correctly populated, click “Next” to continue.
Verify Data
In the next step, review the entered data carefully.
If everything looks correct, confirm your dataset to proceed.
If you need to make changes, go back to edit the data before continuing.

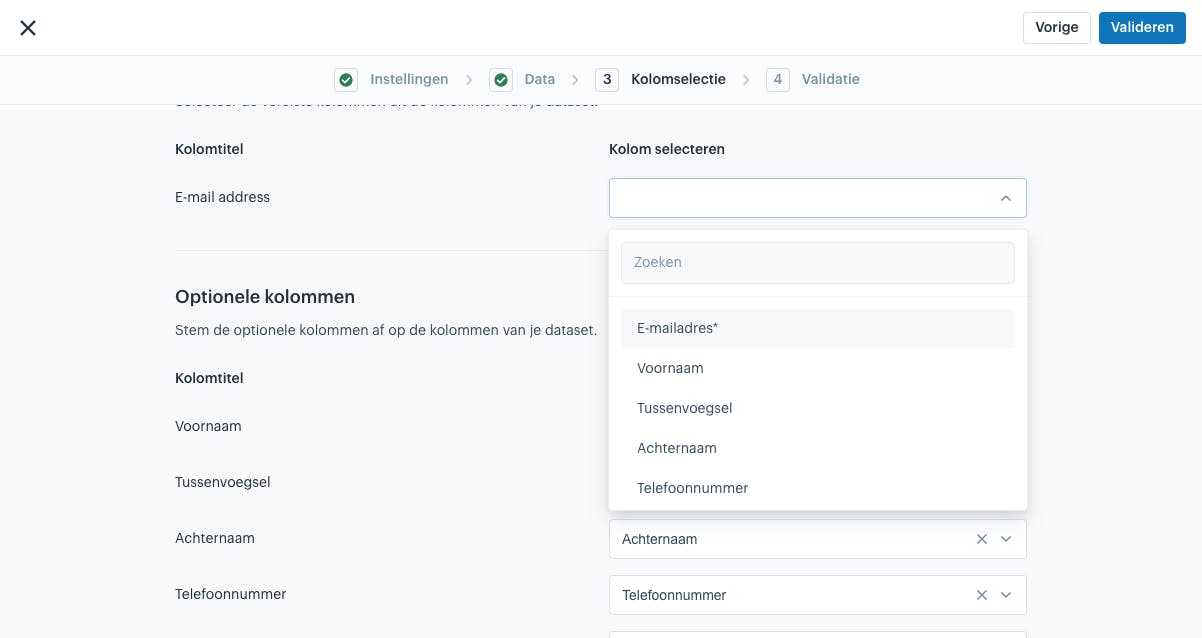
Column Selection
In the next step, you need to map the columns from your dataset to the corresponding columns in Afosto.
If you used the same column names from the template, the columns will usually be automatically matched, as the system recognizes them.
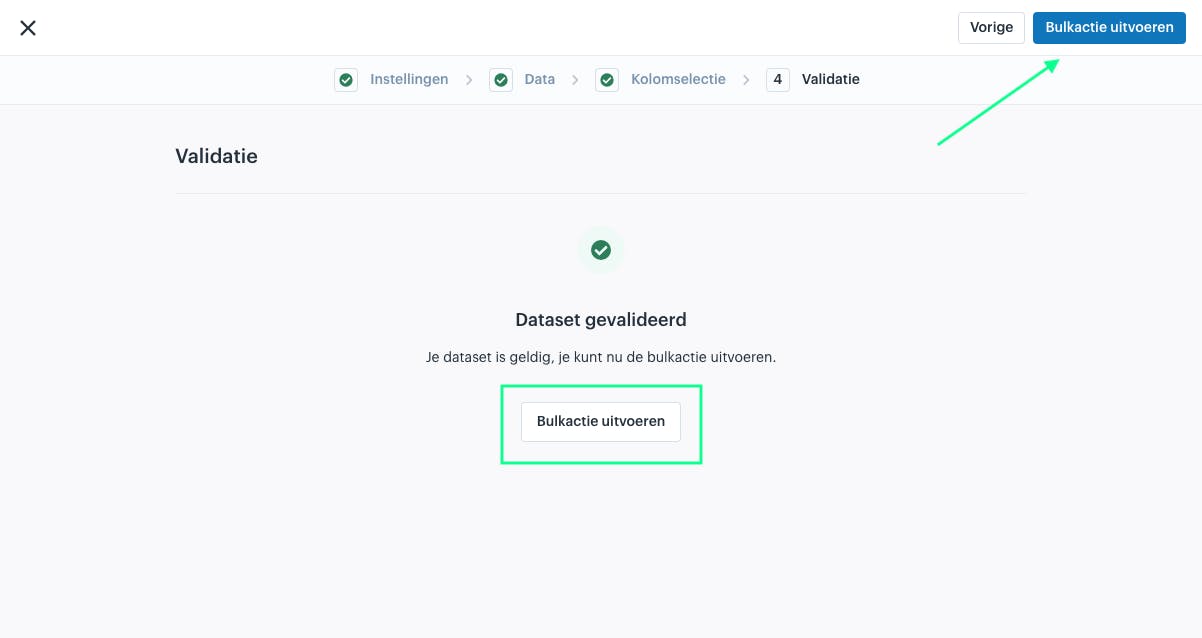
Validation
Once you click “Next”, the dataset will be validated.
If there are no errors, you can click “Execute Bulk Action” to run the bulk action.
If the validation fails the first time, it can help to run the validation again immediately.